|
|
Back to the TÜV inspection of no 2 Number 3 mechanics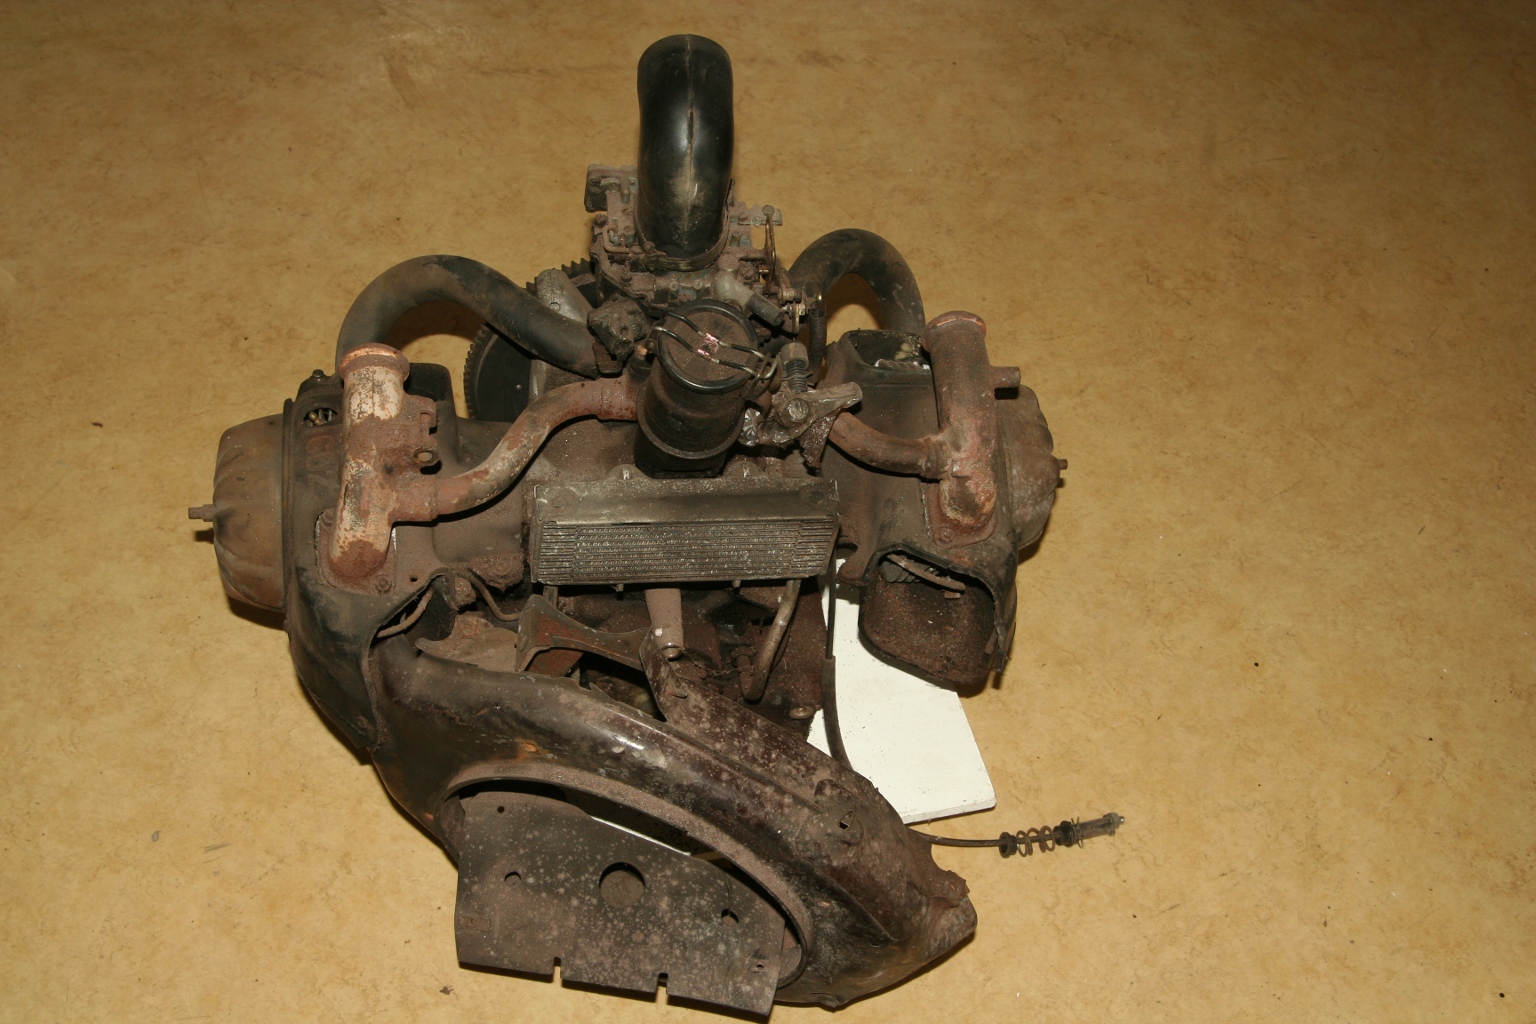 26th of May 2010 - my garage I bought this old engine, because a gearbox was fixed on it. The reverse gear of my no. 2 was loosened and I needed a replacement quickly. As the owner of the engine told me, it was functioning well when he had removed it from an old car some years ago. Because of the fact that it was covered with oil, all seals should be replaced before using it again. A good time to do some exercises and disassemble the whole engine. 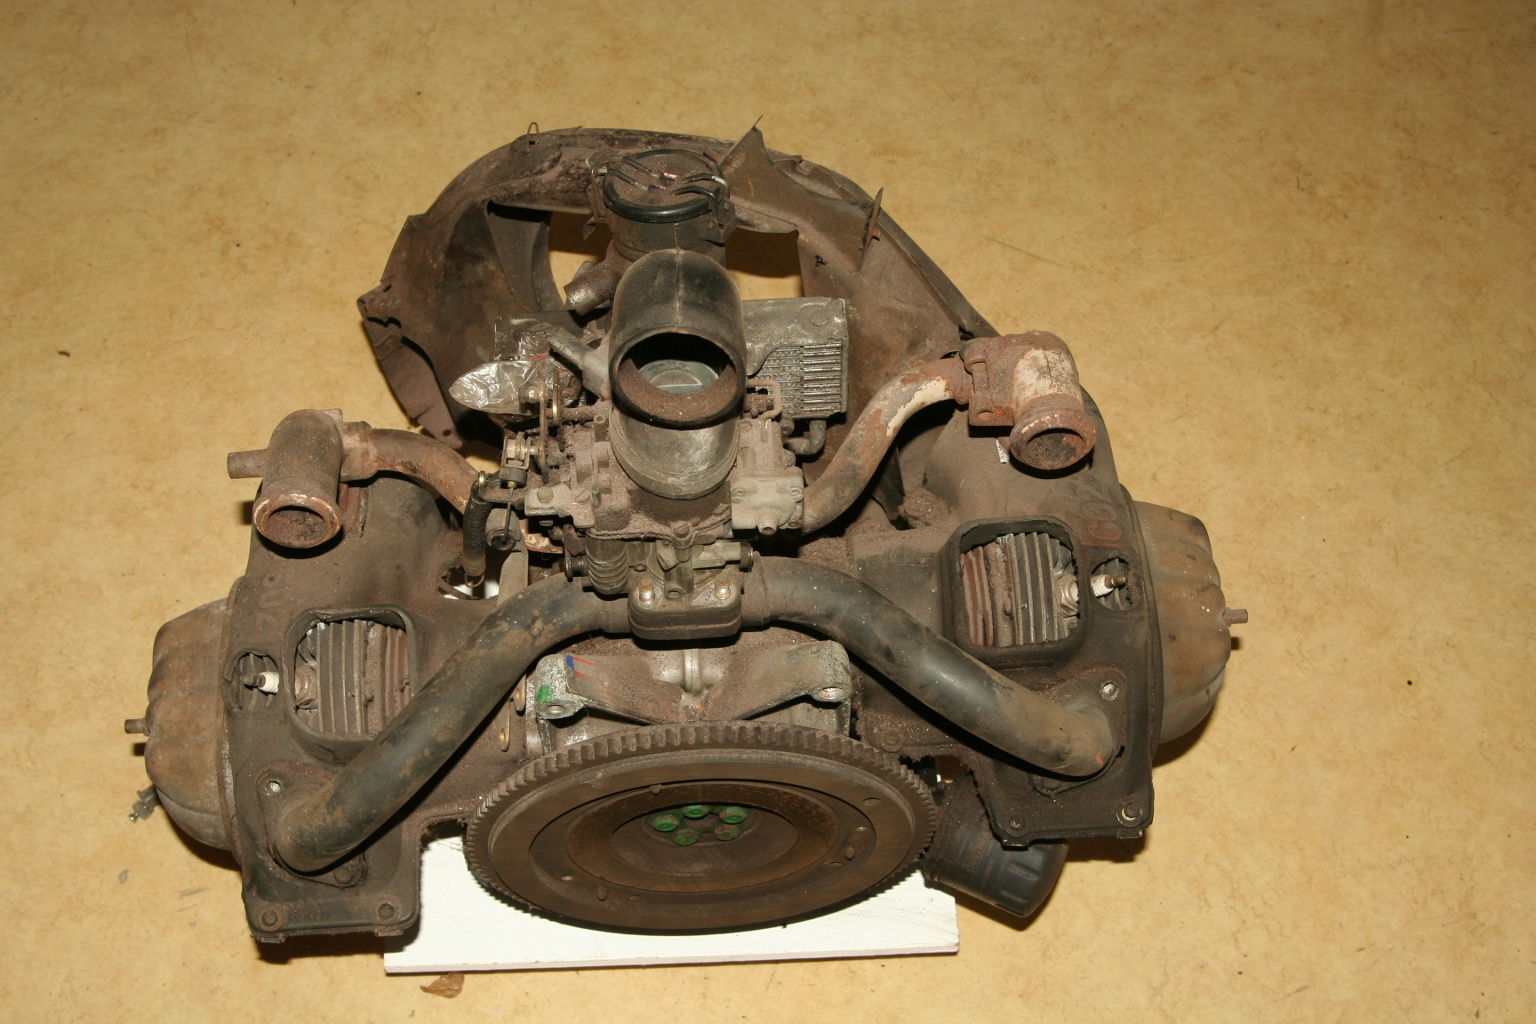 26th of May 2010 - my garage Before disassembling the aggregate, I removed the veeeery old oil. If you intend to store an engine for a long time, you schould do an oil change before. Old oil reacts acidic and harms the engine. 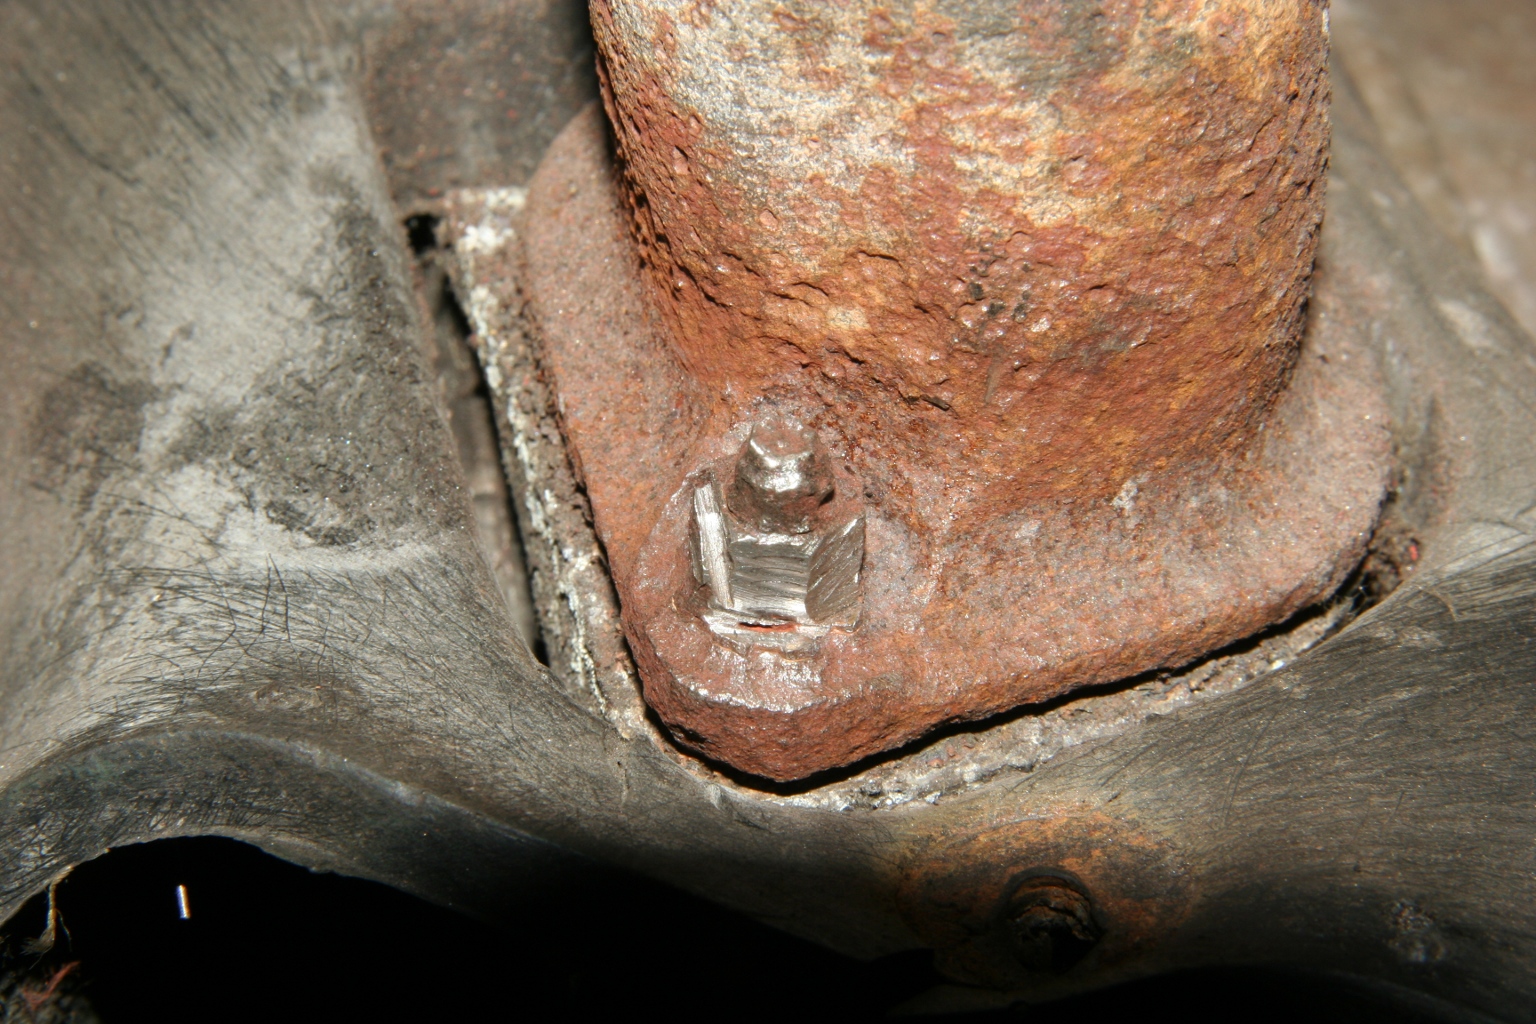 26th of May 2010 - my garage The first crux of the matter was one rusted nut of the manifold spider. Even rust remover or heat could not force it to turn. Because of the fact that a nut is more easy to replace than a broken bolt, I grinded the nut carefully thinner and thinner with the help of a Dremel until it gave up. 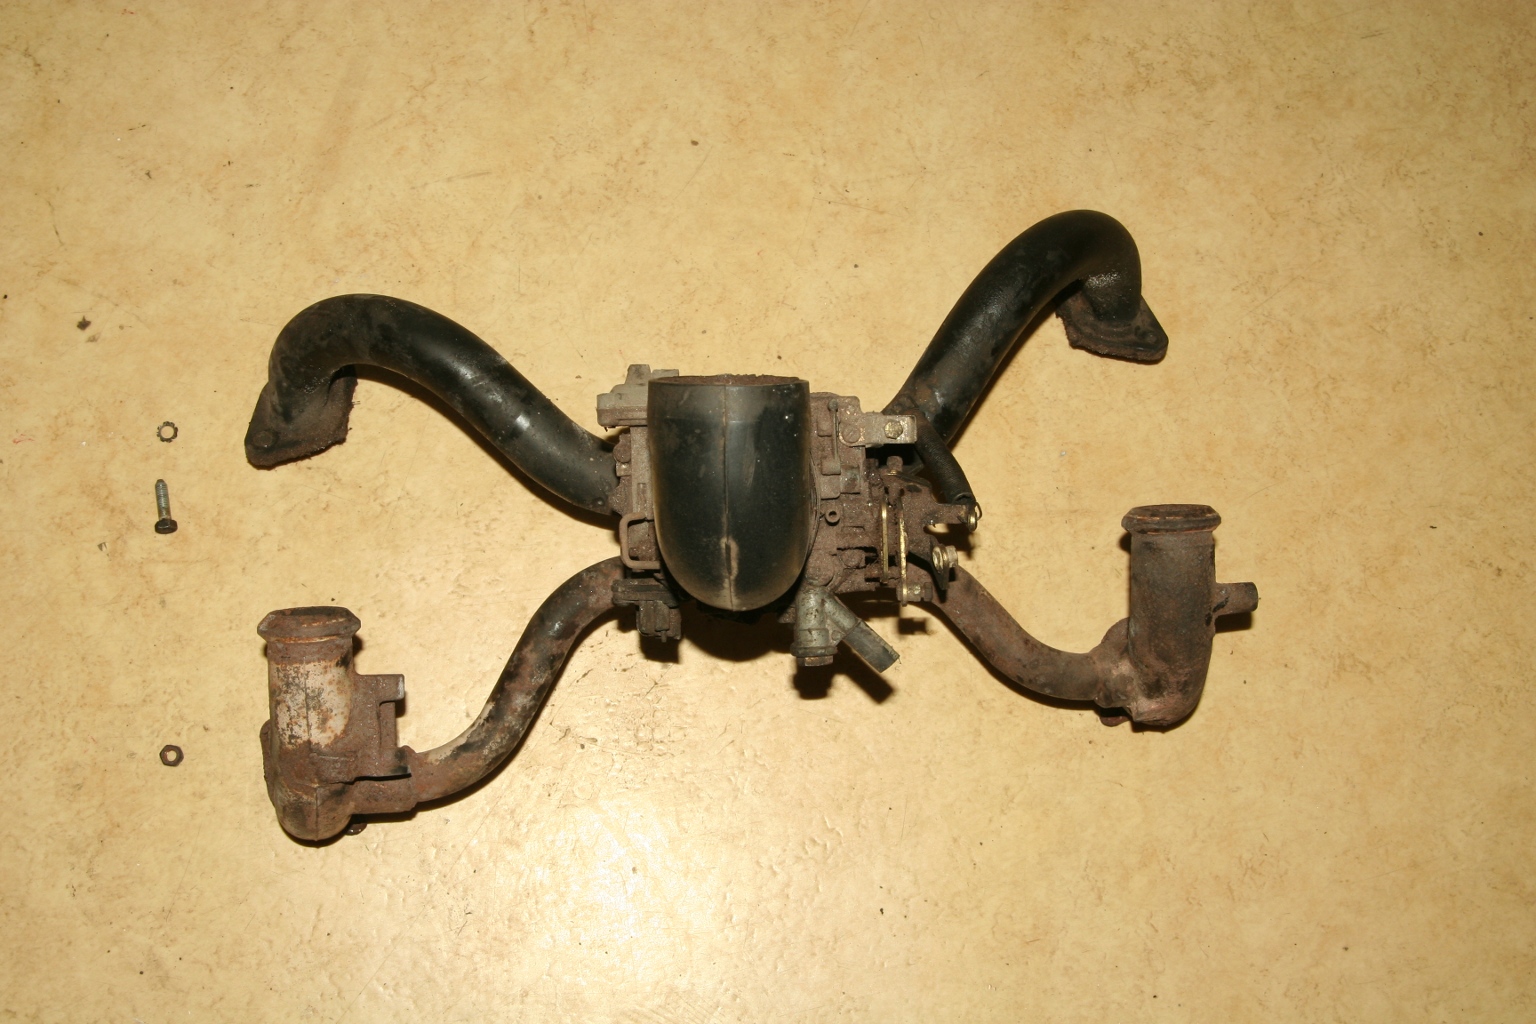 26th of May 2010 - my garage The manifold spider is fixed at the inlet (upper side of the picture) with four M7 screws (11mm wrench size) and at the outlet (lower part of the picture) with four bolts + nuts.  26th of May 2010 - my garage Two M7 screws (11mm wrench size) fix the oil filler neck. 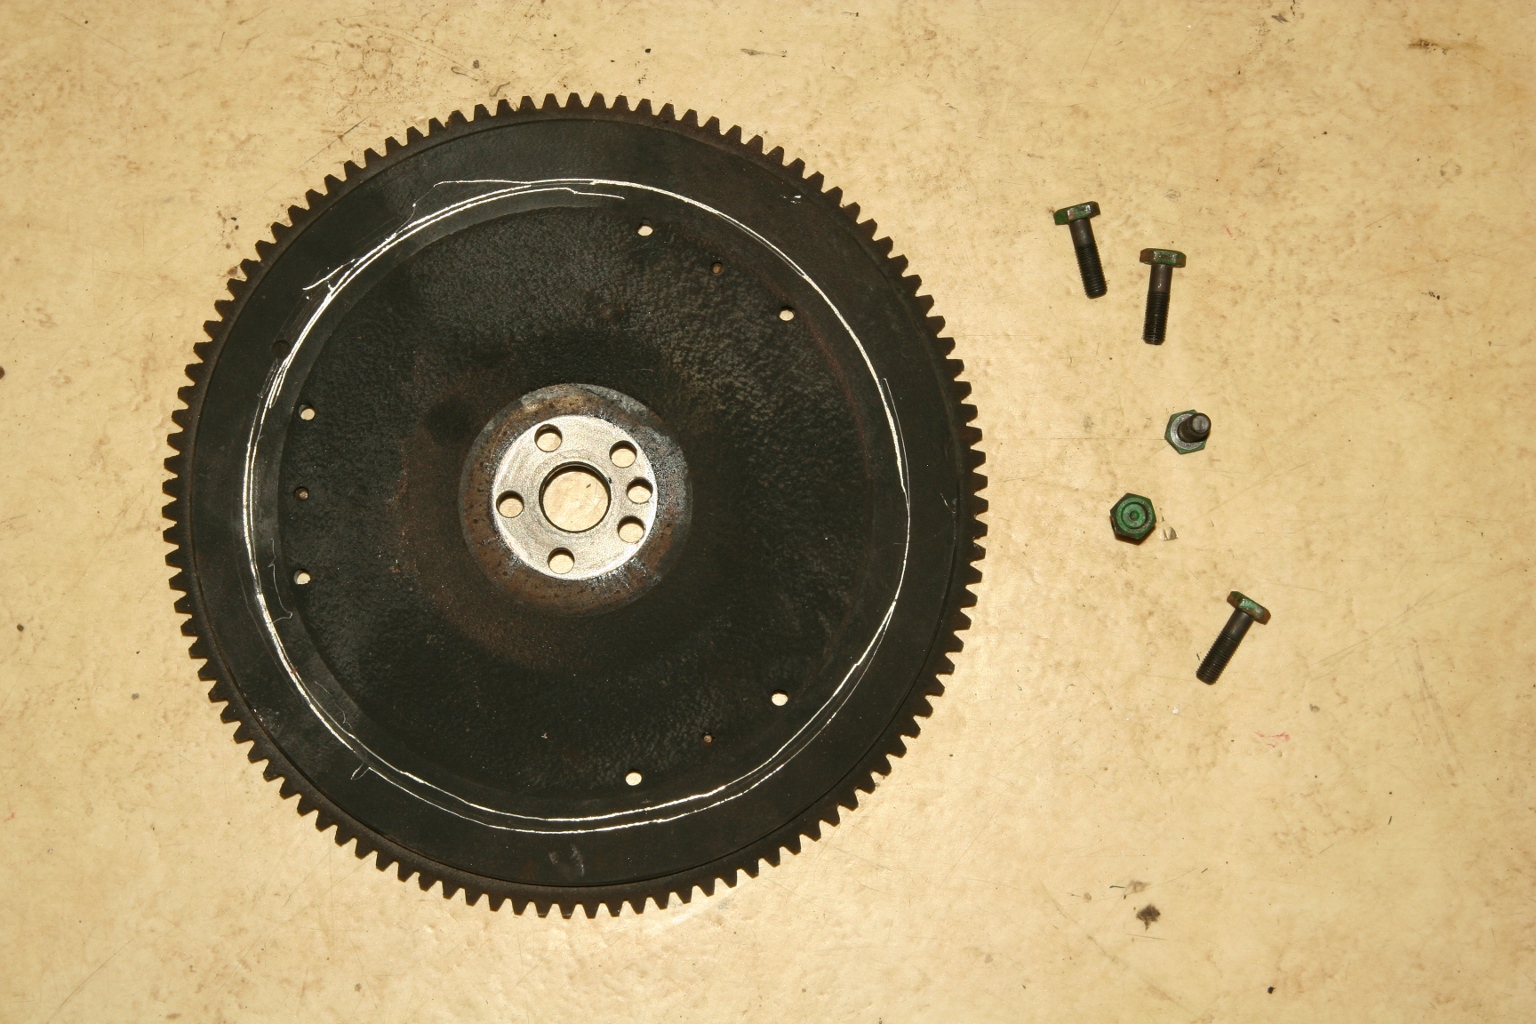 26th of May 2010 - my garage The flywheel is fastened with the halp of five special screws (14mm wrench size), which must be renewed after each disassembly of the flywheel! 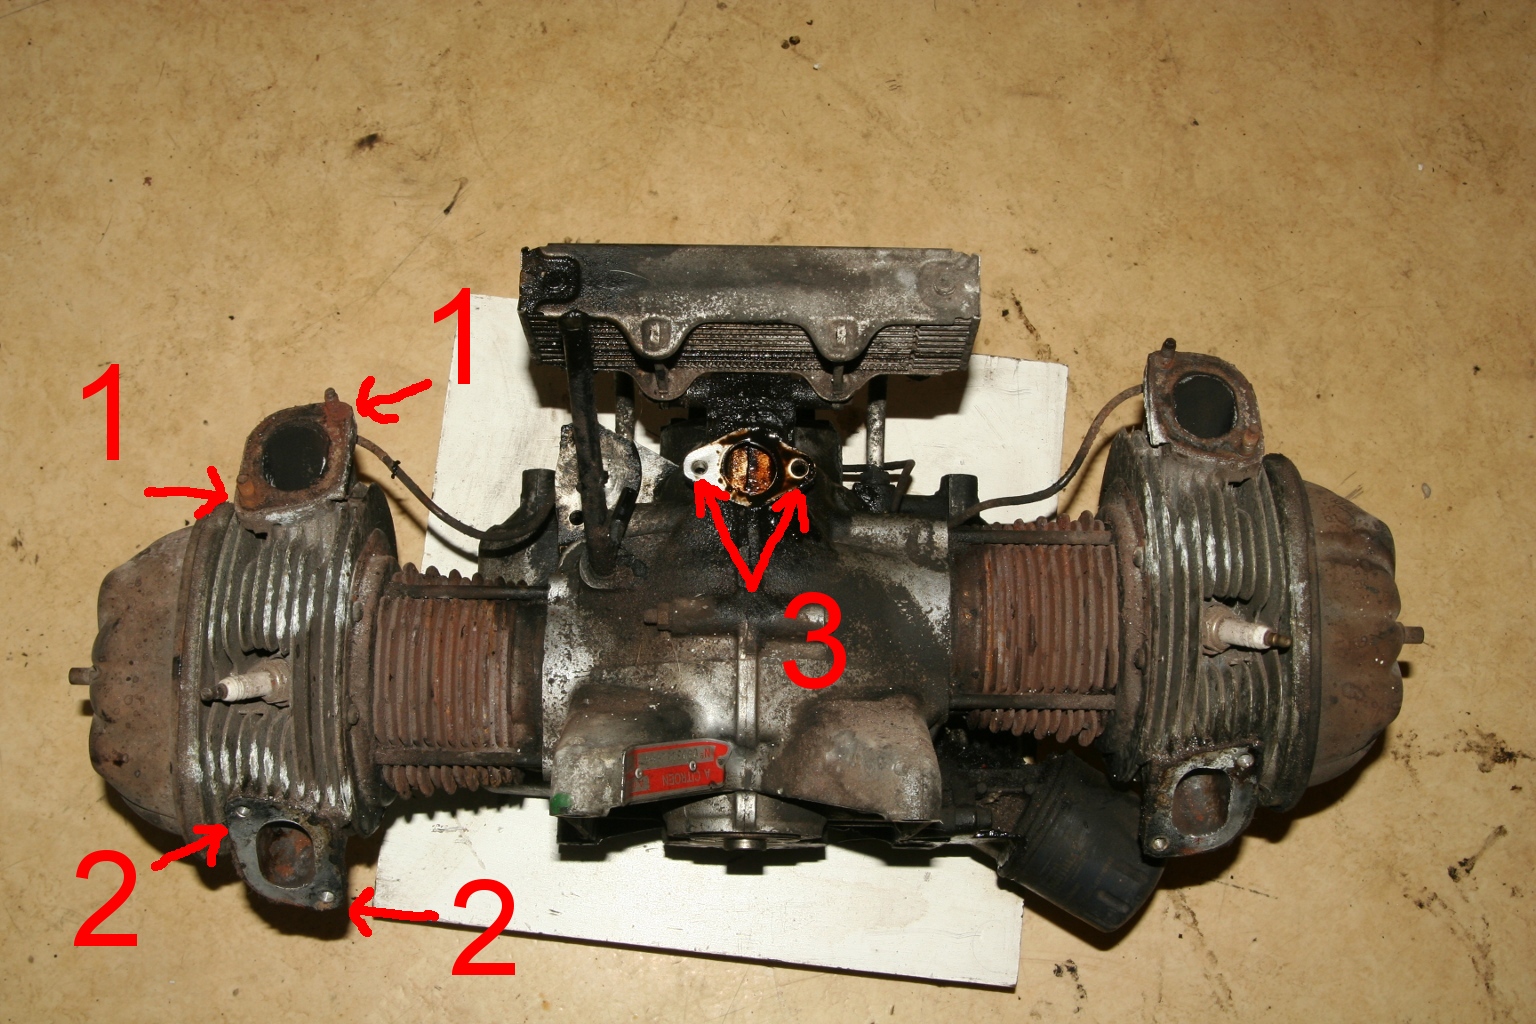 26. Mai 2010 - meine Schrauberwerkstatt 1 - Bolts fixing the manifold spider at the outlet. 2 - Threaded holes fixing the manifold spider at the inlet. 3 - Threaded holes fixing the oil filler neck. 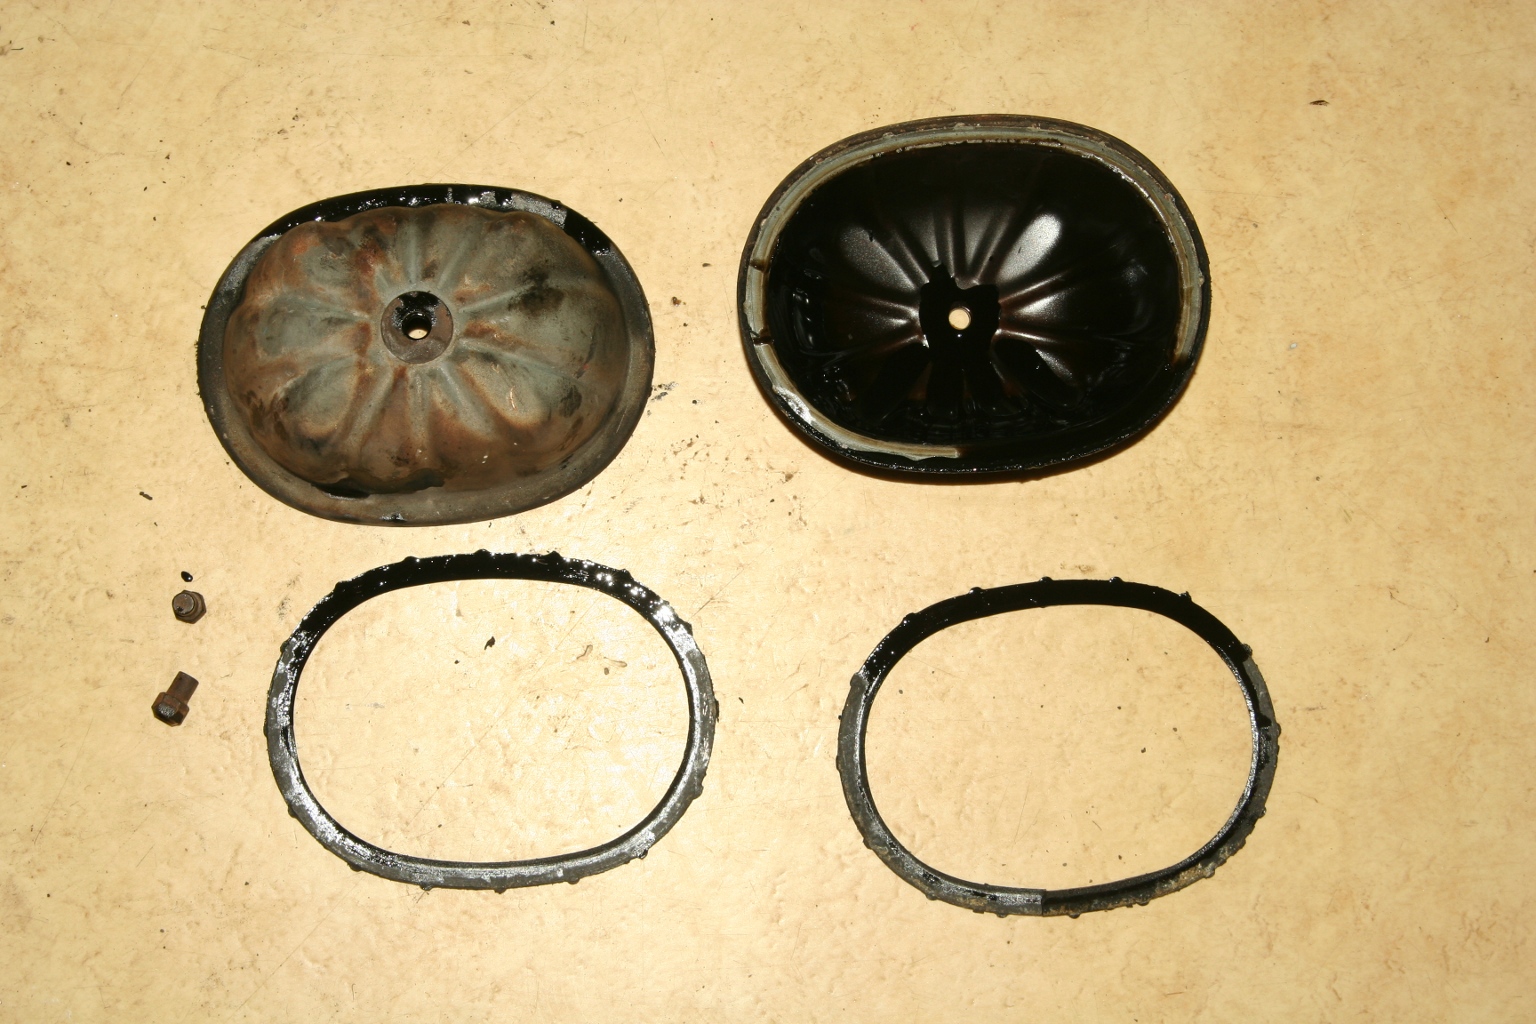 26th of May 2010 - my garage The cylinder head covers sticked very strong at the cylinder heads because of the long storing time. I had to do what should not be done normaly: I levered off the covers carefully all around the edge! There is oil inside the cylinder head covers! Don't forget to put a box below while removing them.  26th of May 2010 - my garage The well known look whenever the valve clearence adjustment is done.  26th of May 2010 - my garage 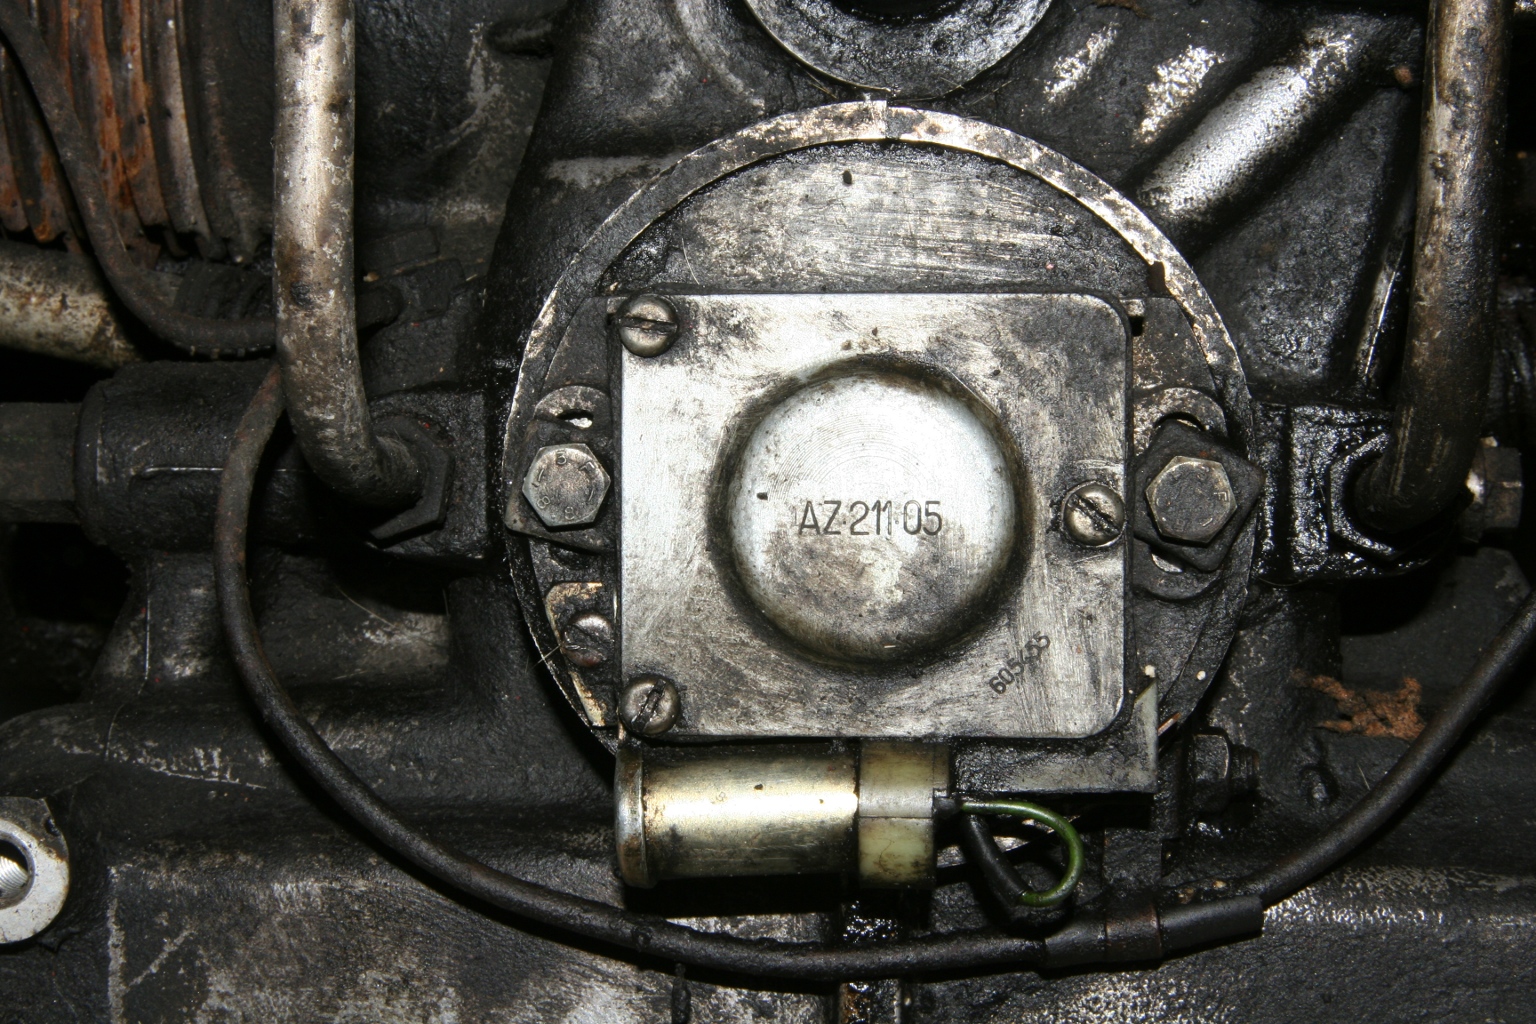
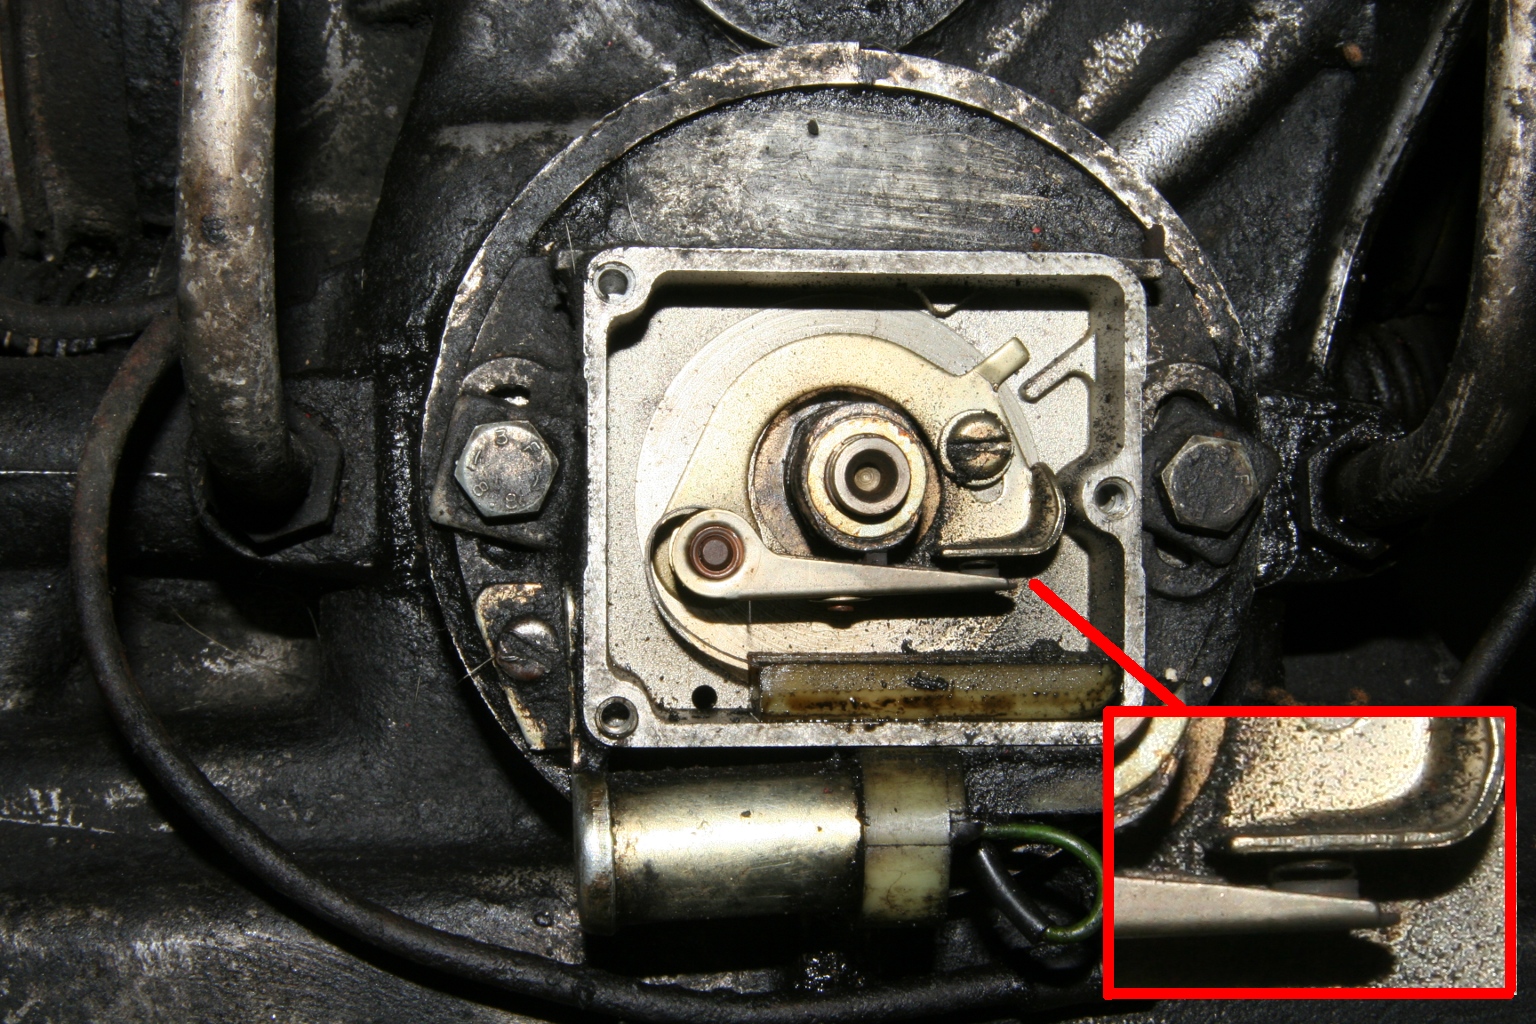
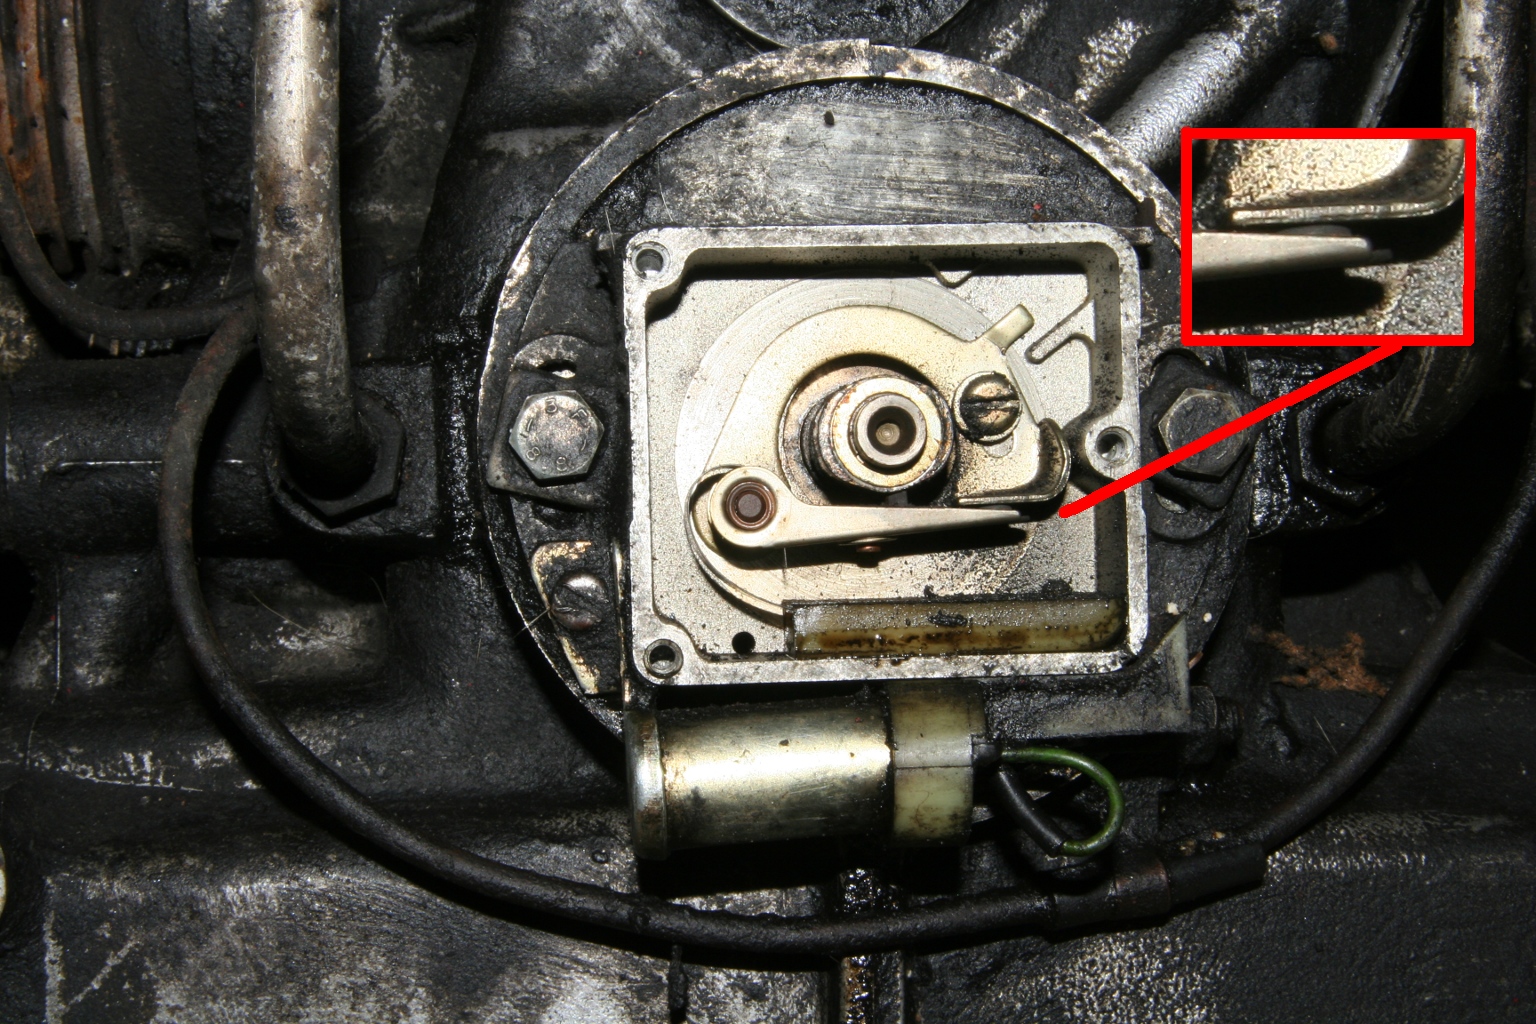
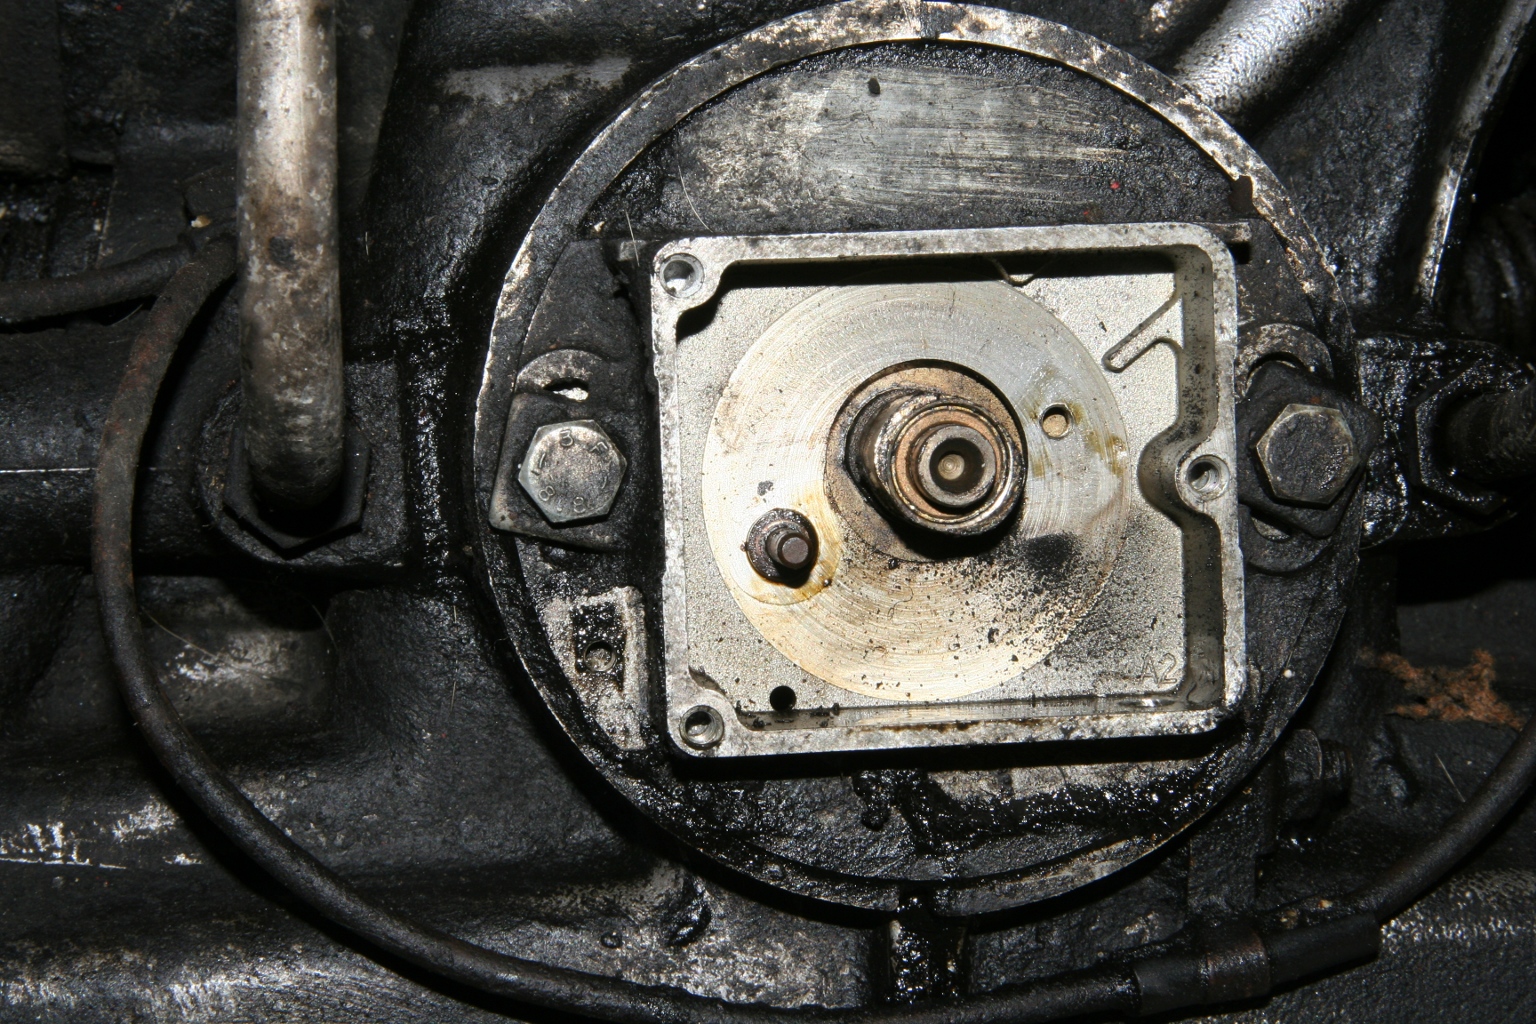


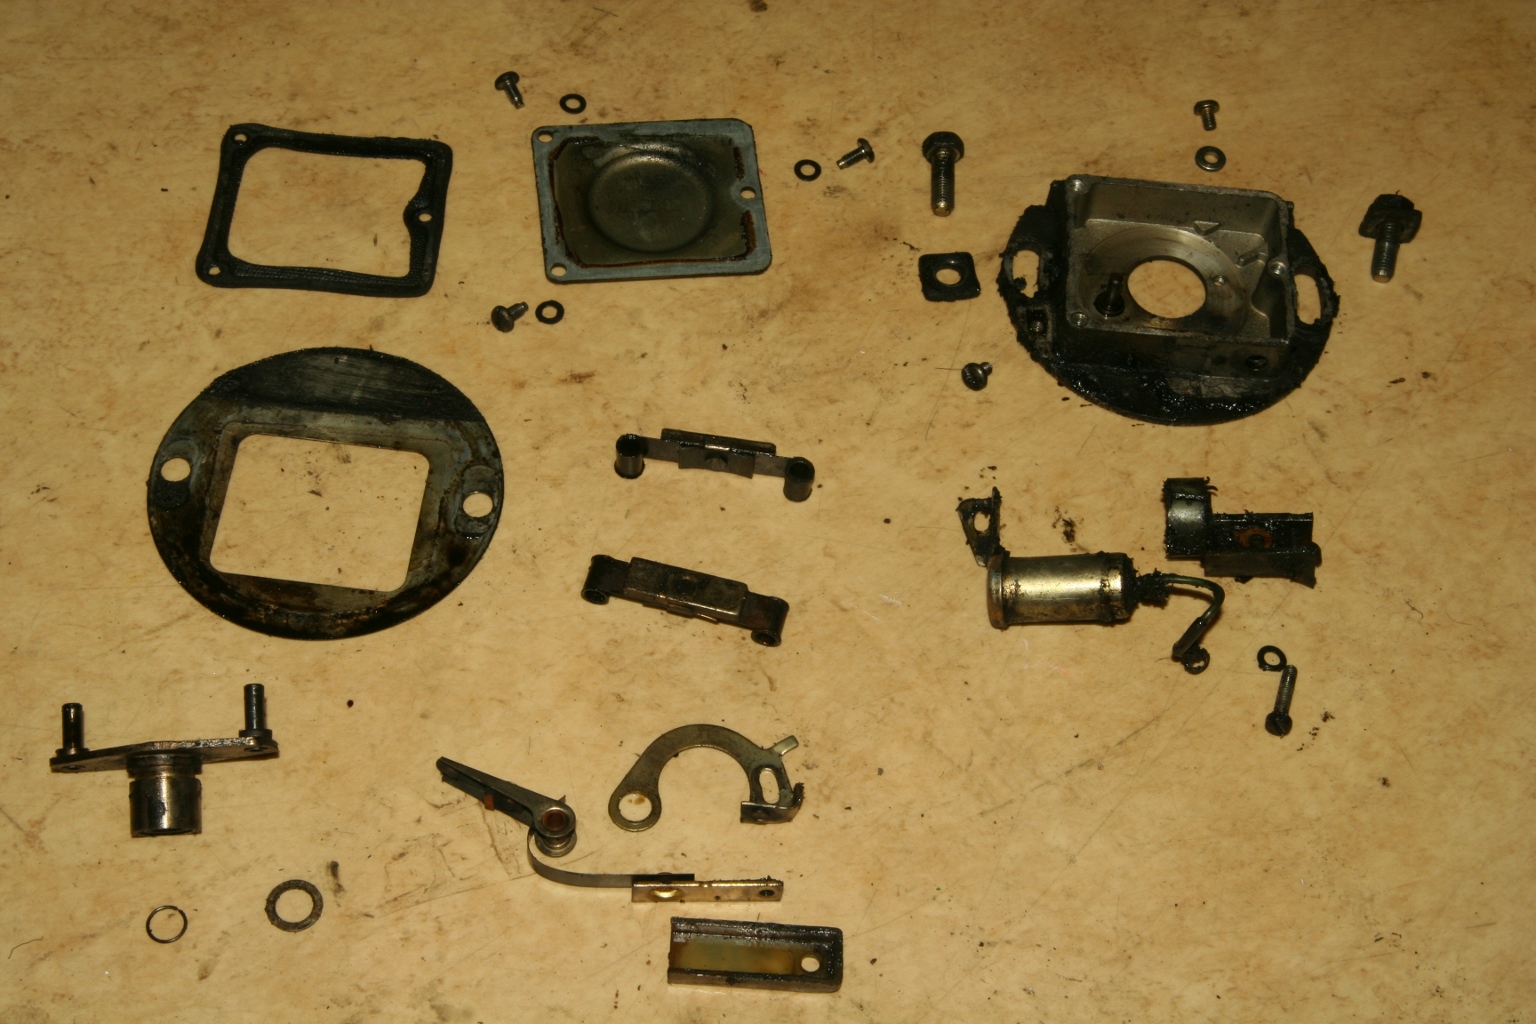
27th of May 2010 - my garage Pic 1: Housing cover Pic 2: Look at the interruptor, position open. The two calms are in vertical position. As soon as the contact opens, an ignition spark is generated at both spark plugs. Pic 3: Position closed - the calms are in horizontal position. Because of the fact that the calm shaft turns half as much as the crank shaft, two calms are needed to generate an ignition spark at one turn of the crank shaft. Pic 4: Contact removed. Pic 5: Interruptor housing removed. Pic 6: Look at the weights for ignition timing. A small circlip at the tip of the calmshaft has to be removed to unlock the parts. Pic 7: The two weights are fixed at a pin of the calm and a pin at the calm shaft. As the engine turns faster, the weights are moving outwards, turning the calms and therewith the ignition spark is generated more early. Pic 9: The upper weight is at the position of low rotation speed and the lower weight at the arrester, reached at higher rotation speed. Pic 10: The pins of the weights are press-fitted and can't be removed. If you like to install an electric ignition system, two small magnets are attached at those two pins and all removed parts are no longer used. Pic 11: Components of the interruptor. 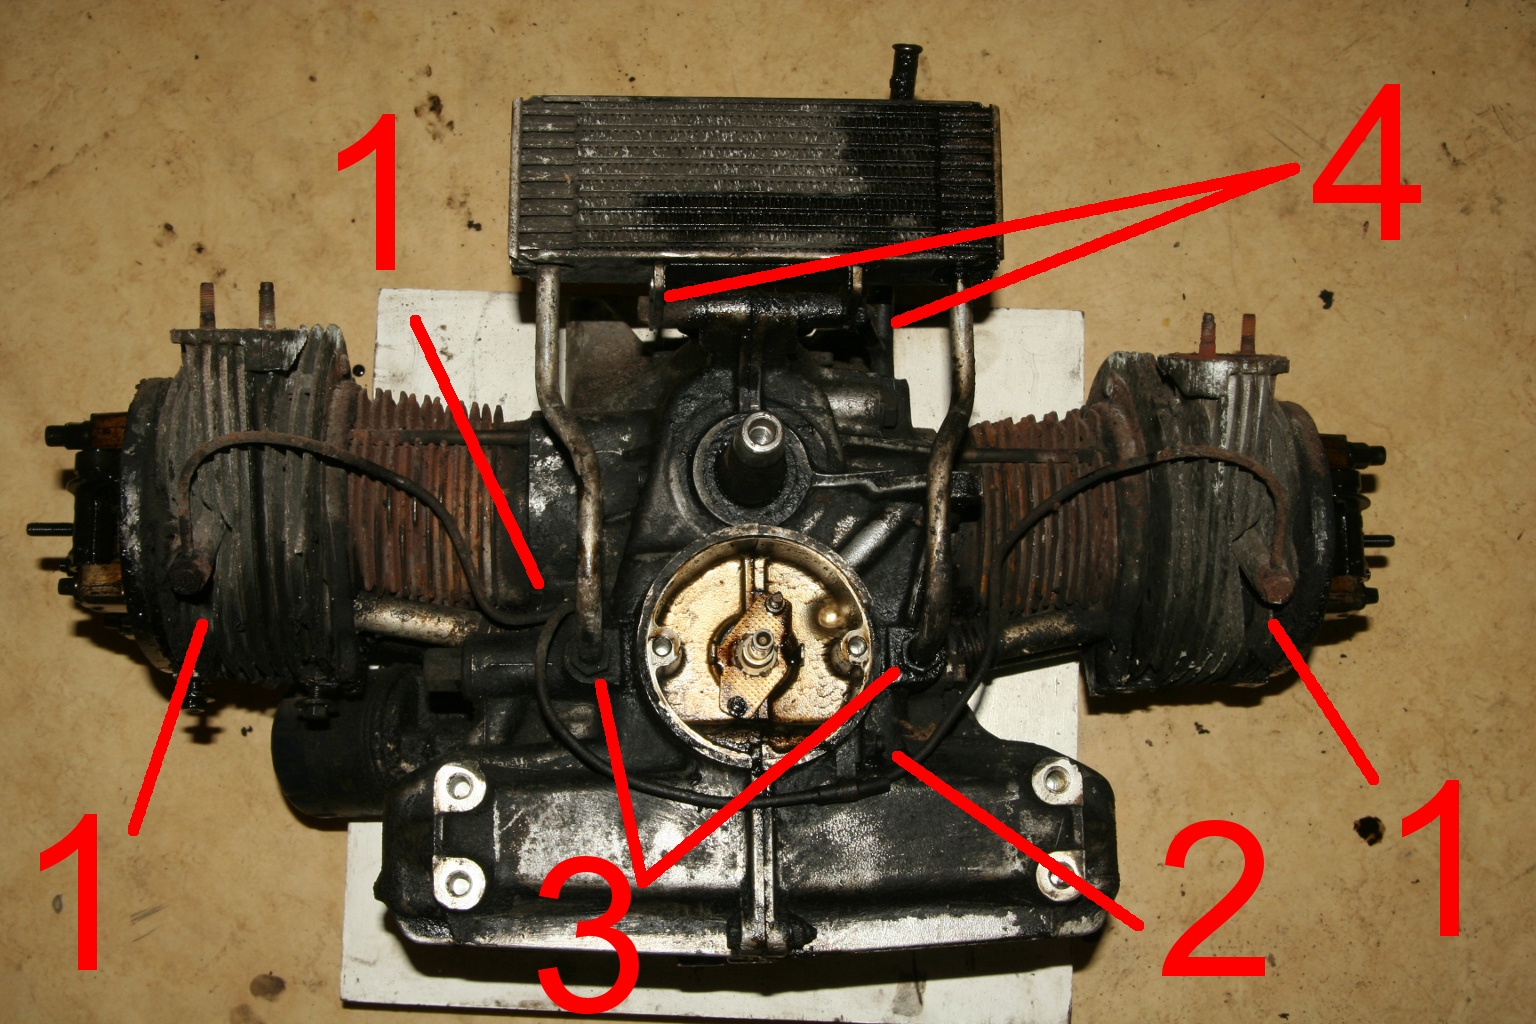 27th of May 2010 - my garage 1 - Attachments of the oil pipe with the help of special drilled screws. Wrench size 17mm. 2 - Additional attachment of the oilpipe by a M7 nut (wrench size 11mm). 3 - Attachments of the inlet and outlet pipe of the oil cooler (wrench size 17mm). 4 - Attachment of the oil cooler by a long M7 screw (wrench size 11mm) and distance tubes. 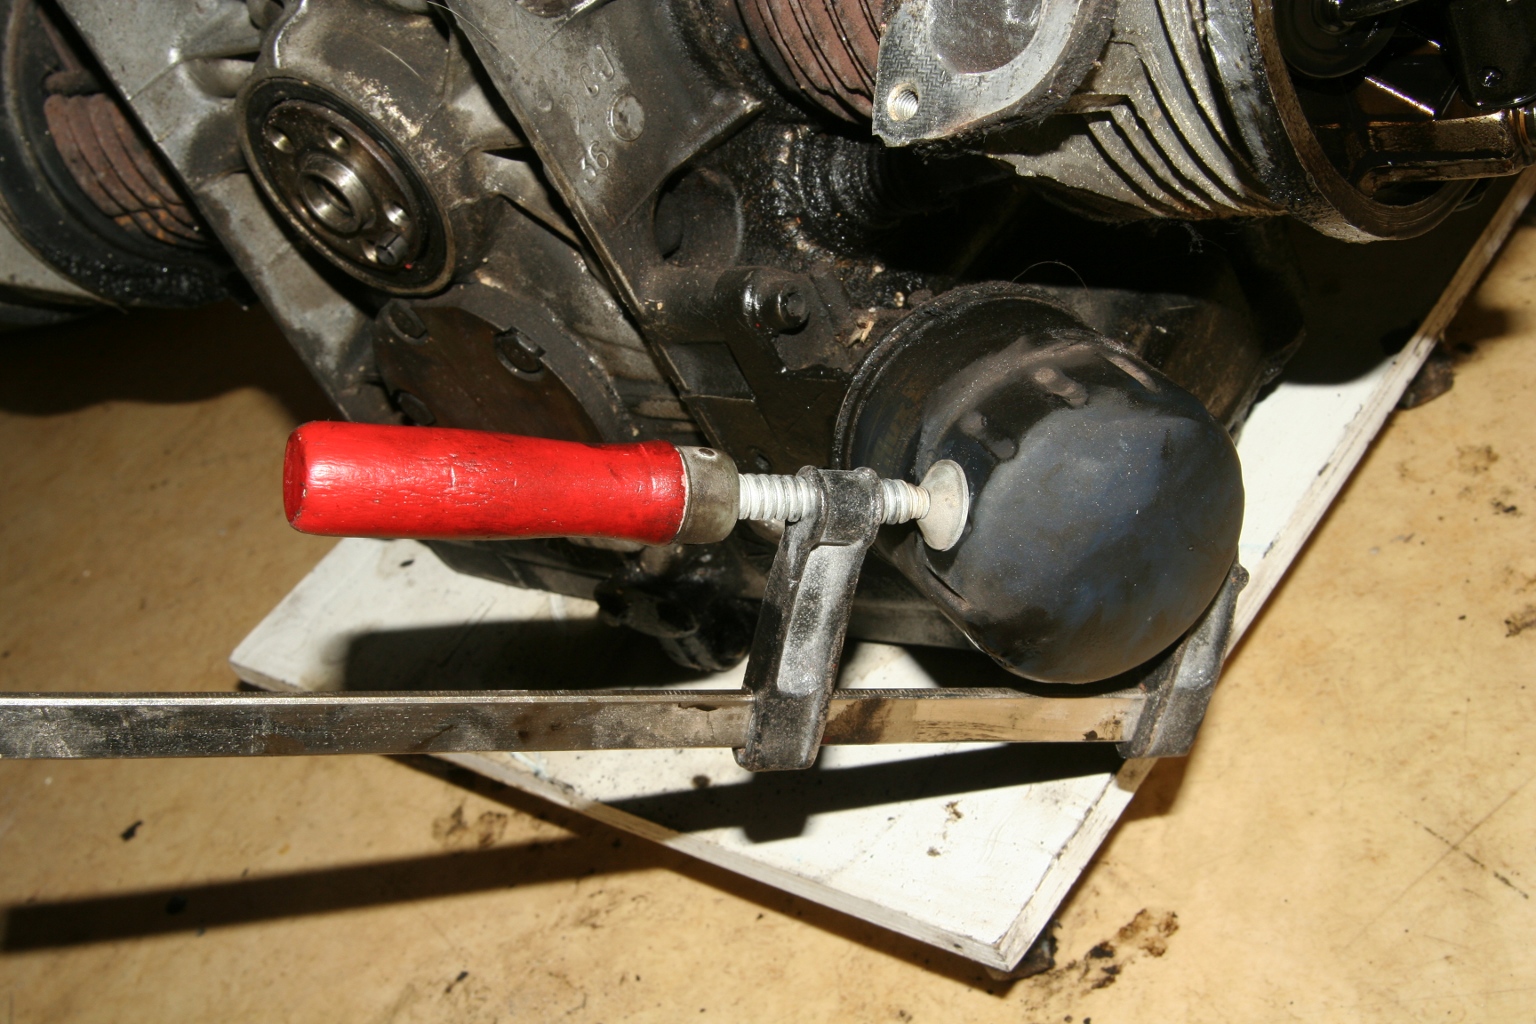 27th of May 2010 - my garage The oil filter can be removed by a bar clamp.  27th of May 2010 - my garage Oil cooler + -pipe + -filter. At the right top of the picture you can see one out of six copper seals of the oil pipe. 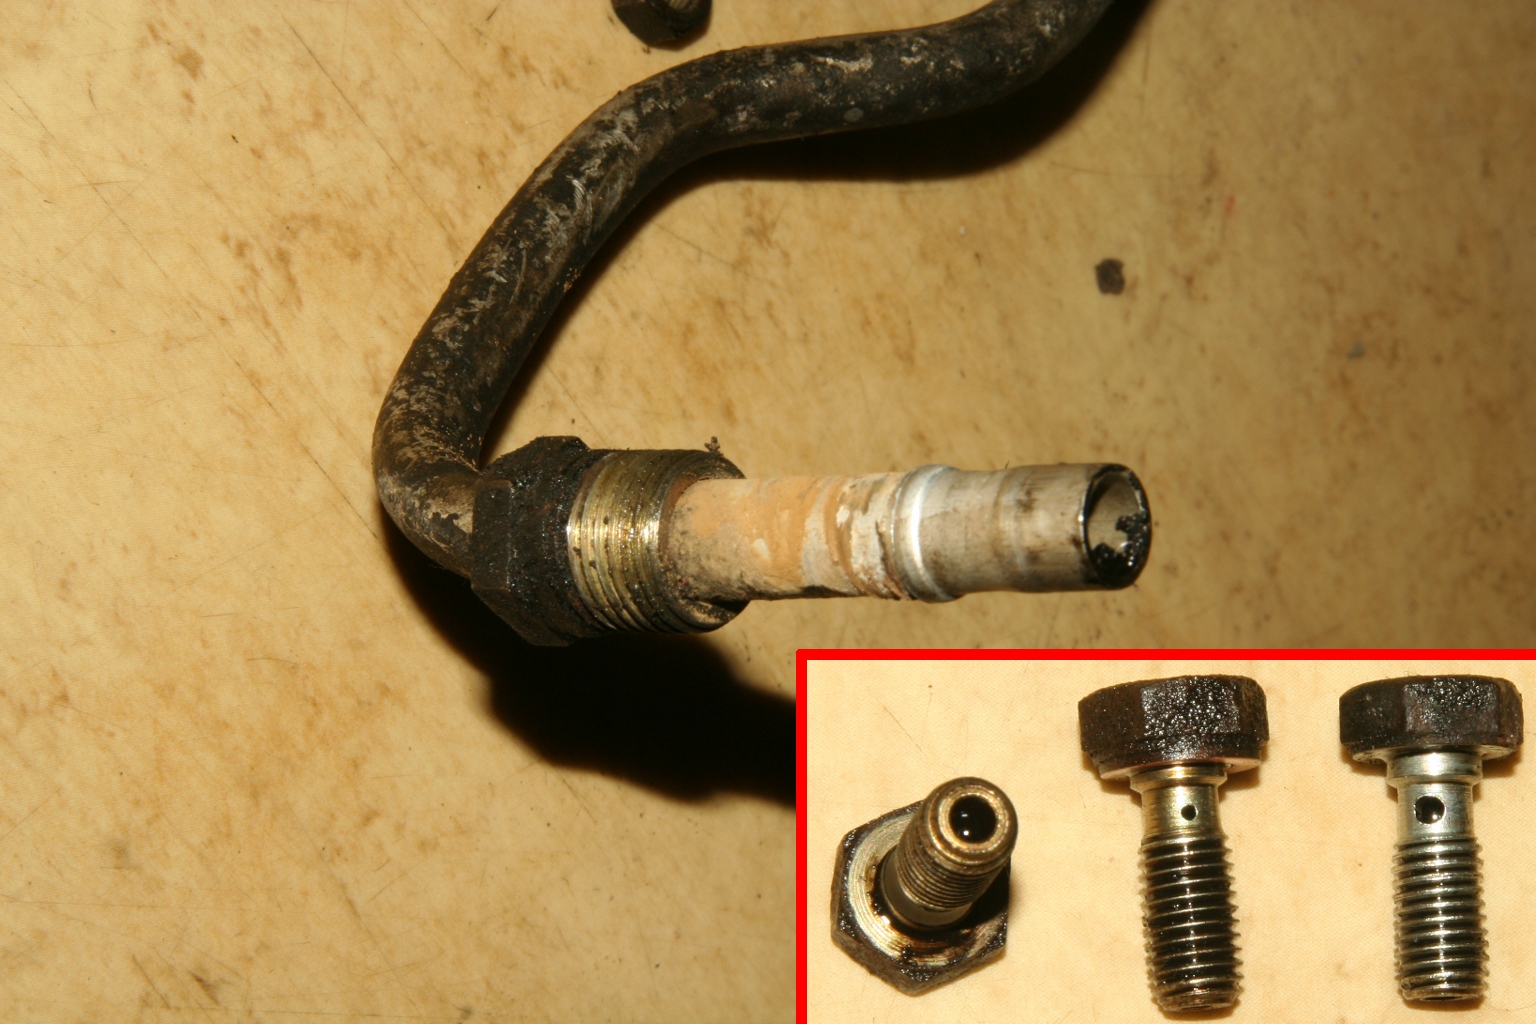 27th of May 2010 - my garage Attachment of the oil cooler and the special screws of the oil pipe in full view. The screw with the bigger drilling belongs to the center of the oil pipe, the two screws with the thinner drilling to the cylinder heads. 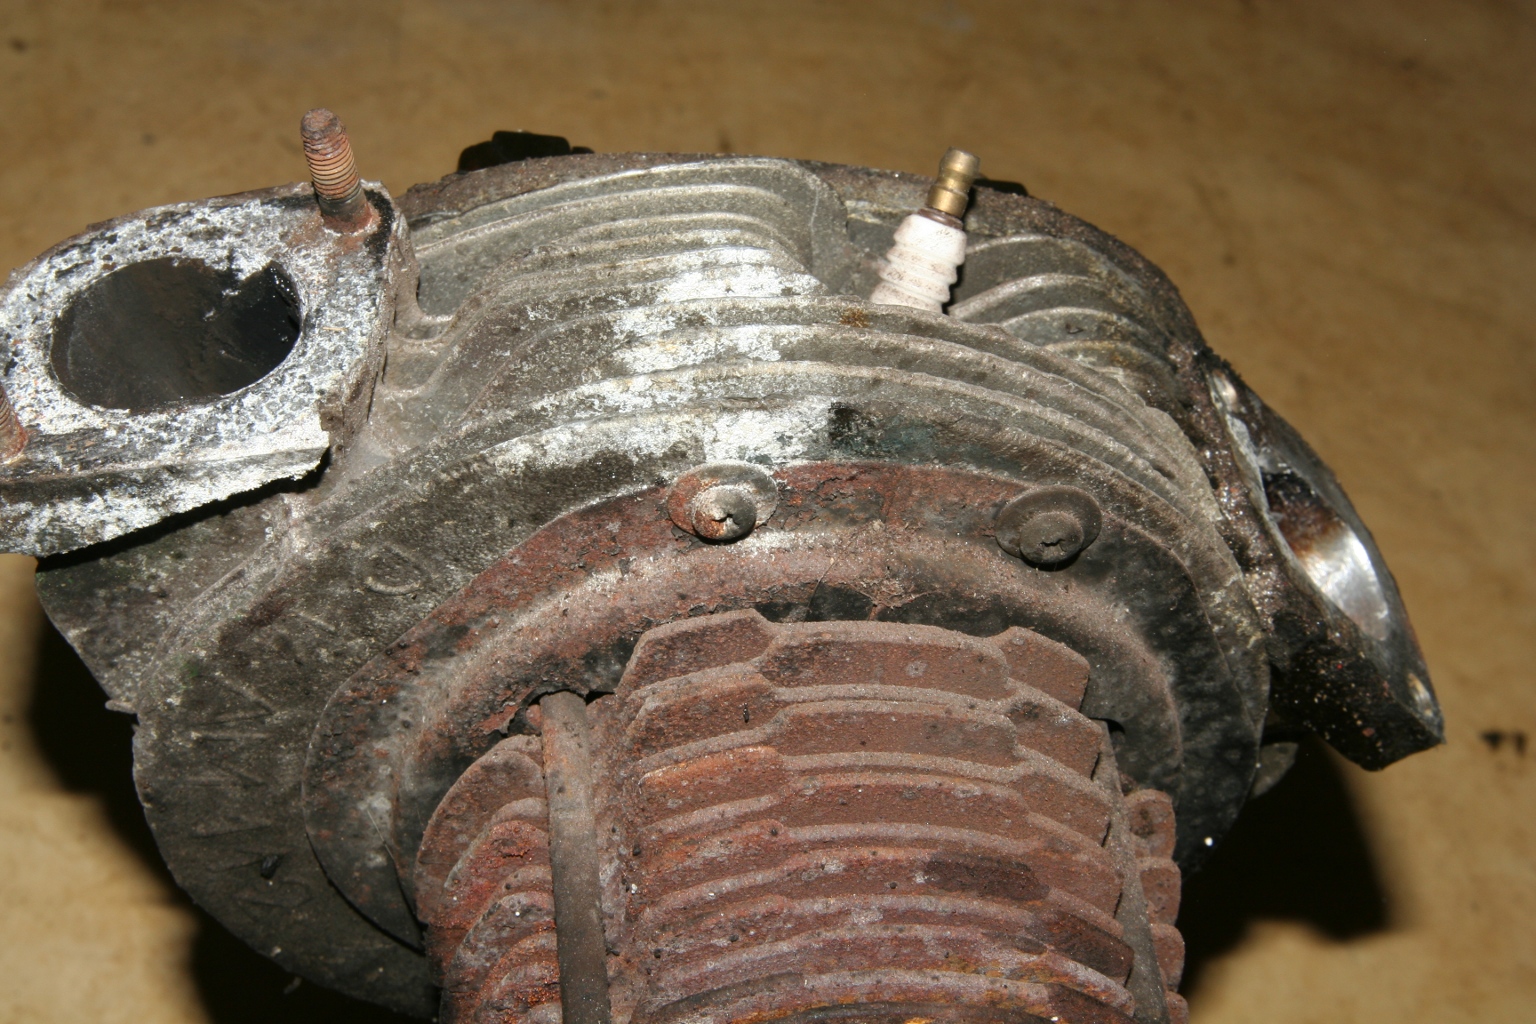 28th of May 2010 - my garage Cylinder and Cylinderhead are connected by two sheet metal screws and the accordant clamp. 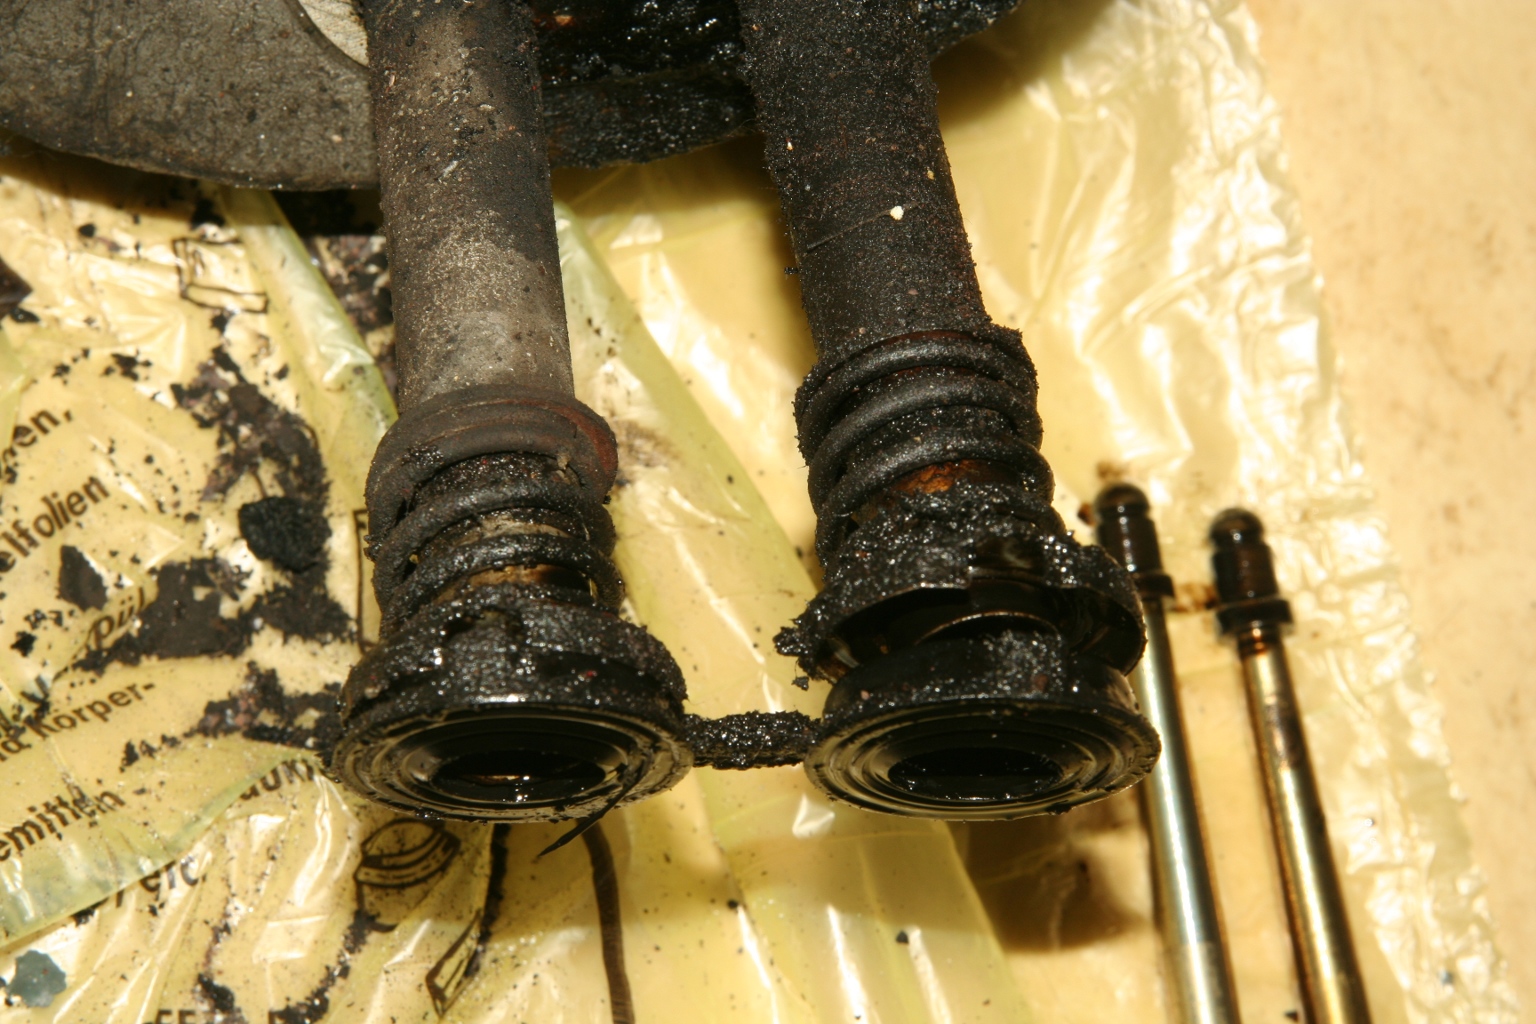 28th of May 2010 - my garage The sealing of the tubes of the valve push rod. 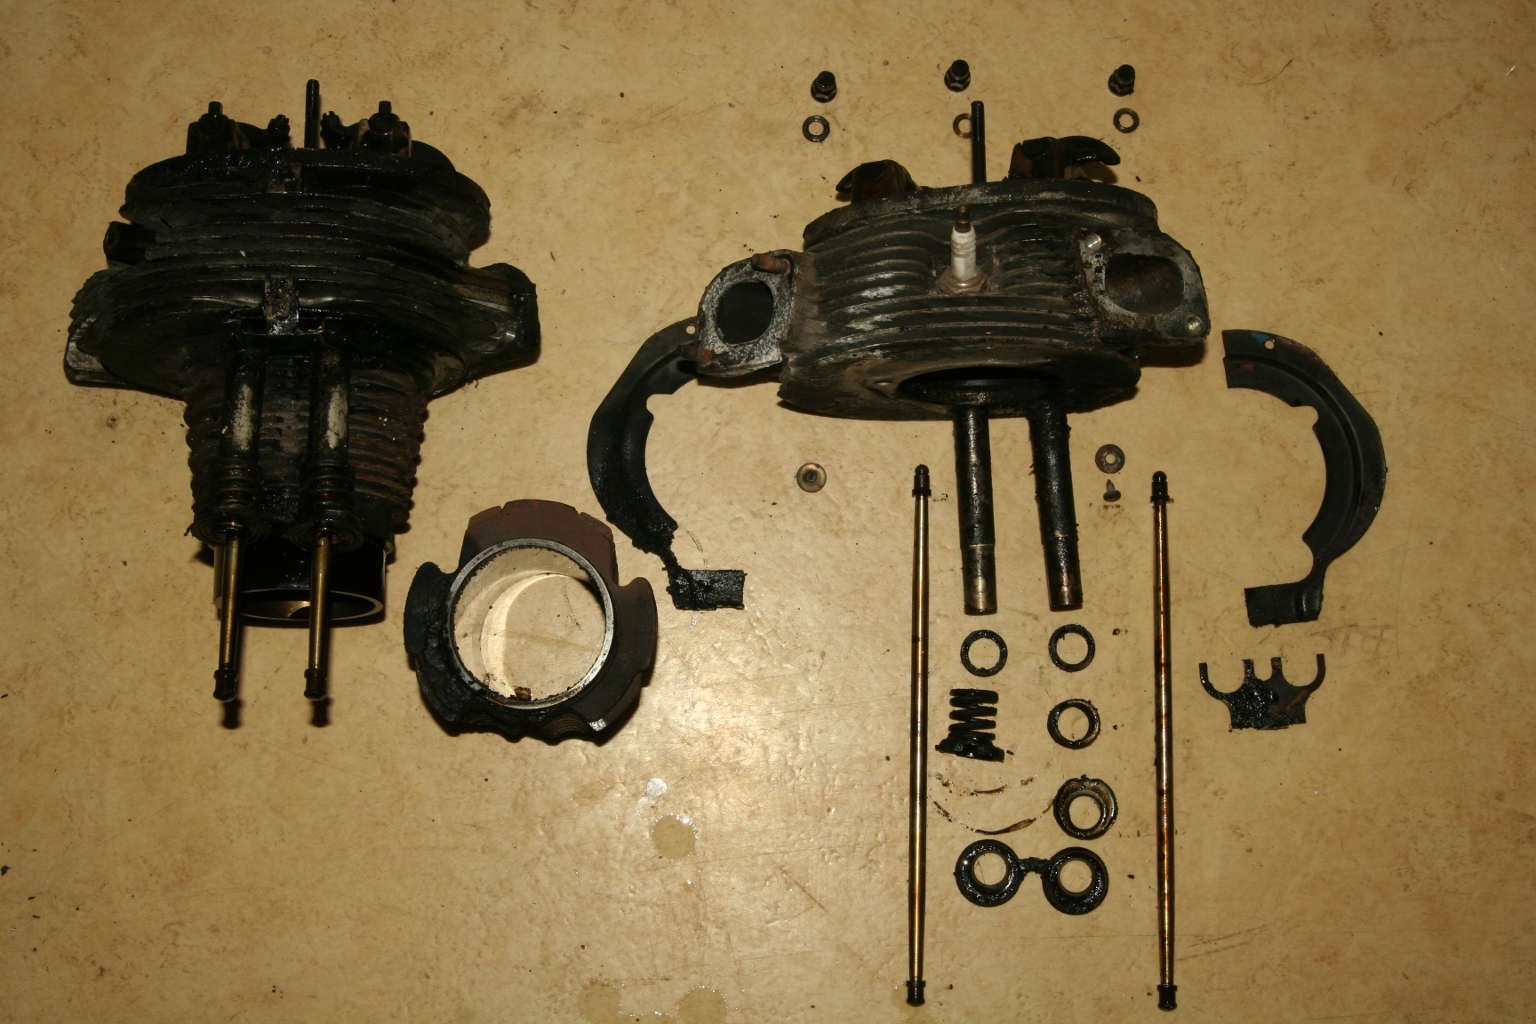 28th of May 2010 - my garage 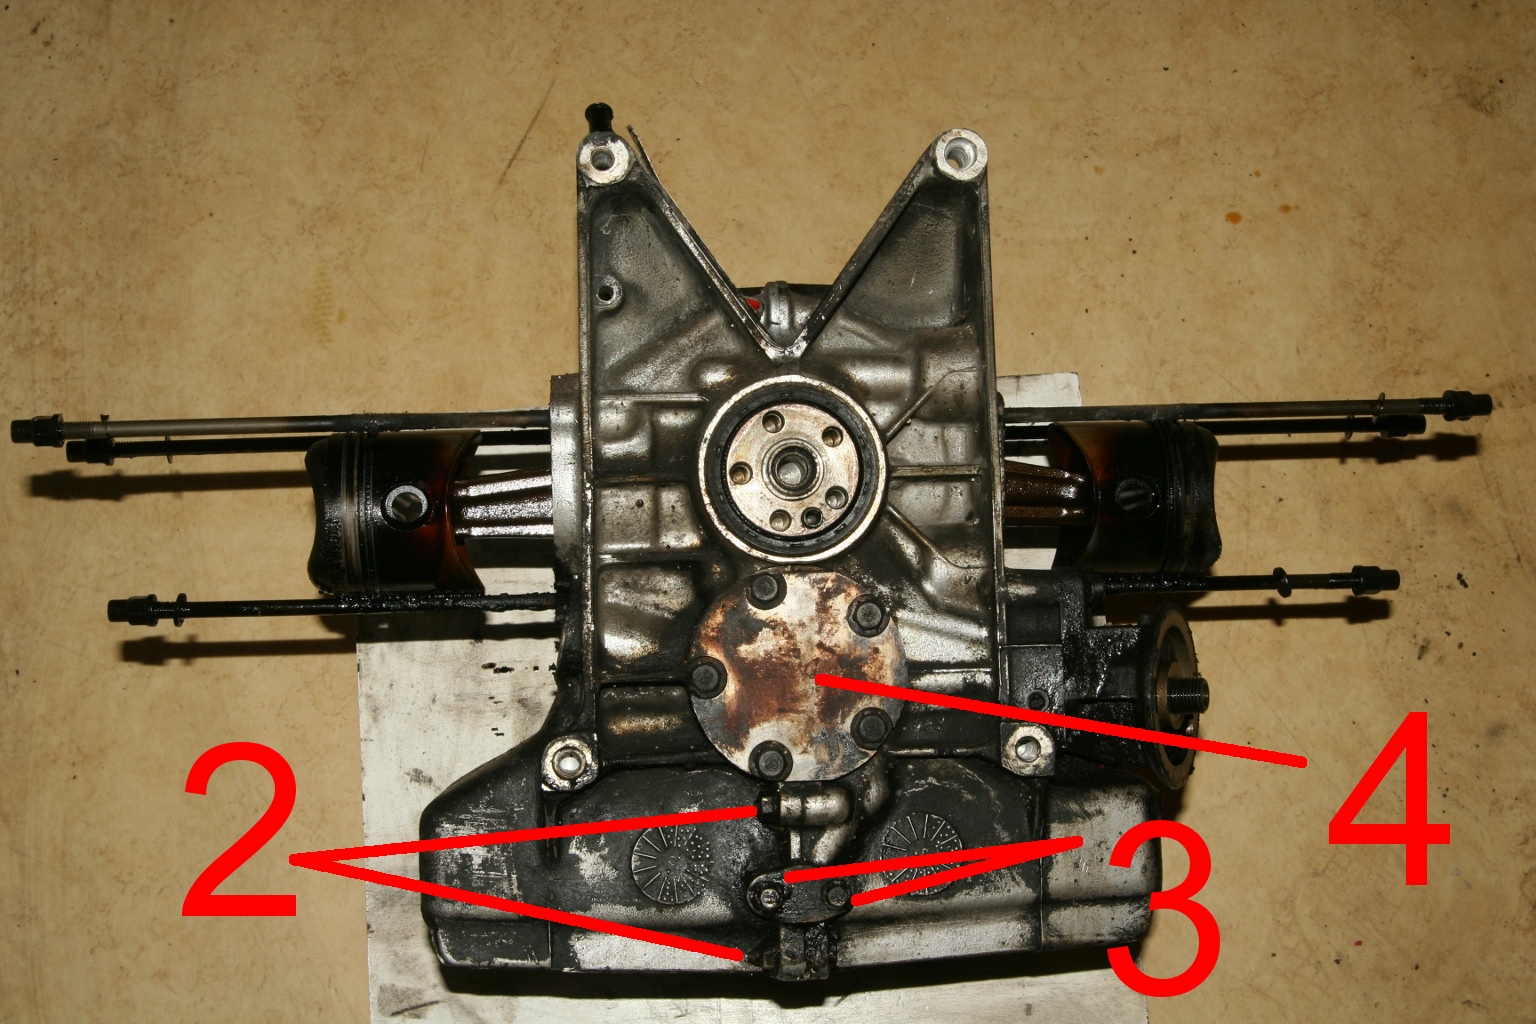 28th of May 2010 - my garage To be able to detach the halfes of the engine block, the screws (2), the fixing of the oil screen (3) and the cap of the oil pump (4) have to be removed. 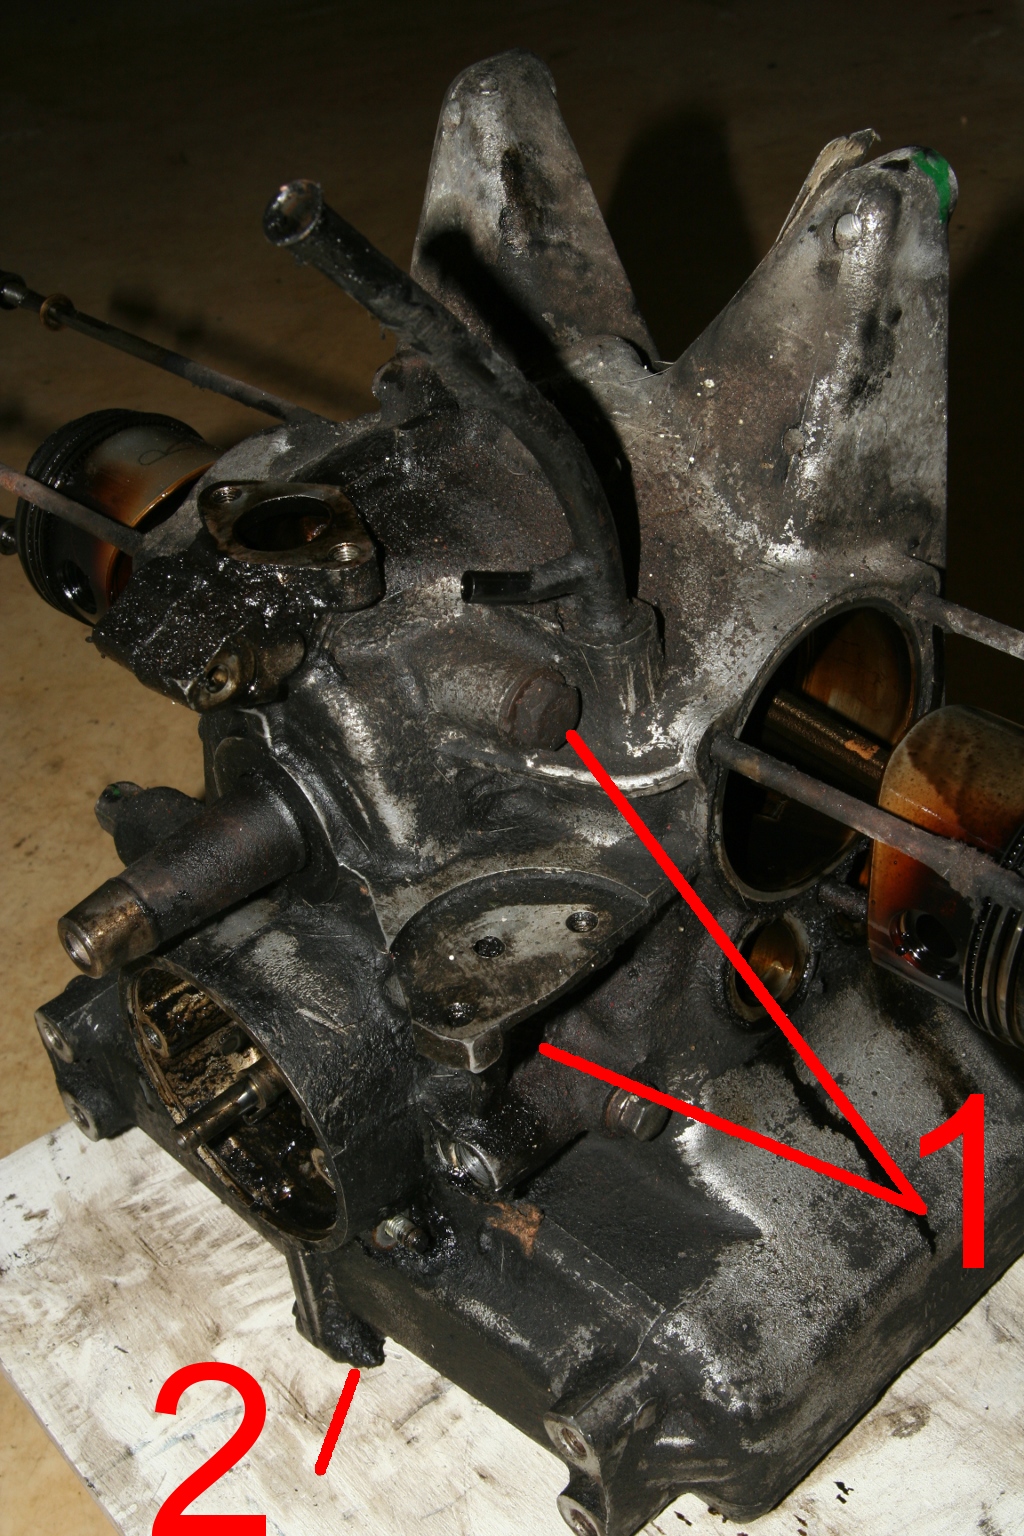 28th of May 2010 - my garage Further attachments are the bolts (1), wrench size 17mm and the screw (2), wrench size 11mm.  28th of May 2010 - my garage Look at the oil pump. 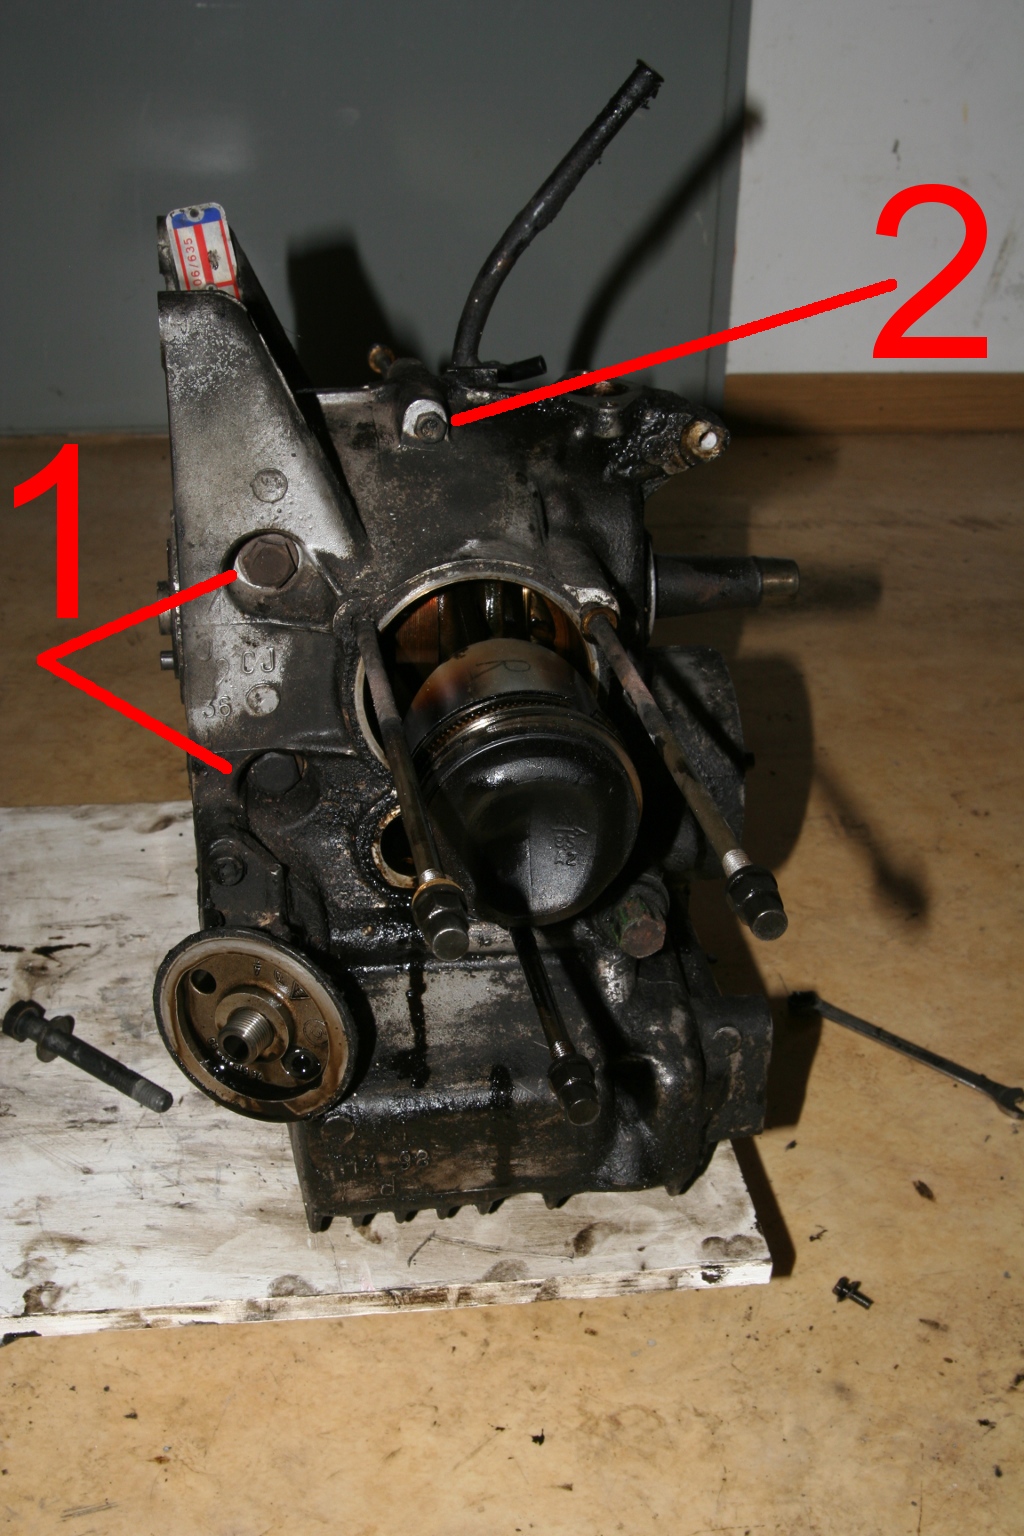 28th of May 2010 - my garage Two more bolts (1) and one screw can be seen here. Not to be seen is the last screw at the bottom of the engine block at the oil pan. 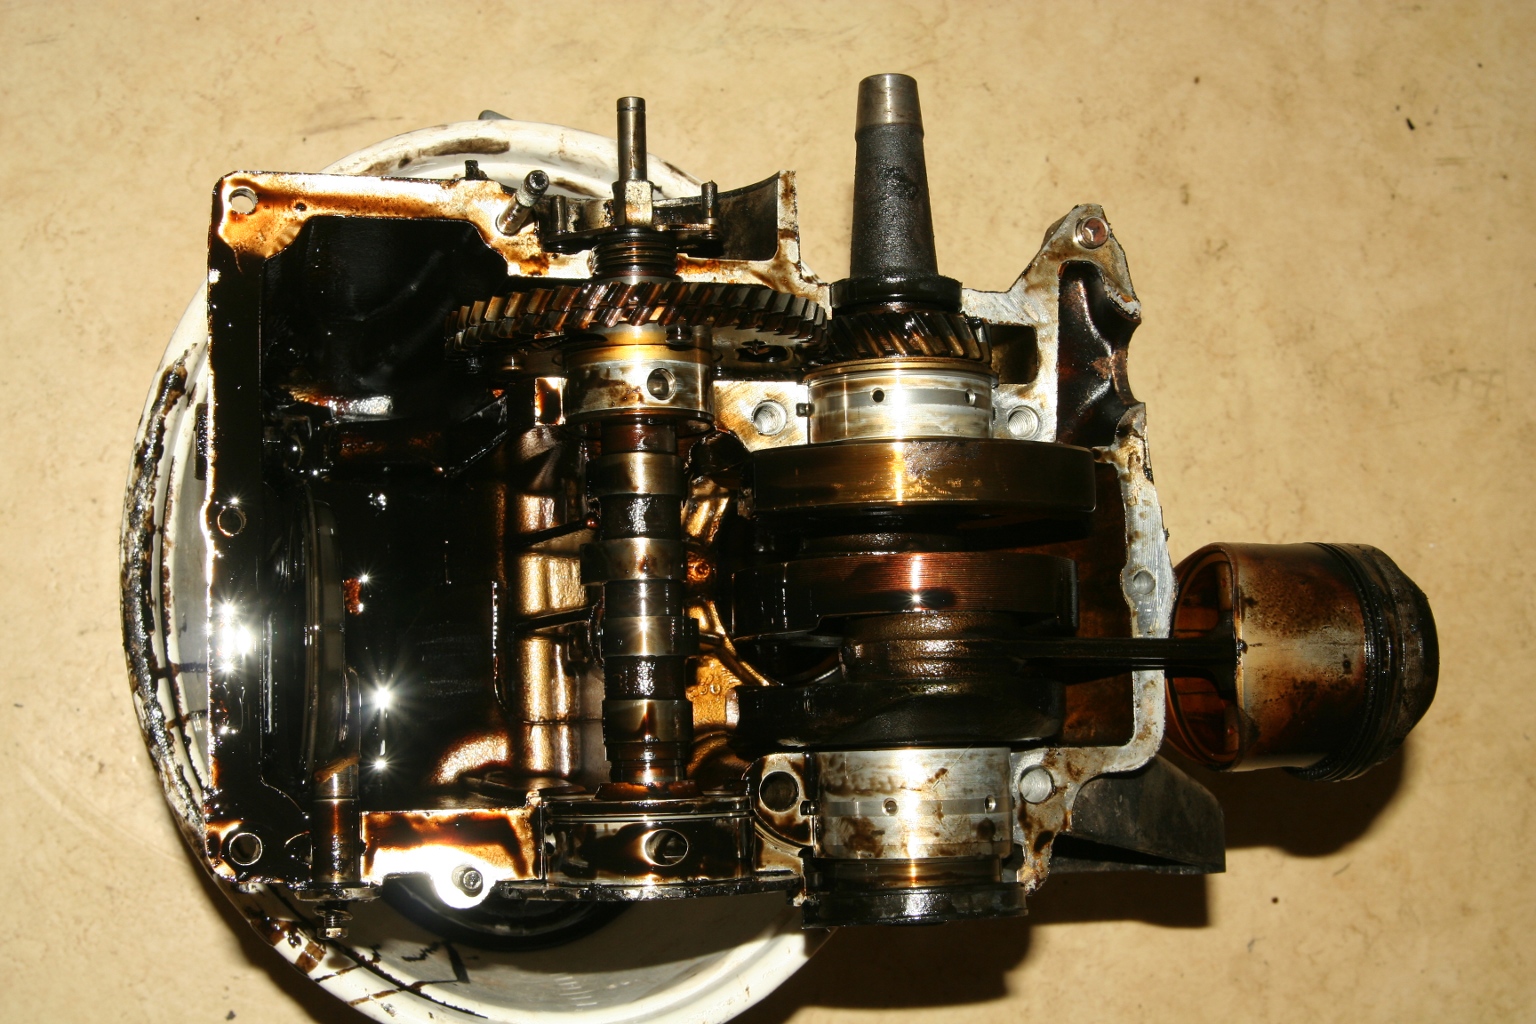 28th of May 2010 - my garage The half with calm and crank shaft. 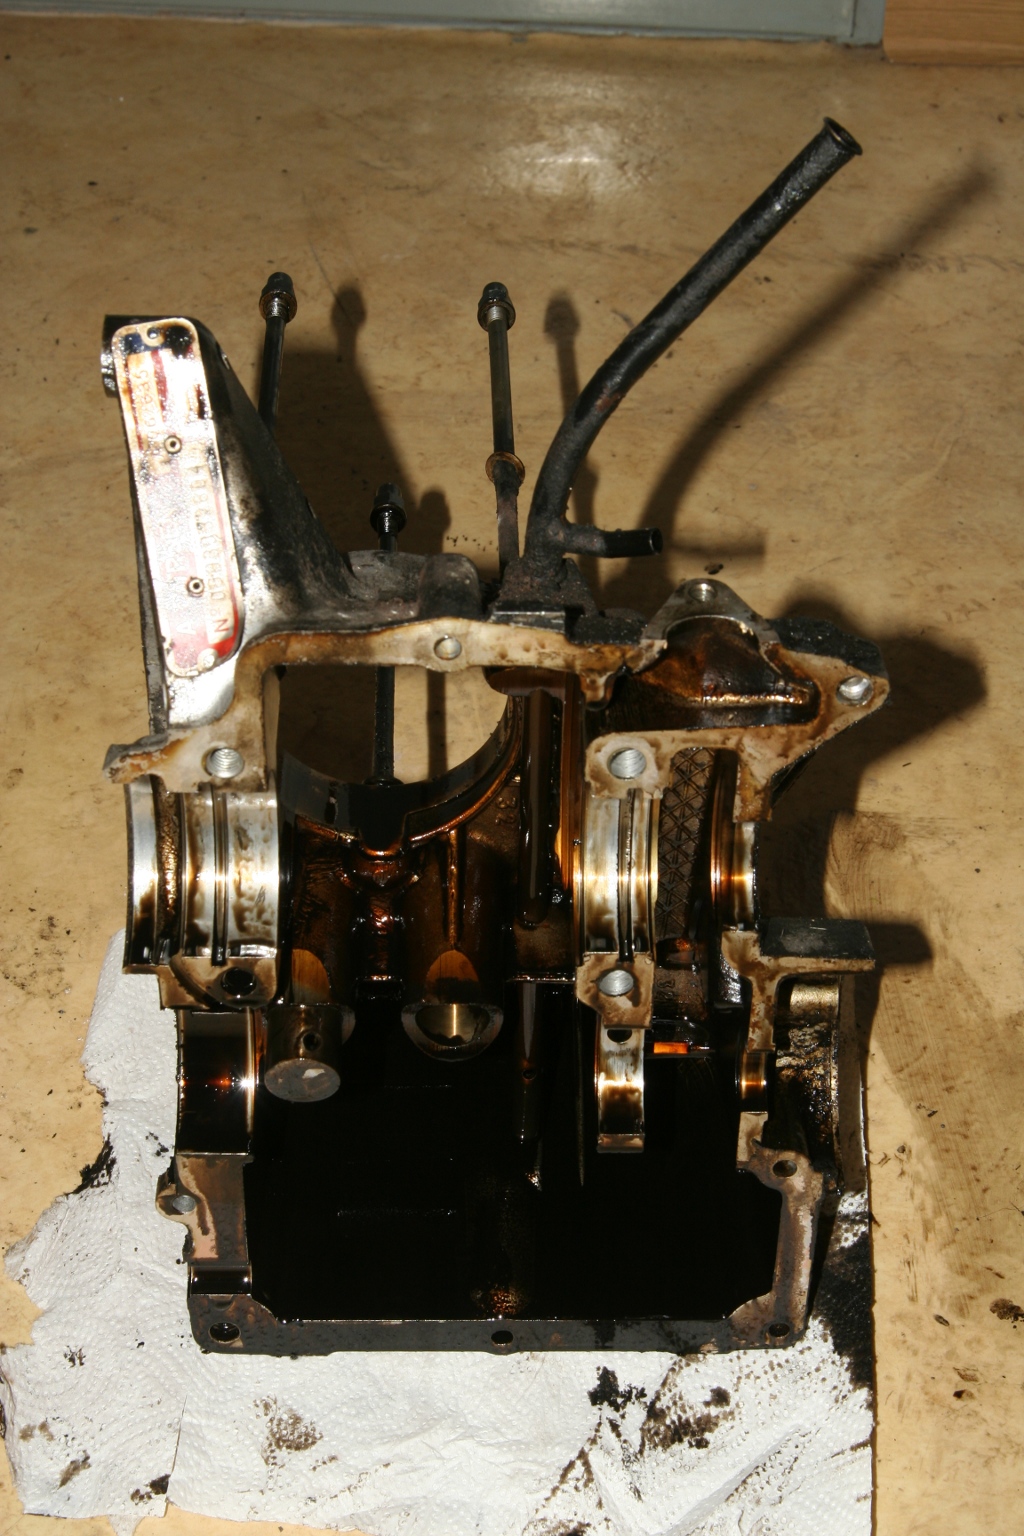 28th of May 2010 - my garage The "empty" half. 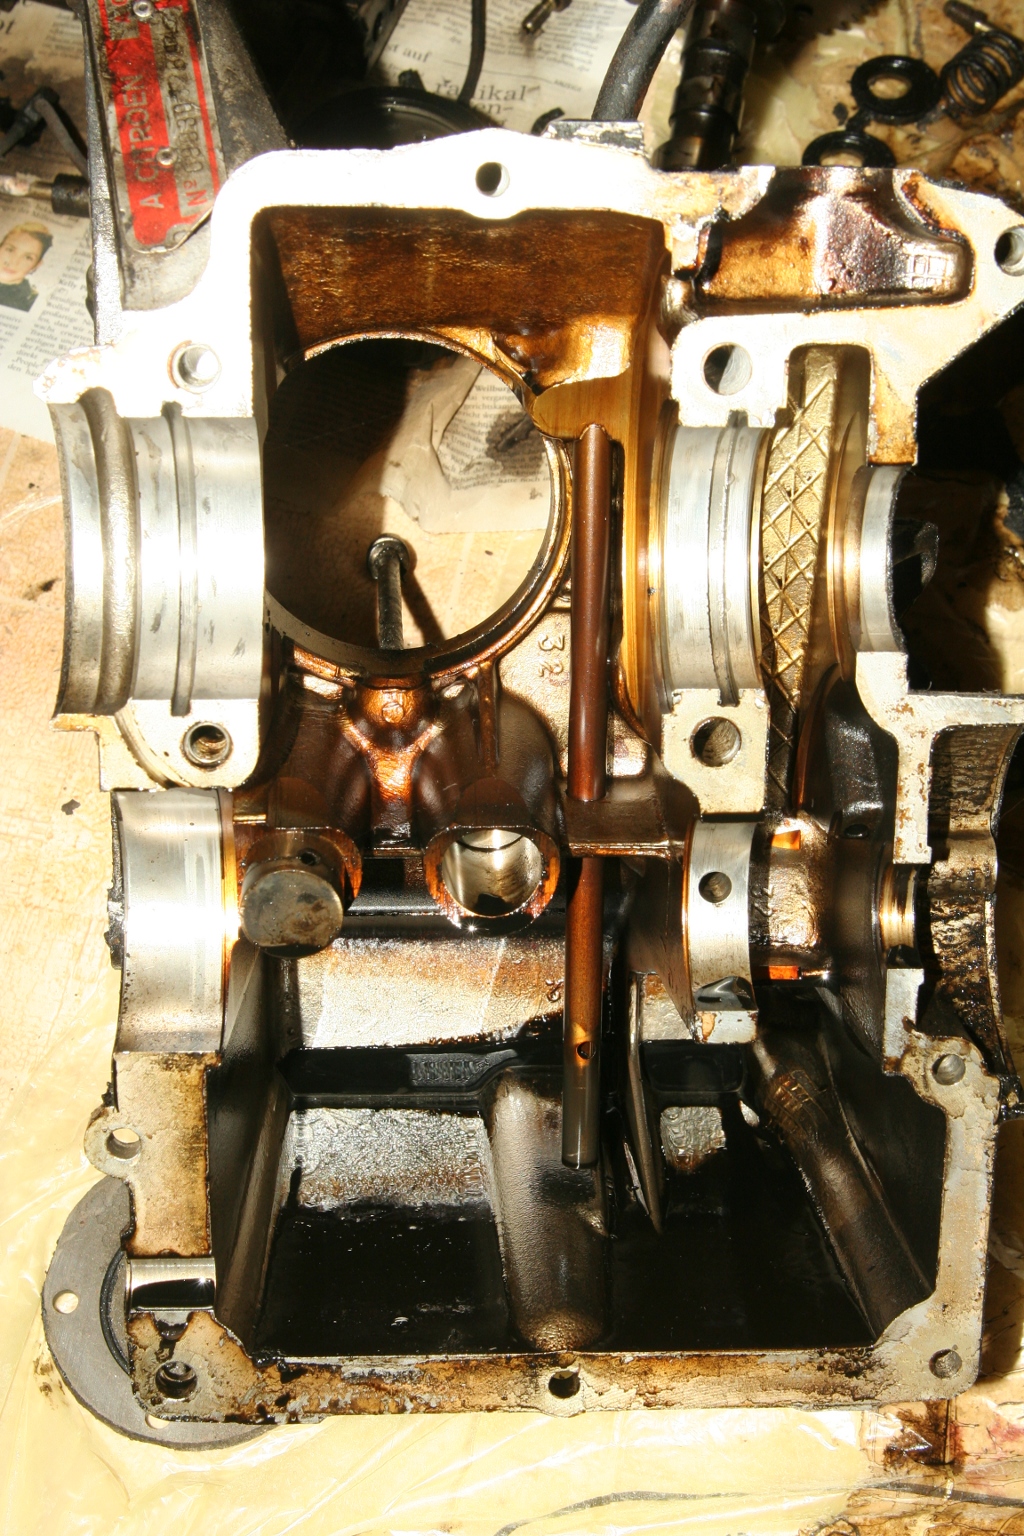 22nd of February 2011 - my garage The push rods of intake (blue arrow) and outlet (red) valve are actuated by the cam shaft with the help of cups. Don't swap the positions of those caps when reassembling the motor. The green arrow points to the drilling of the fuel pump rod (without a cup). 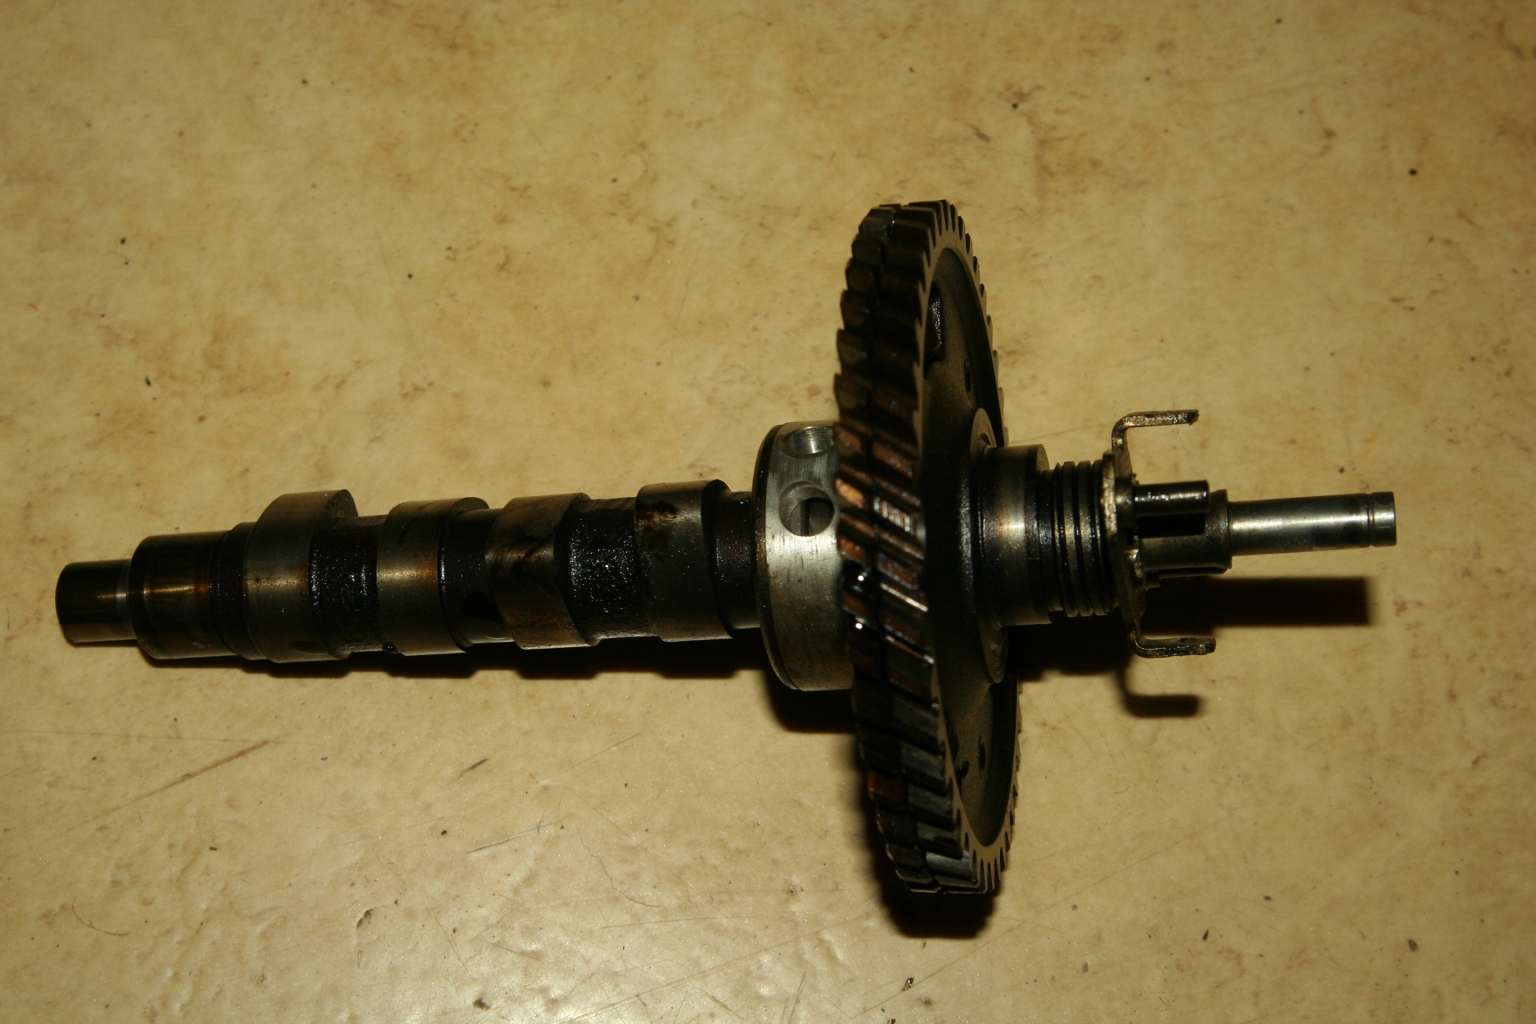 22nd of February 2011 - my garage The cams of inlet and outlet valve (blue and green) and the fuel pump (green). ...to be continued. Back to the TÜV inspection of no 2 Number 3 mechanics |