|
|
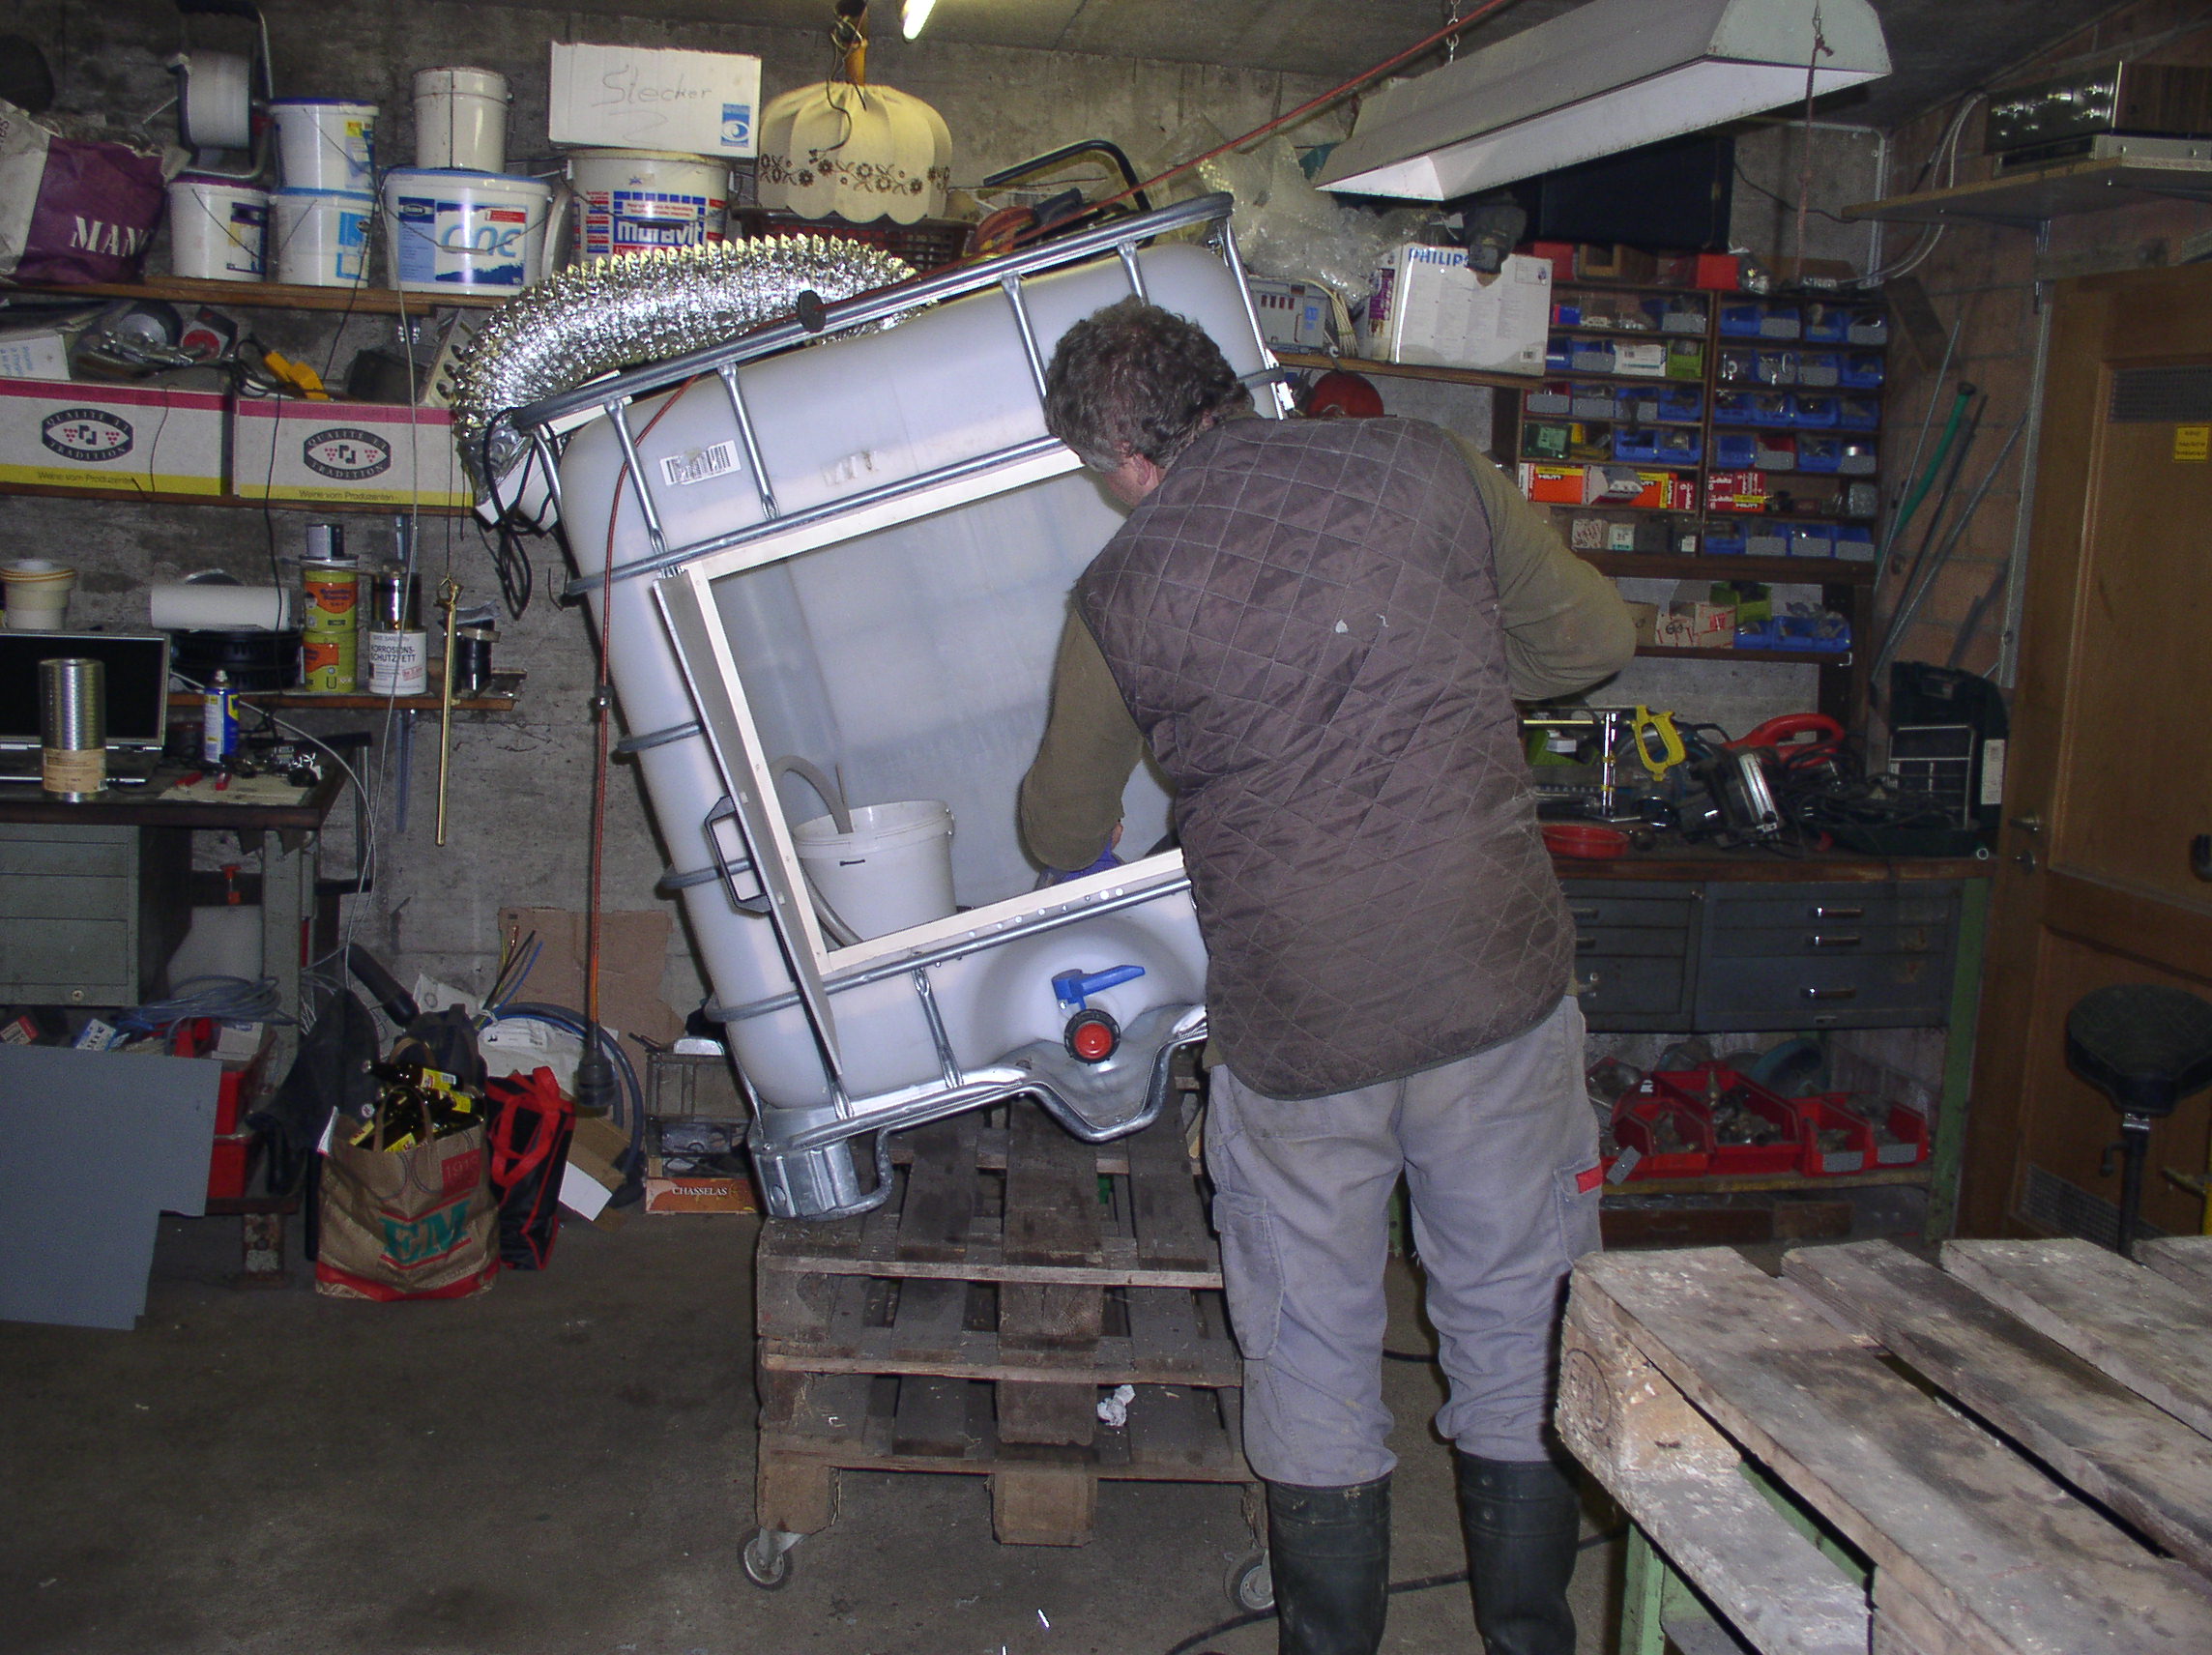
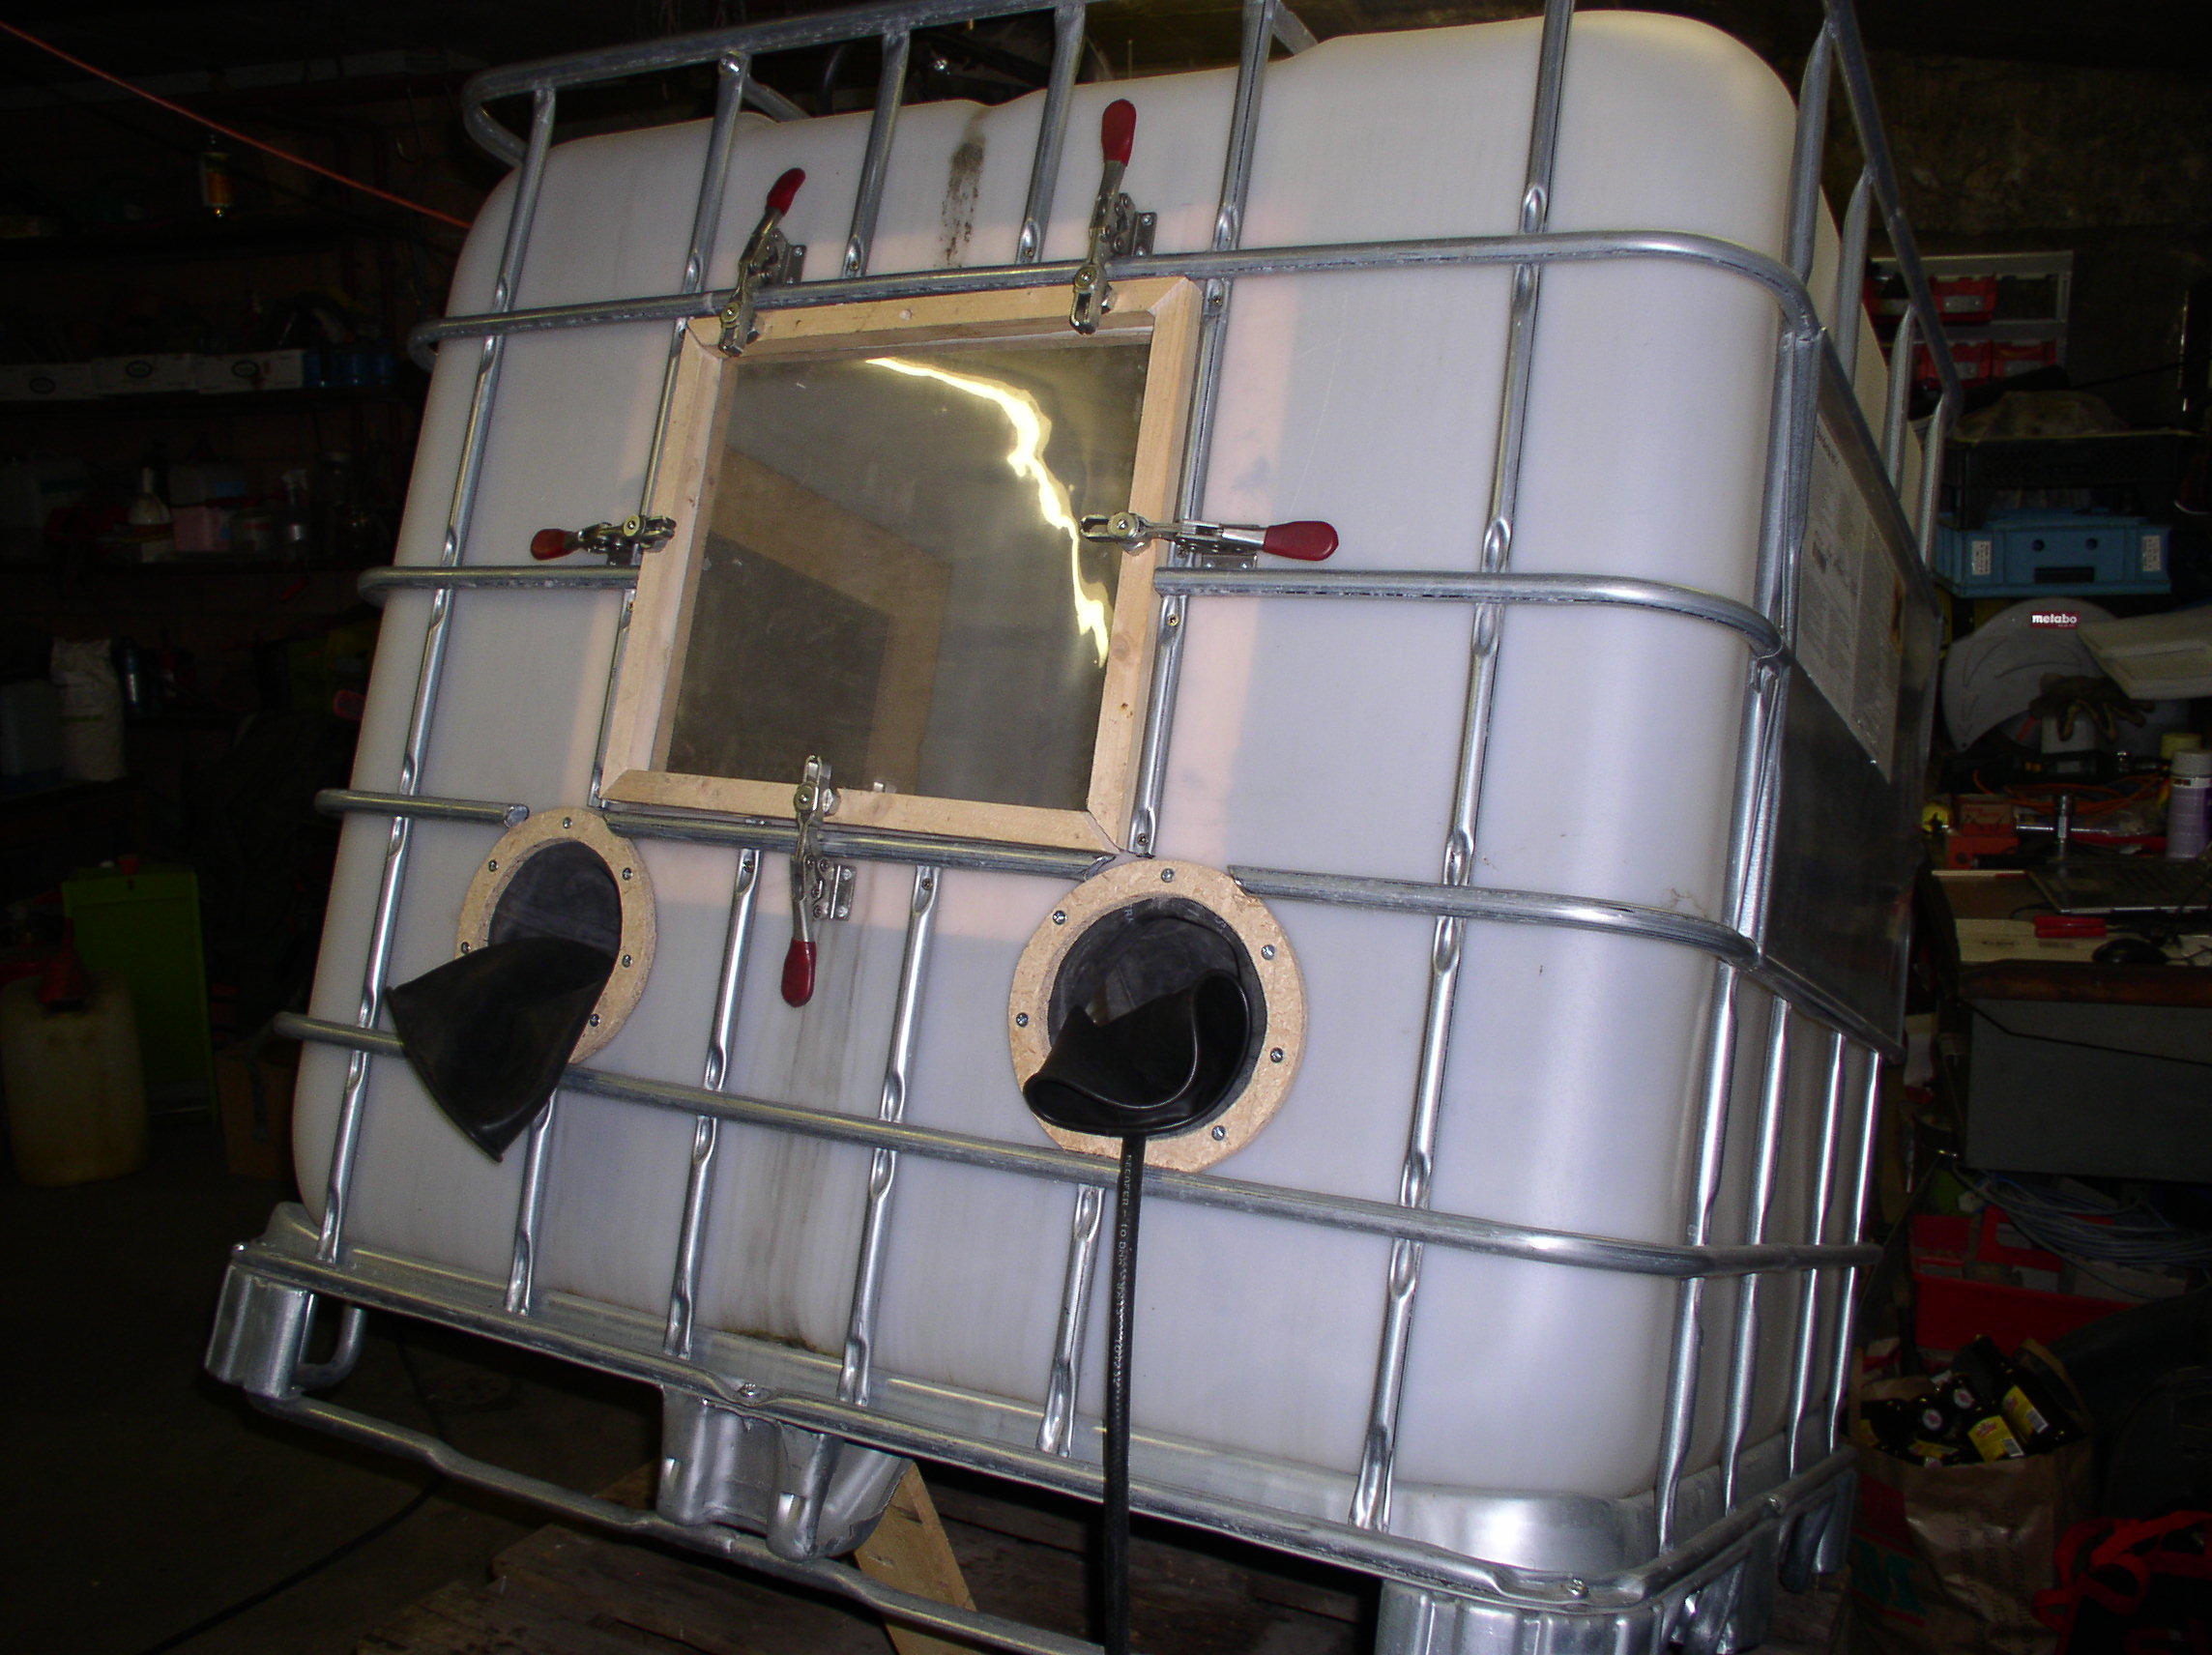
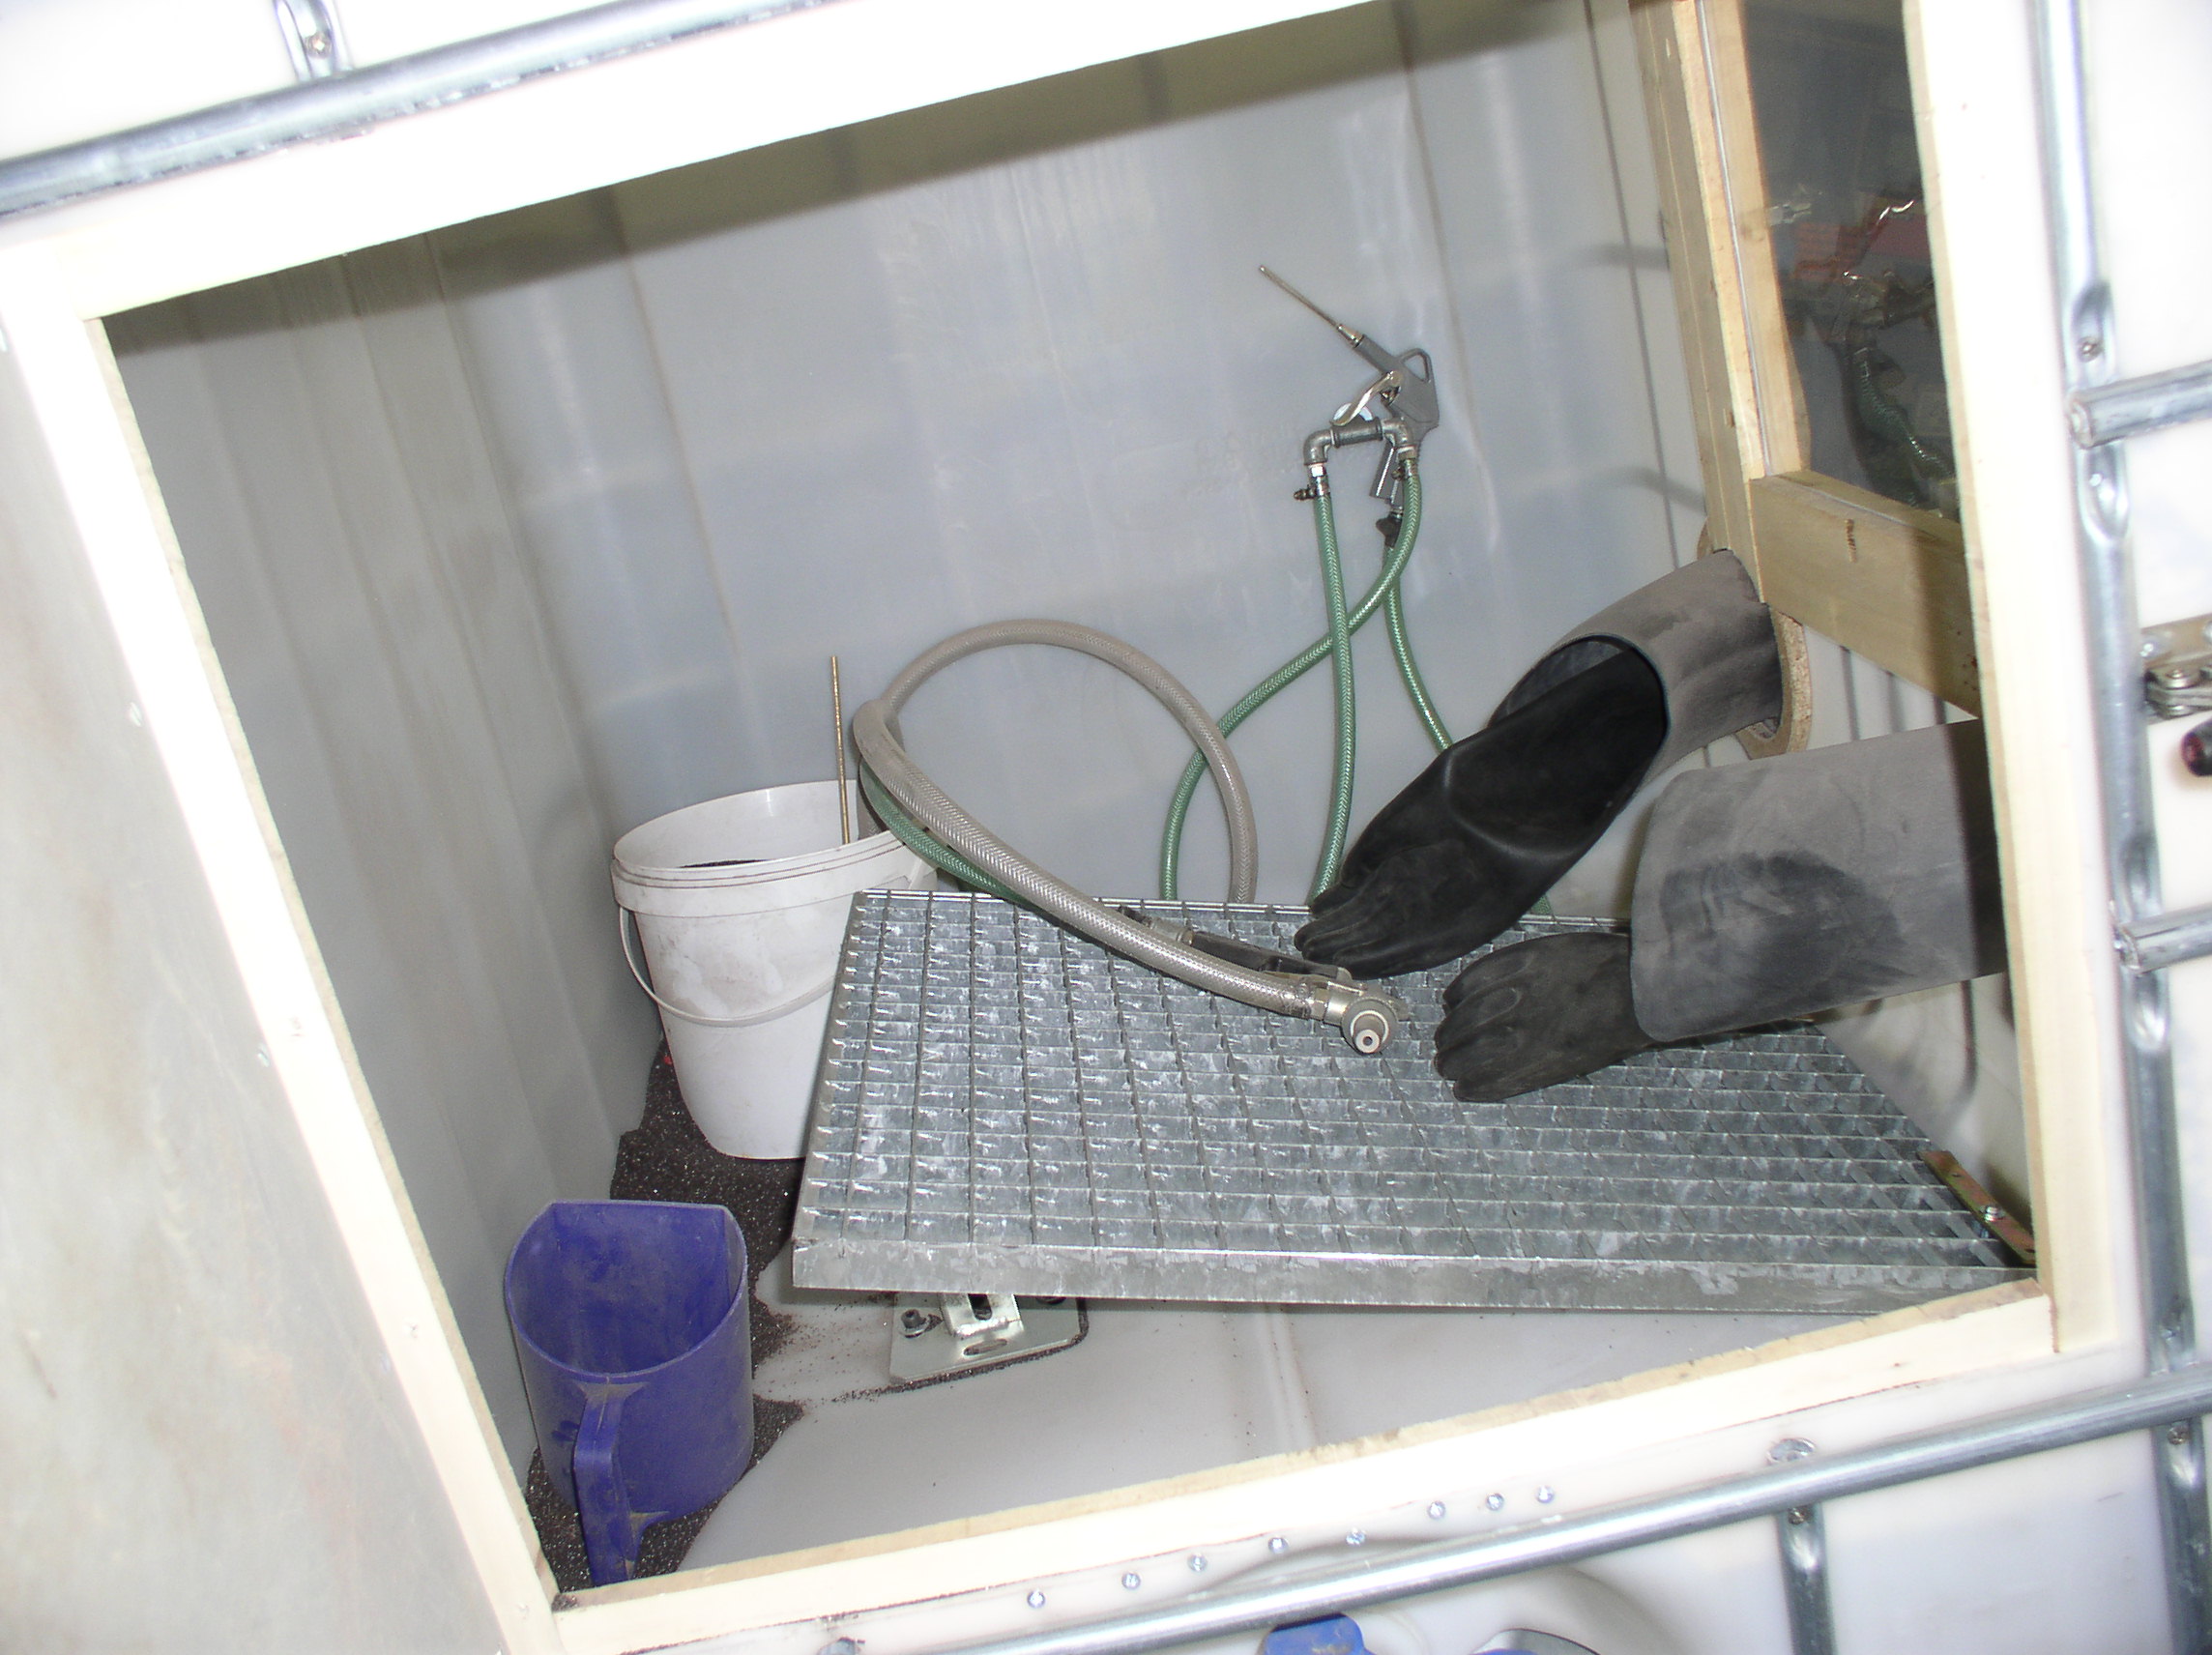
Tips & TricksYou know some more tricks? You can find my mail address at the column contact.Sand blastingHanspeter has built a box for blast cleaning using an old 1000l plastic tank: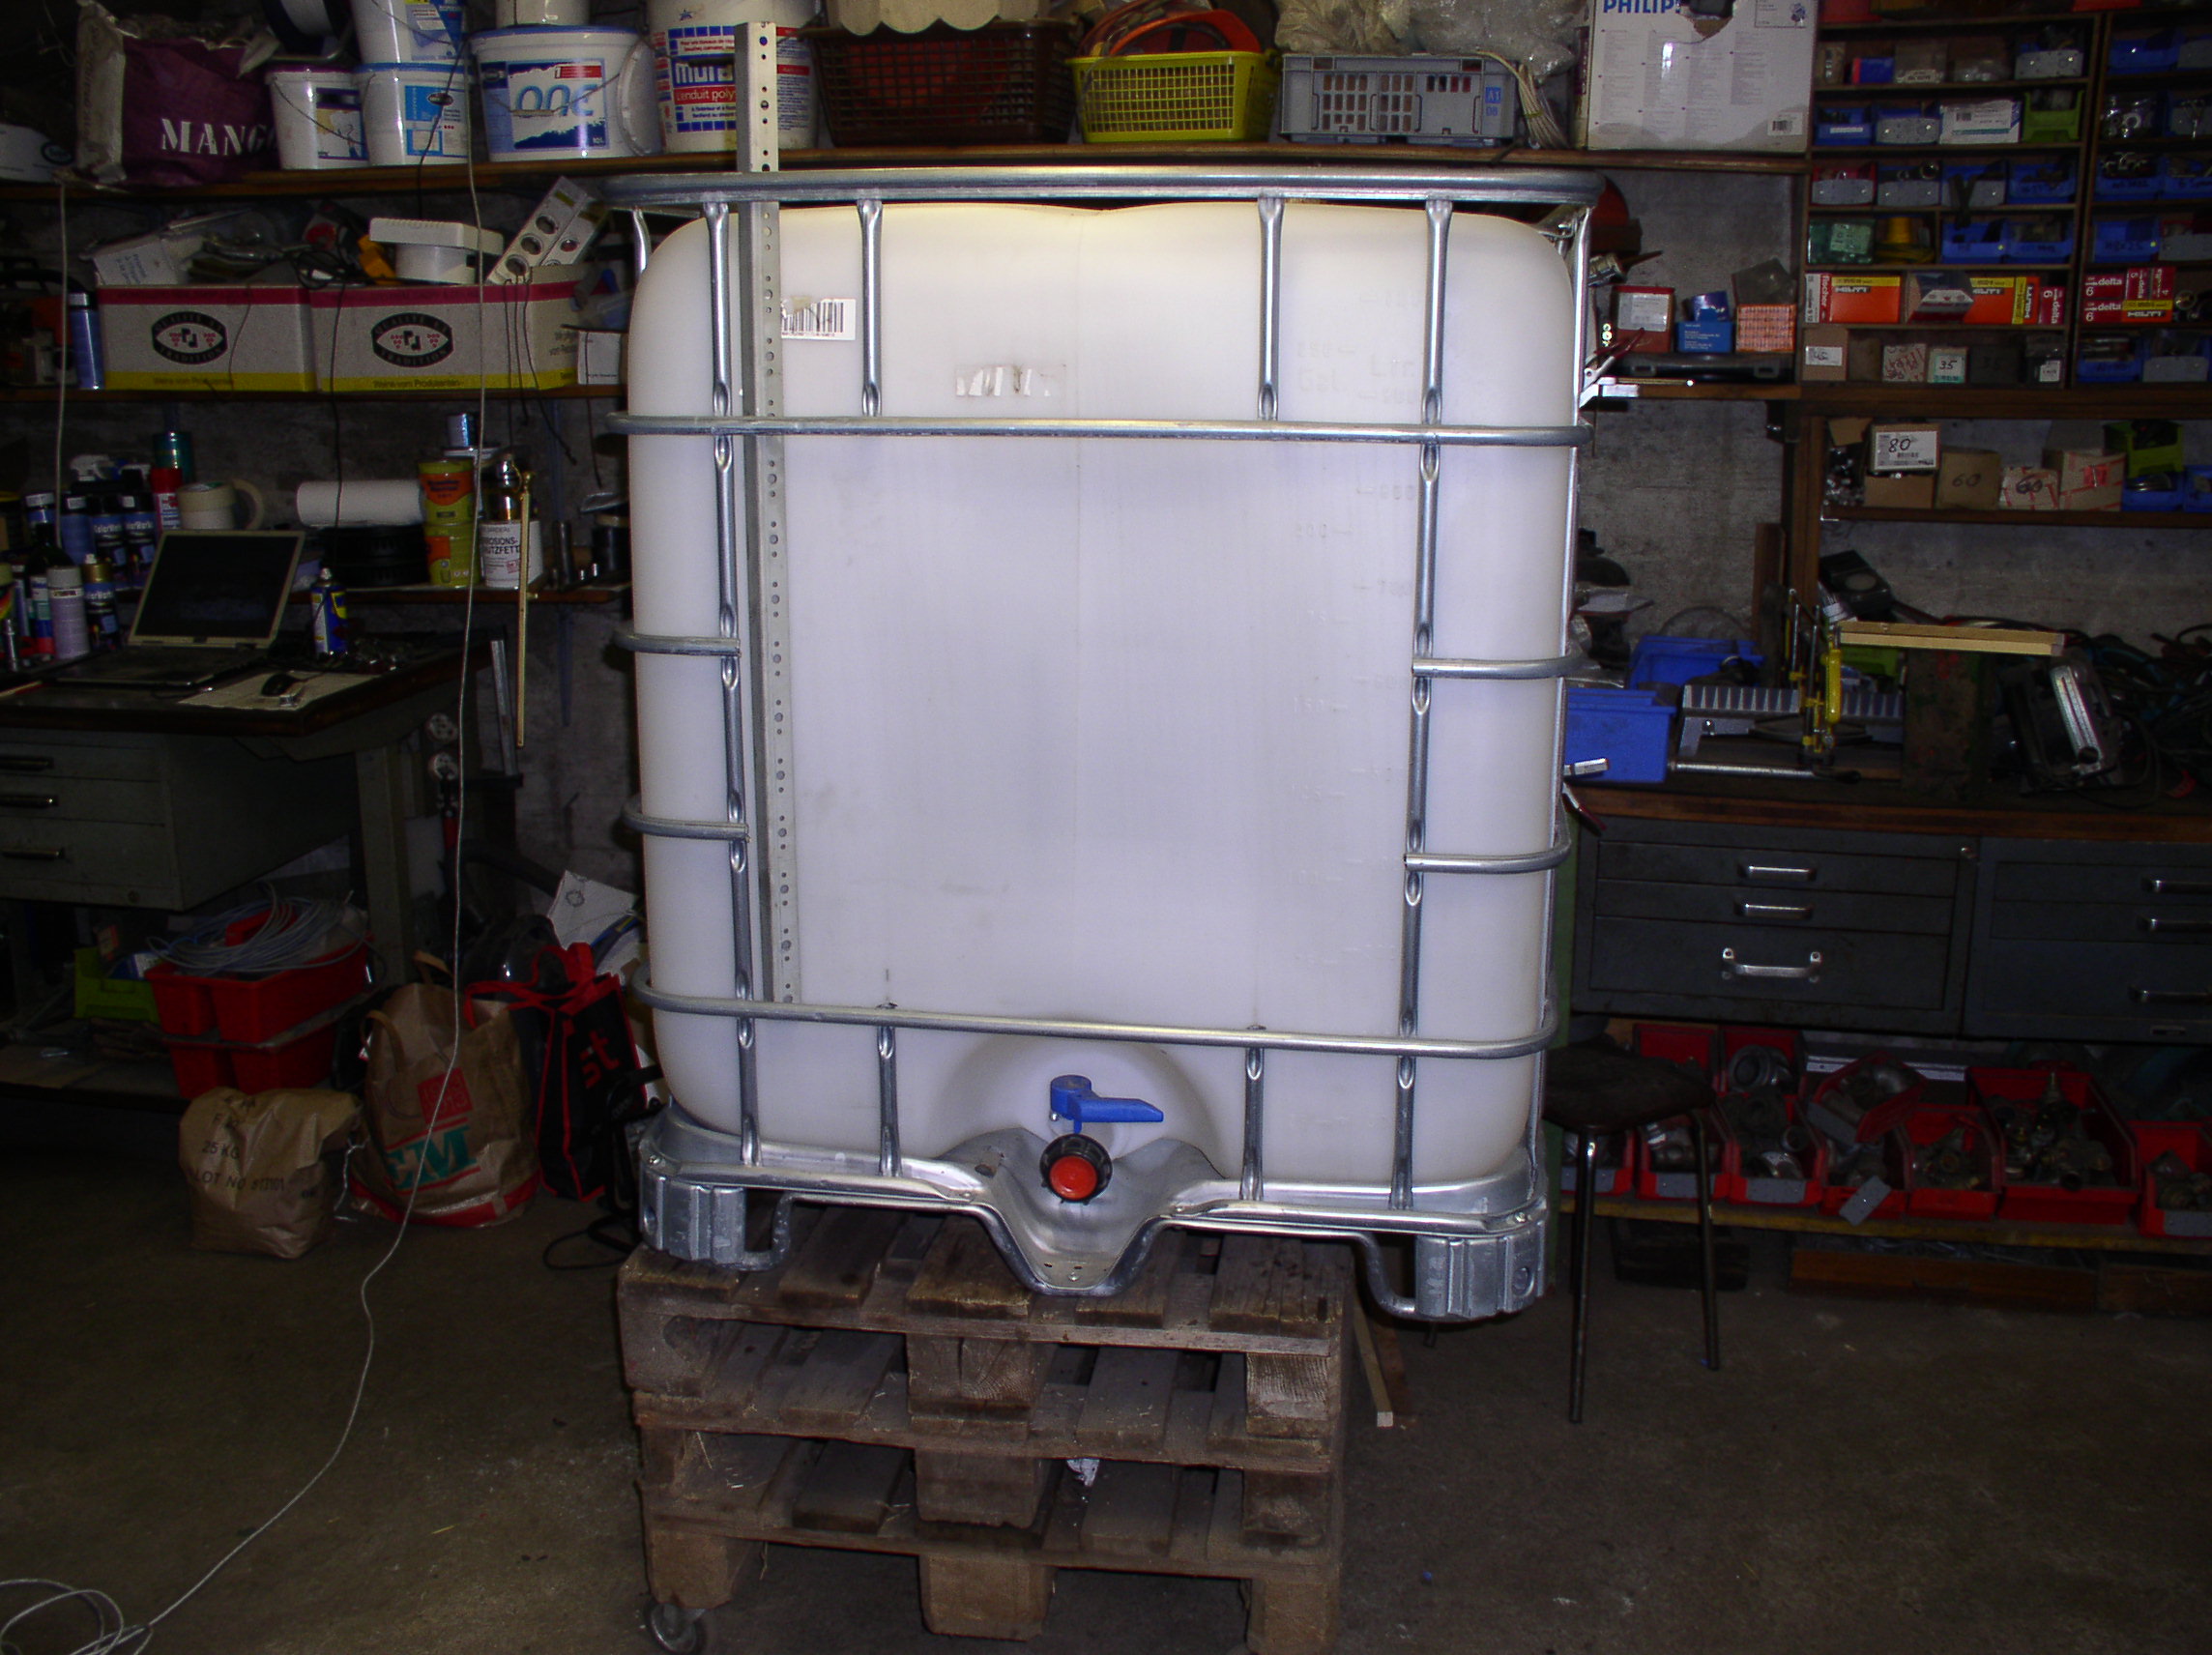


StationaryDominik did not have an old rim and instead he built this construction to be able to loosen or fix the crown nut of the front axle respectively the nuts of the rear drum brakes. An advantage is that it prevents inadvertent rolling.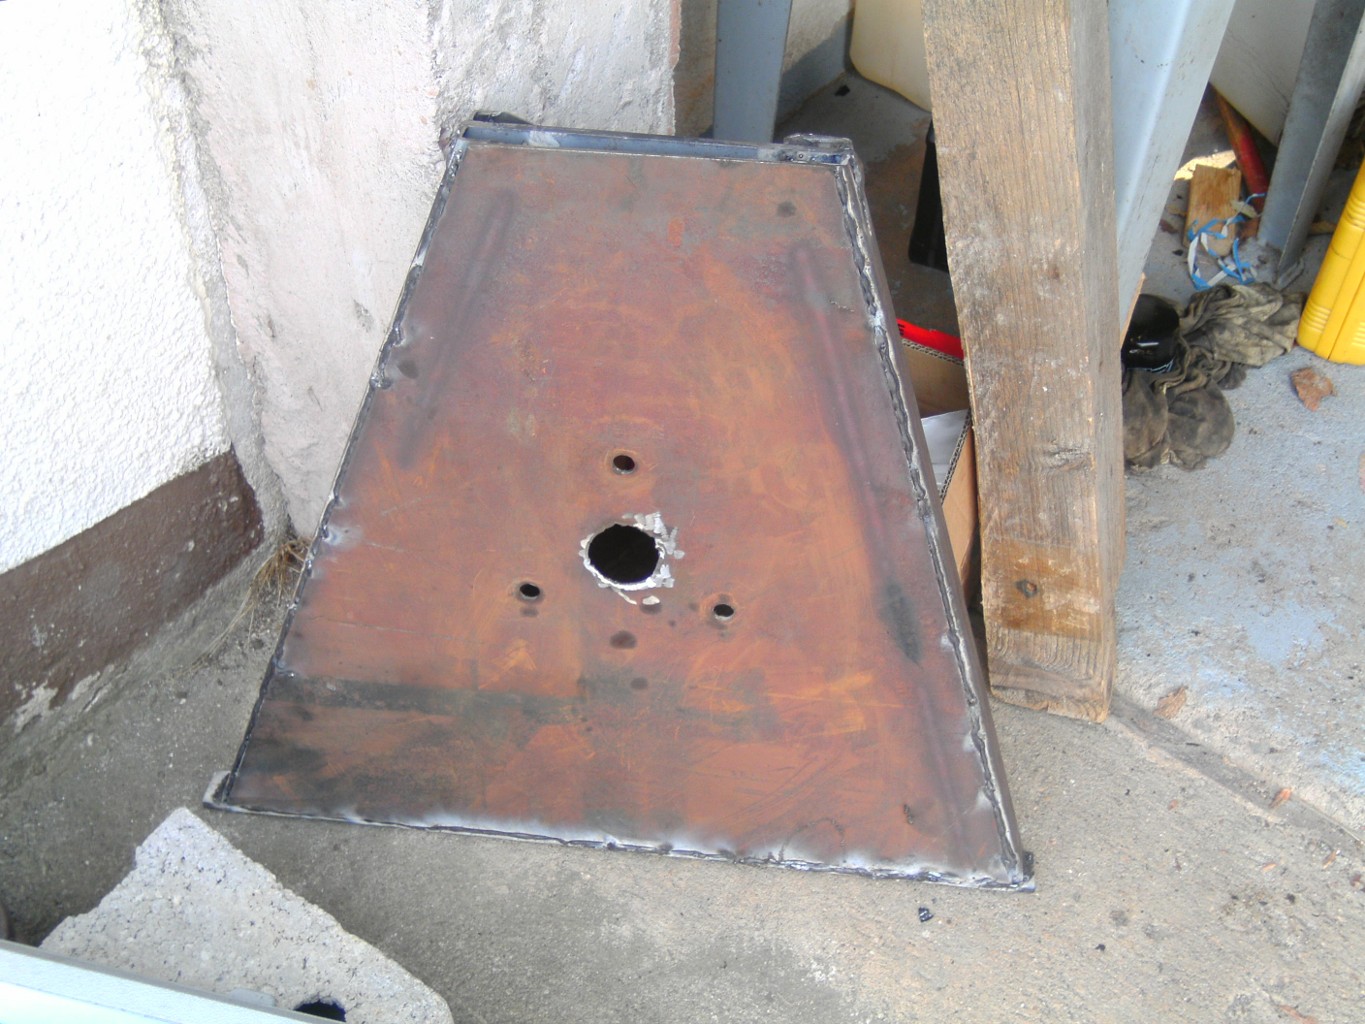

Motor troubleFrom Béla is the flow chart to diagnose motor trouble which I found at the pages of the 2CV forum. It is self-explanatory:Click at the preview to see the big version. 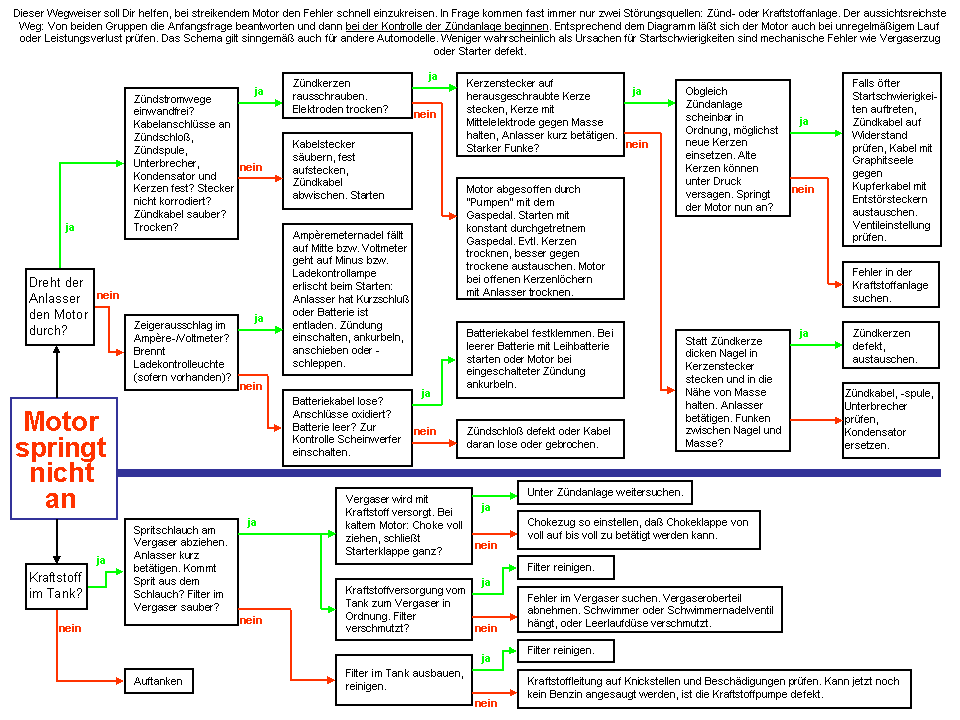
I is always wise to deal with engine troubles in such a systematic way. Replacing just the easy accessible partis is often done when a motor starts making trouble, but that is rarely helpful... Locking mechanism of the back seatsReleasing the locking mechanism at both sides of the rear seats simultaneously and turning the seat bench with the third hand is very tricky. Rolf from Switzerland connected the two locking devices with a cable or at a second attempt with two aluminum bars. Hence pepole with just two hands can turn the seat bench, too: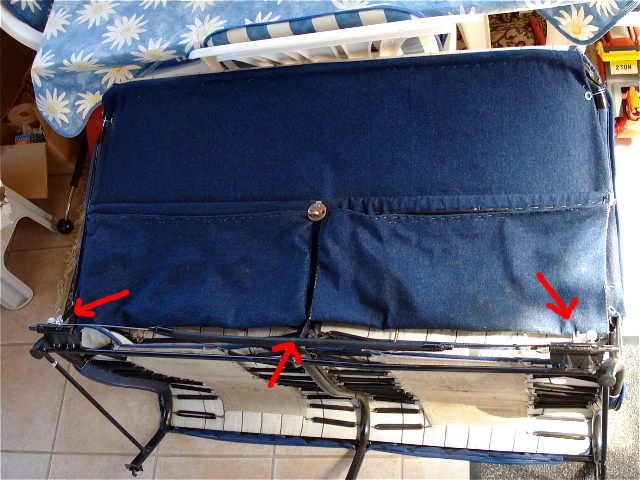
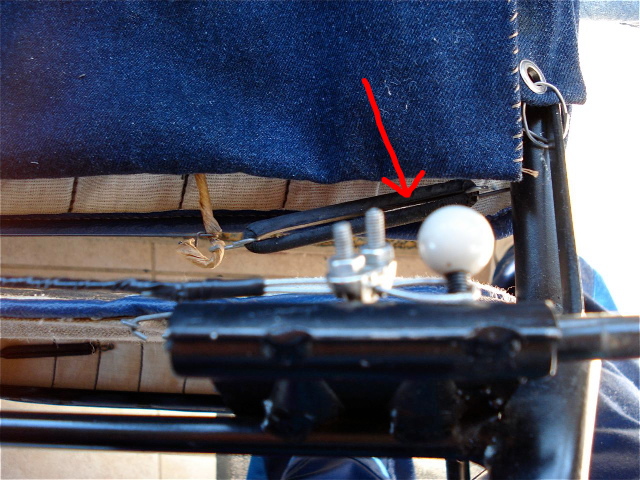

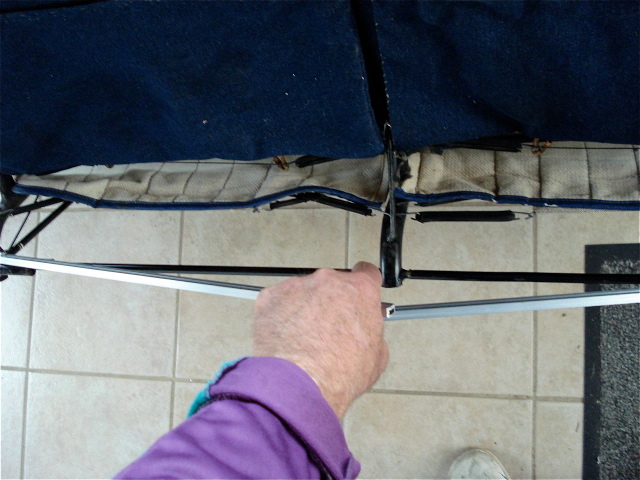
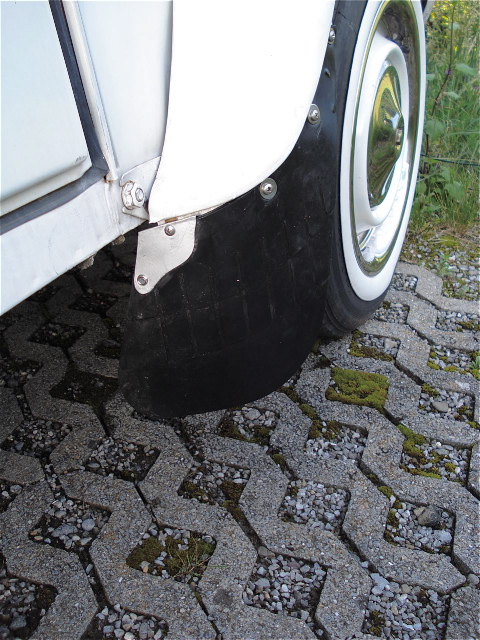
Dirt deflectorRolf also gave the tip to enforce the fasteners of the dirt deflectors: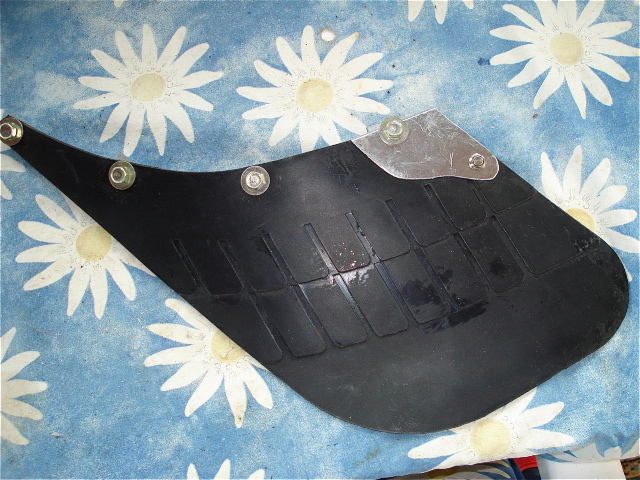
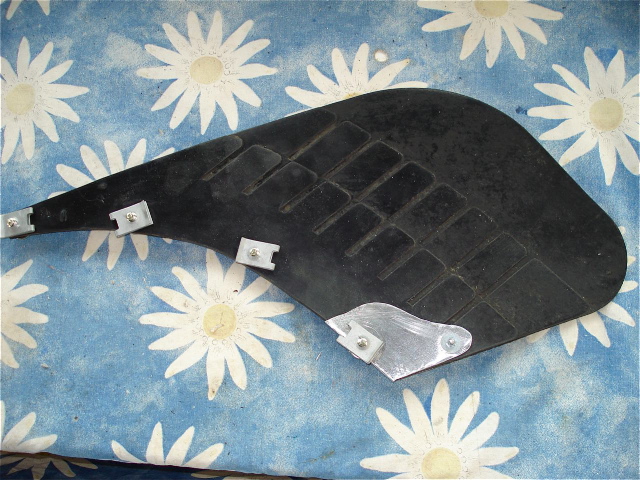
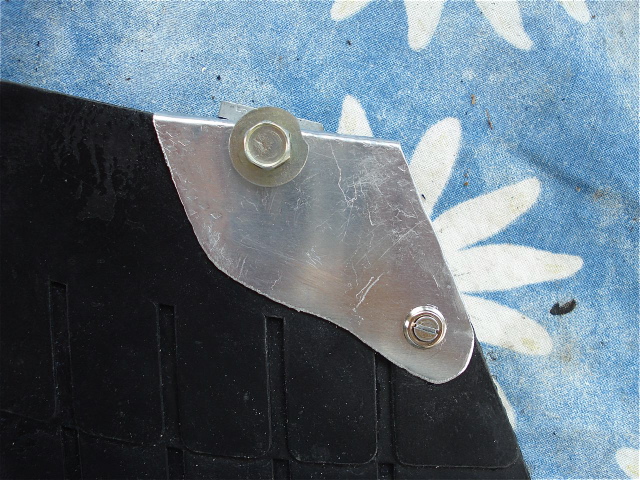
Somewhere at a meeting is saw the second variation, which needs some more material and time to build: 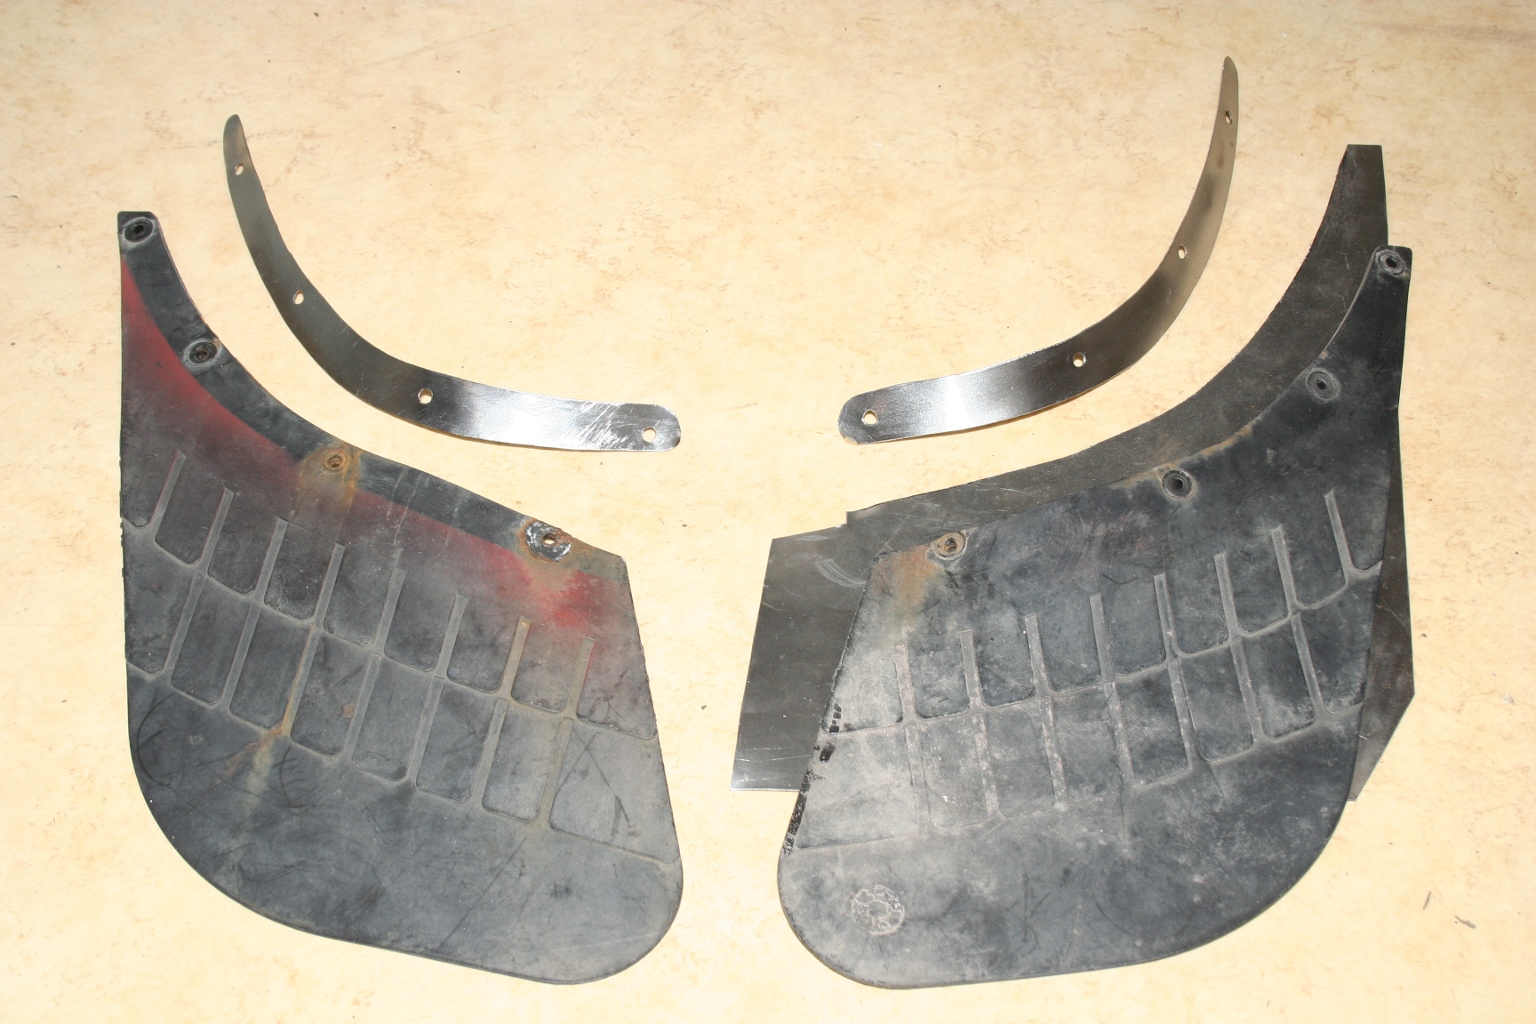


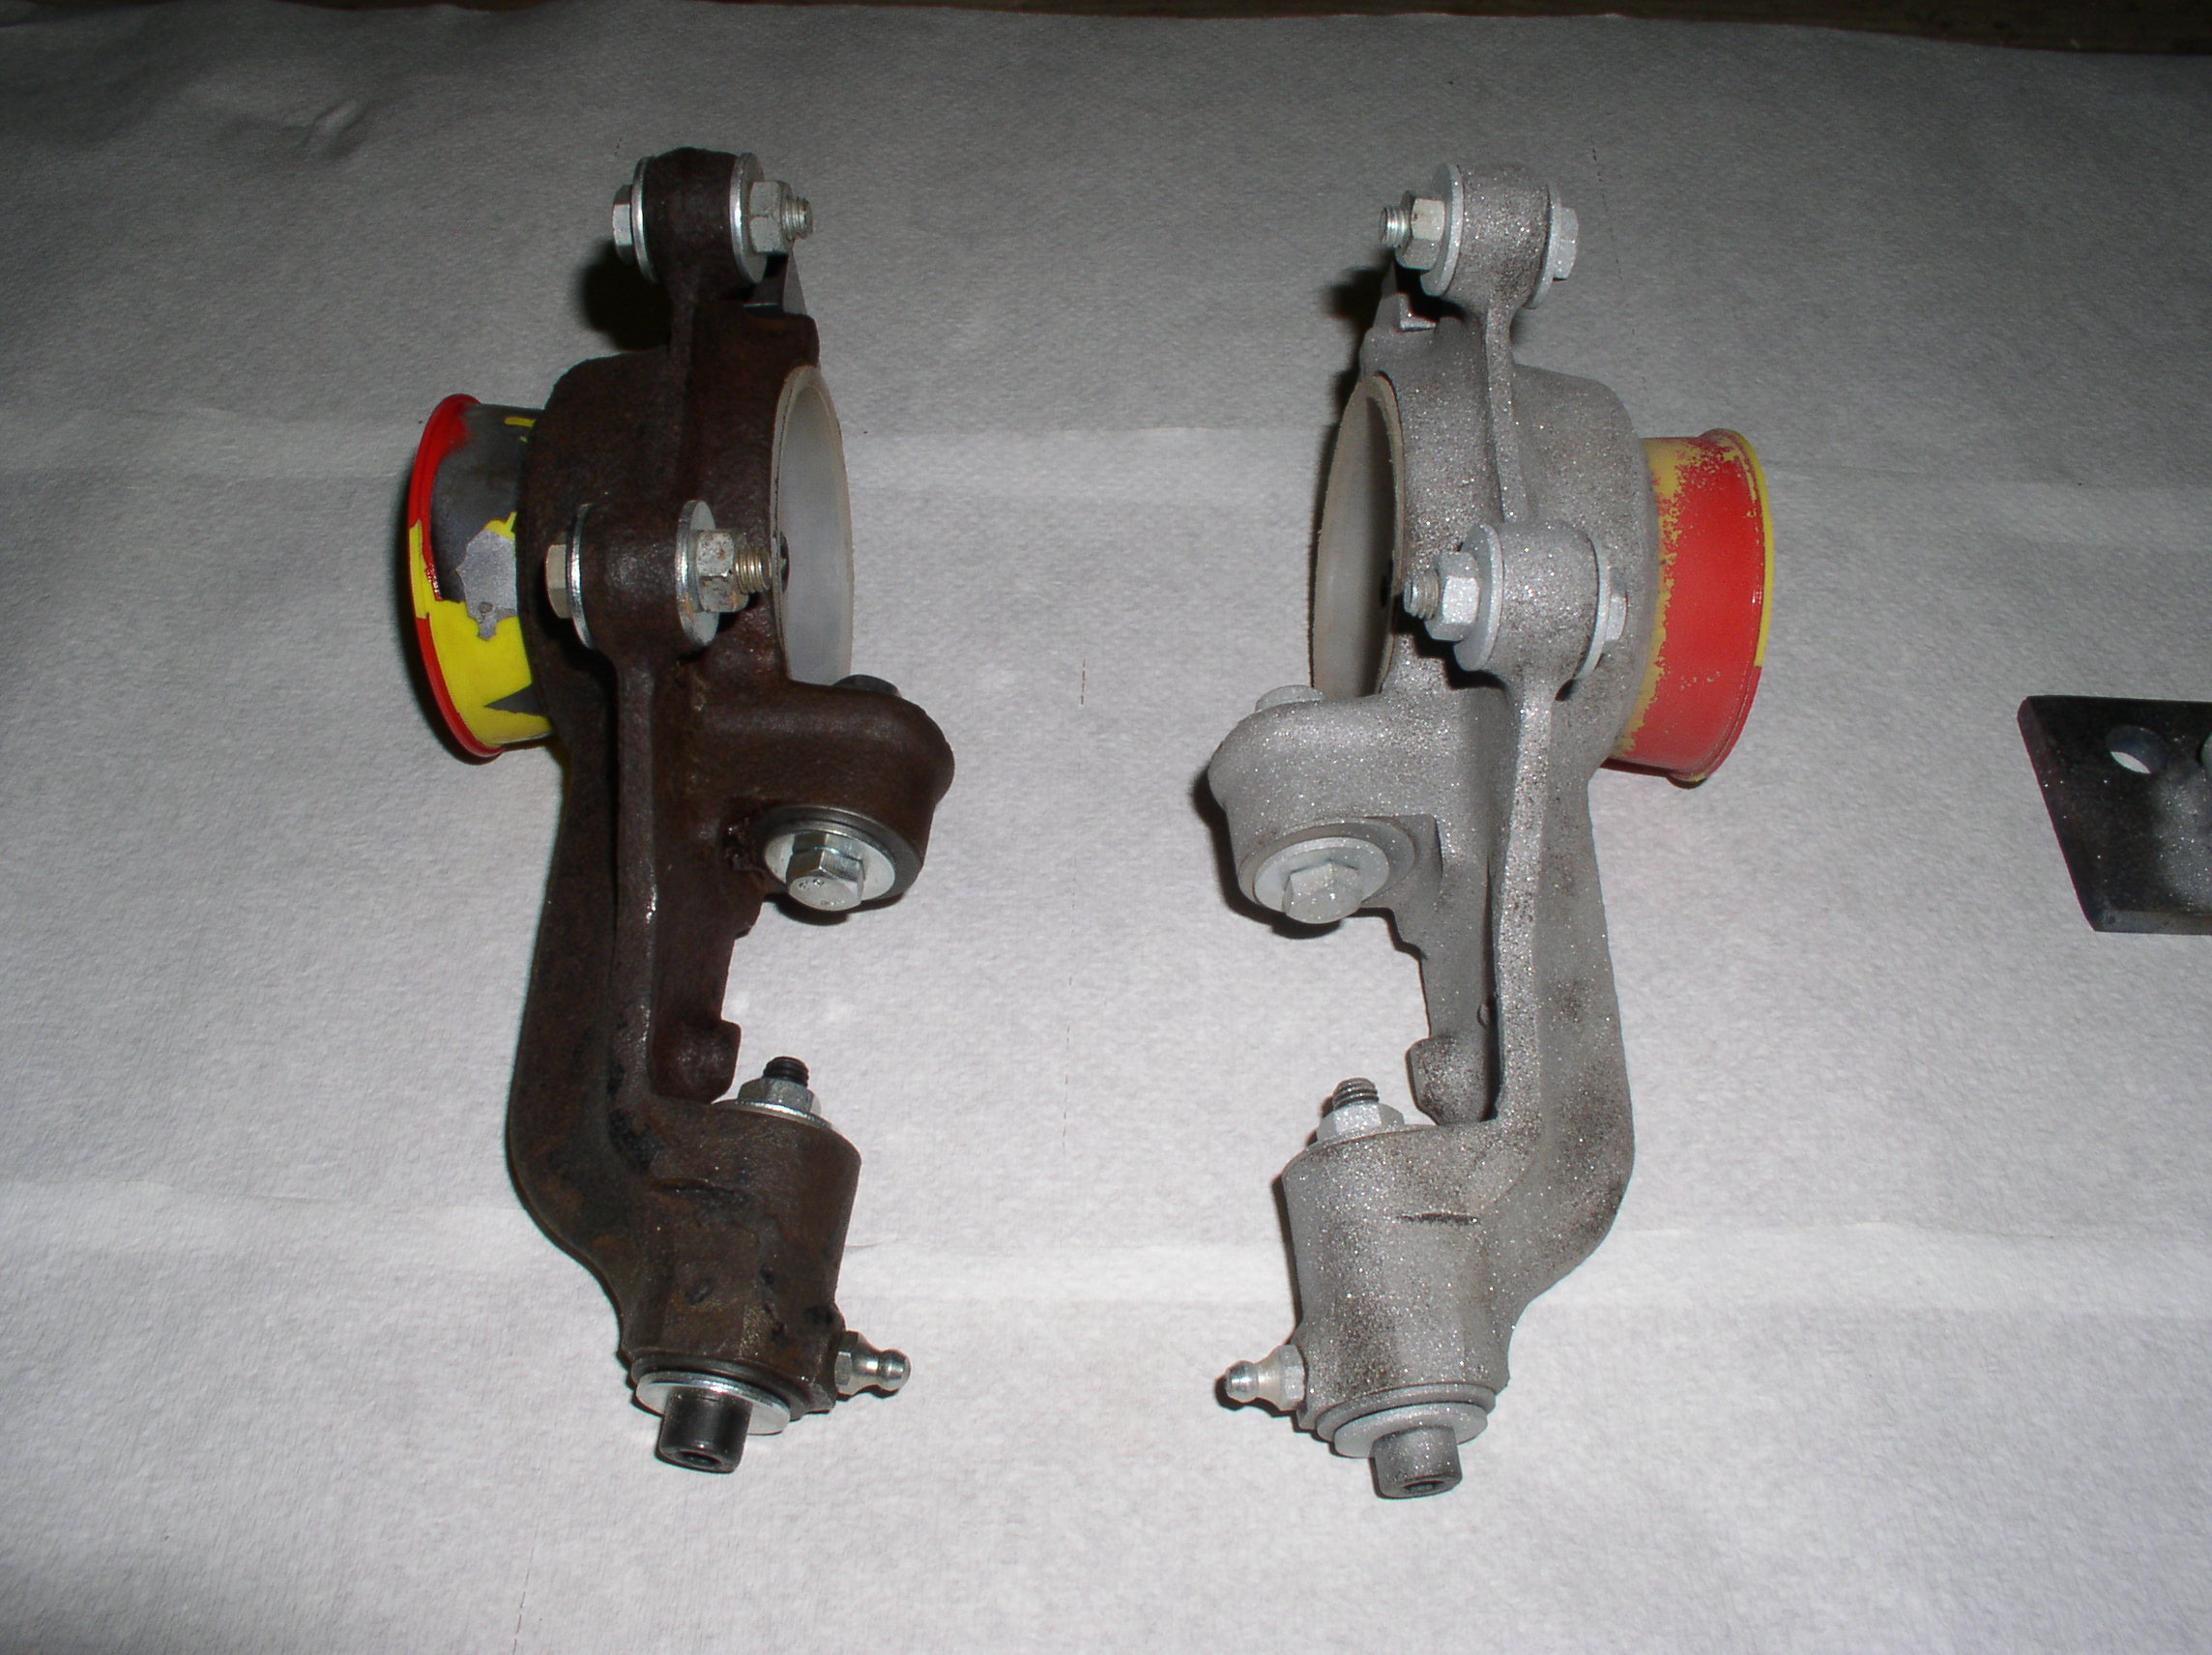
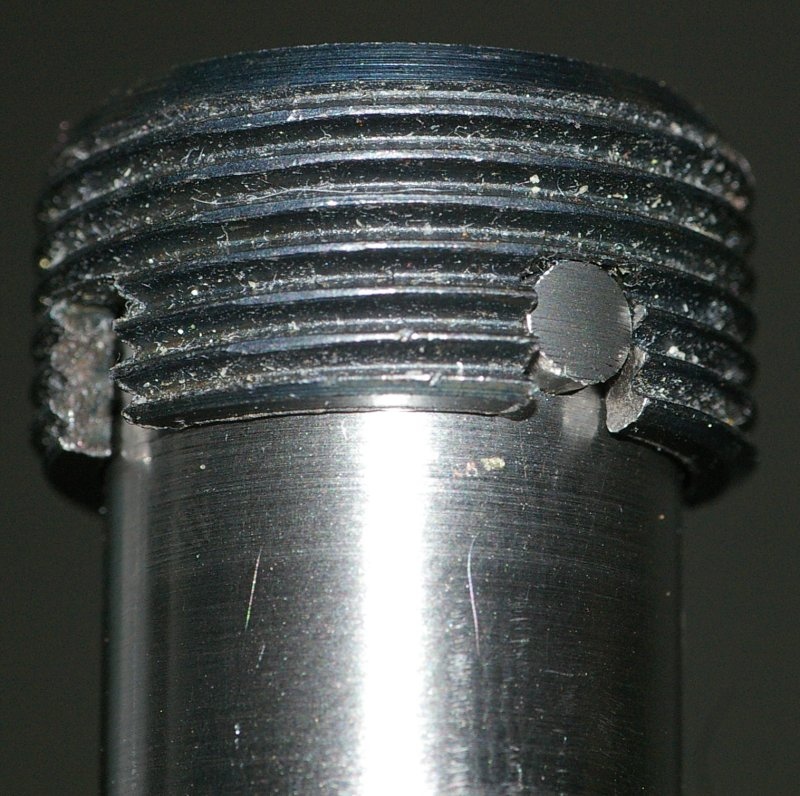
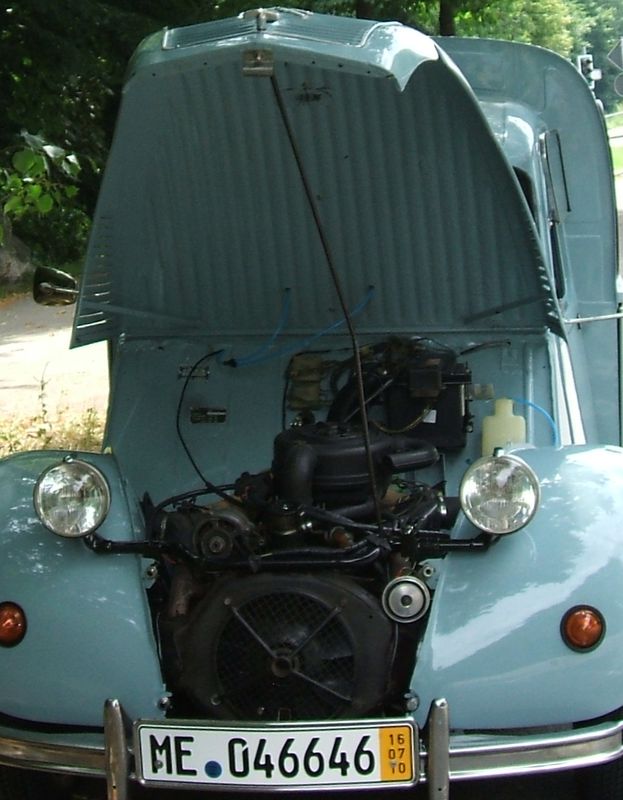
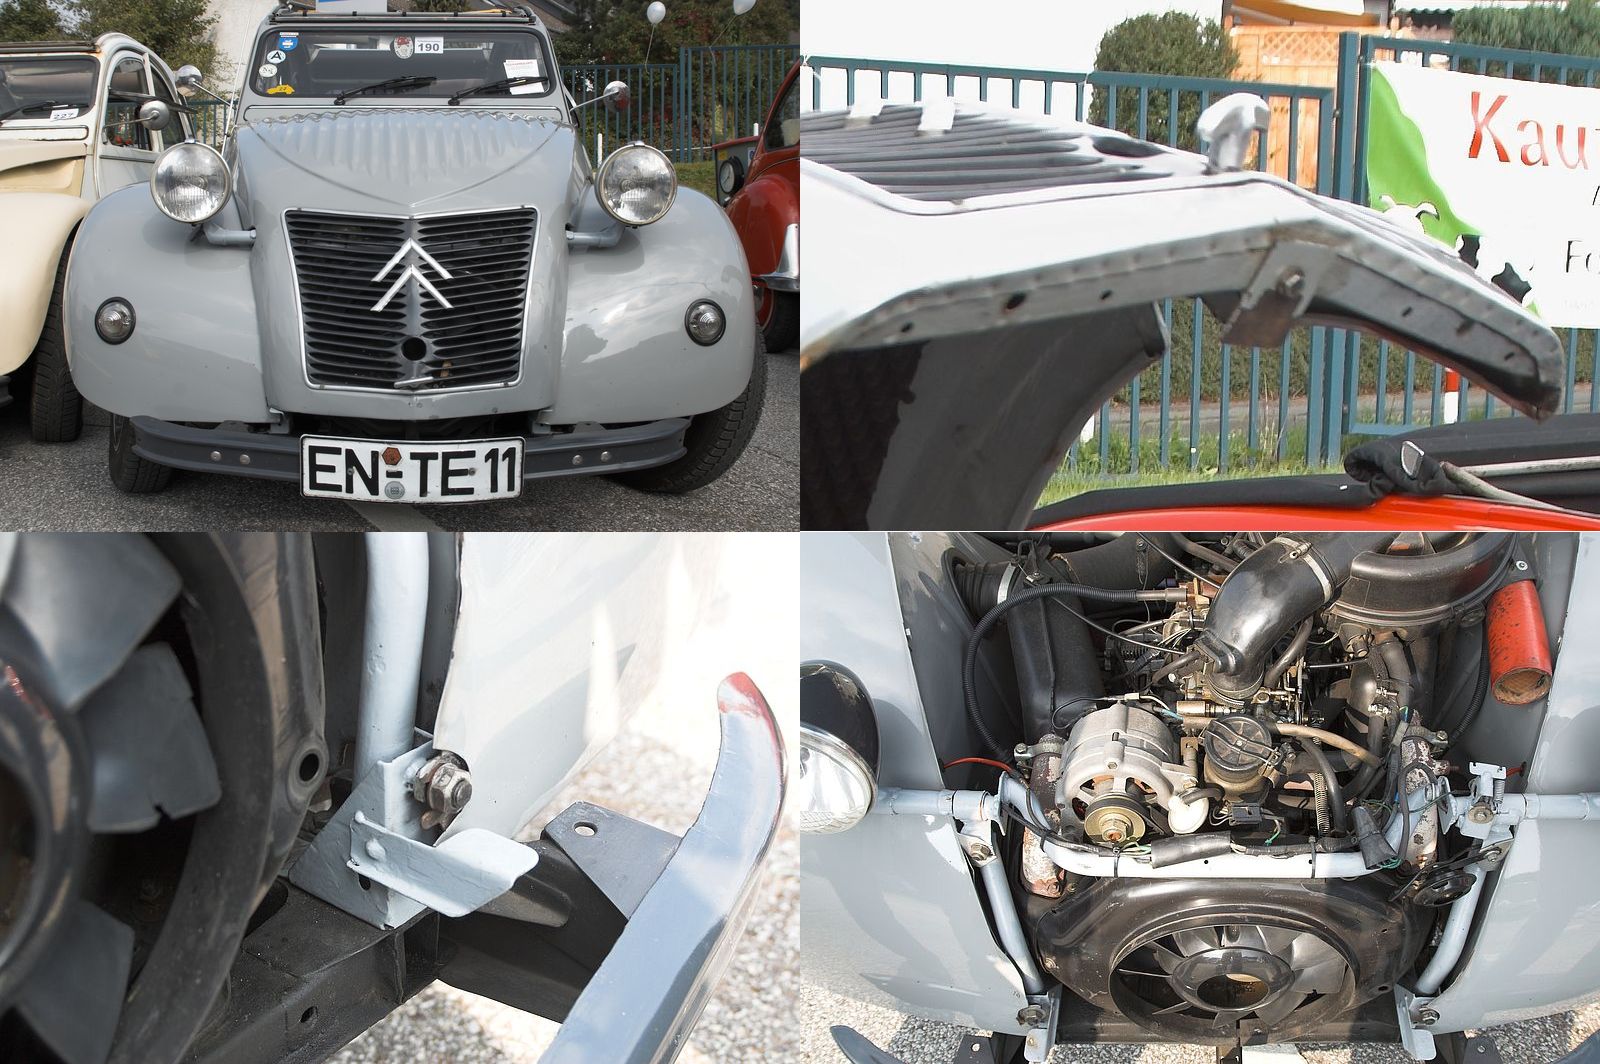
It is always wise not to plant the fender like shown at the right photo but rather lay it down at one side! That prevents the dirt deflectors from damage. Overhauling the steering without disassembling the front axisMike described the overhauling procedure of the stearing without removing the whole axis:The German TÜV criticized besides the king pins some radial clearance at the steering device and I decided to correct it without removing the whole axis. Your tip to buy an oversized guide ring was good, but not so simple to implement in praxis because the gear rack assembled at our car was press fitted and not clinched. That's why we ordered a complete new gear rack with an oversized guide ring at the Citroën online shop and a guide pipe from an used front axis. First I disassembled the caps respectively the fastener of the front shock absorbers. Second thing was to remove the steering links from the ball-headed pins and to remove the screws of the guide pipe. Now the guide pipe can be disassembled together with the gear rack by turning the steering wheel completely to the right. During that procedure you have to lock the counter bearing (for example by a matching metal bar) to avoid it from bouncing up. With the fixed counter bearing you are able to assemble the gear rack some later without removing the whole axis. Unfortunately you can't insert the whole construction group but have to insert the gear rack first, contrive the guide pipe and finally insert the ball-headed pins and the bearing inserts. To be able to screw in the crown nut, I designed a 50cm long special tool which was manufactured by the company I am working at (see the photos for details). When I had finished the assembly I found out that the newly acquired gear rack was unusable, because there was a difference of 0.5mm between the two ends of it. Thus the steering was very stiff at one side. Meanwhile a good second hand gear rack has been assembled and we got a new vehicle inspection sticker. 
Special tool for removing the ventilatorKurt sent me the drawing of a special tool to remove the ventilator in a very gentle way:Long time ago, around 1966 I disassembled my first 2CV together with Robert my father-in-law. Amongst other things I have learned how to build a special tool to remove the ventilator. You can use something like an old king pin with a pinion going through. It has to be about 30mm away from the end being inserted in the ventilator. The diameter of the king pin and the pinion should be chosen in a way that there is just little clearence. At the other end of the king pin you have to weld a screw or a nut with 19mm wrench size. The whole thing looks like this: 
I built this tool many years ago and it is 60km away from me at the moment, so I did not remember the exact dimensions. You can also cut an old crank lever and weld a screw nut on it, but creating a more a solid tool is better. Using the tool to disassemble the ventilator: Remove the screw inside of the ventilator and insert the special tool. Put a four-way wheel brace on the nut and lock the flywheel completely. Turn the wheel brace with both hands and pull it slightly. Therewith the ventilator is removed without stressing the crank shaft. Dominik built this tool from an old starter crank: 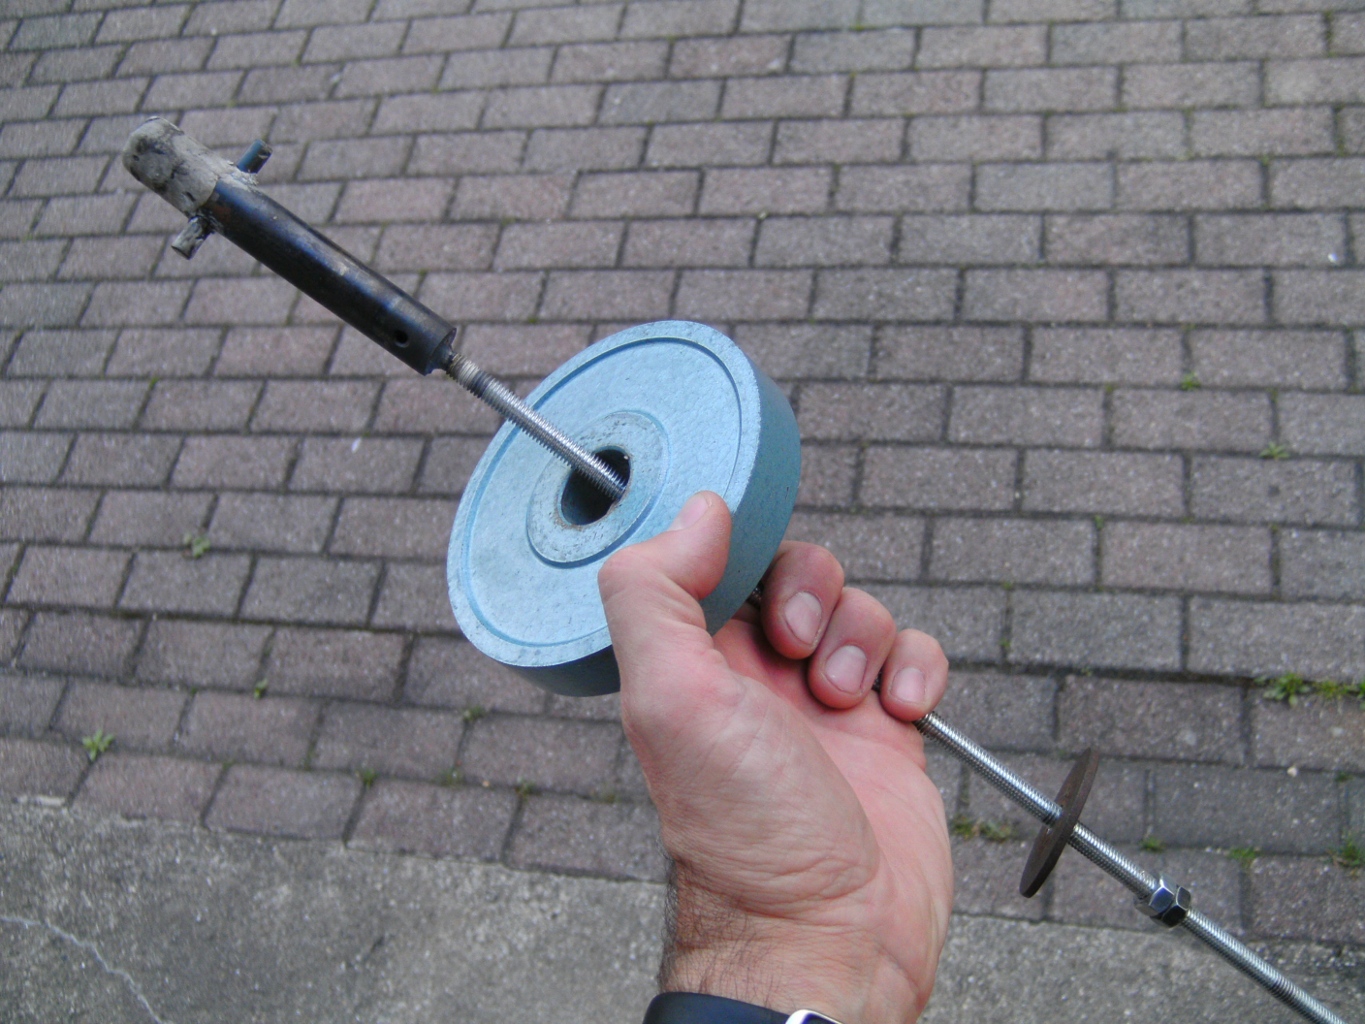
The disc is from a weight of the muscles factory... Removing the sealing of the crank shaftKurt gave me another tip:How to remove the sealing of the crank shaft... I have elbowed and rounded an arsenal of different screwdrivers to be able to remove the sealing. You just have to lever with one of them at one side and once more at the other side of the sealing and it will fall off. WinterAs soon as it starts to be could and the sun is shining only from a low orbit, many 2CV's are parked until it's thawing again. To make the unlocking procedure as easy as possible in springtime, Rolf is lubricating all of the locking devices very well in autumn and he is taping them with a piece of duct tape.There is never too much grease at a 2CV! 
Converting to corrugated iron hoodMy opinion: "Leave the corrugated hoods at the corrugated 2CVs!"Anyhow I have been asked about the conversion many times. It is not as simple as it looks and to make all things fit, many hours of work pass by. The original hood looks always better than a botched corrugated hood! Mike did a really good job and here is his tutorial: "My conversion took more time than expected (normaly, or not?). Primarily that was a matter of the bad replica fenders I had bought. I converted the holder of the headlights, displaced the ignition coil, suited the locking mechanism and choped the release lever. The holder of the headlights has been cut at position 1 + 2 (see photo) and welded again at a position of approximately 30° downwards. It was not as simple as it sounds, because the holder is not symmetric and the cross section had to be trimmed. The holder was flattened slightly at position 3. The level adjustment of the headlights is by now done with the help of a screw at the lamp holder. The lamp holder was chopped at point 4 to get the optical characteristic of an old 2CV. I removed the air deflector above the fan-belt. I don't think that the generator will overheat, because it is right behind the radiator grill. To fix the ignition coil I have attached an self-made holder at the gearbox. The locking device of the hood is still in the original state, I just had to bend a metal plate (1,5mm NOX) for the hood. I saw a nice conversion at the meeting in Wuppertel - see attached photos." 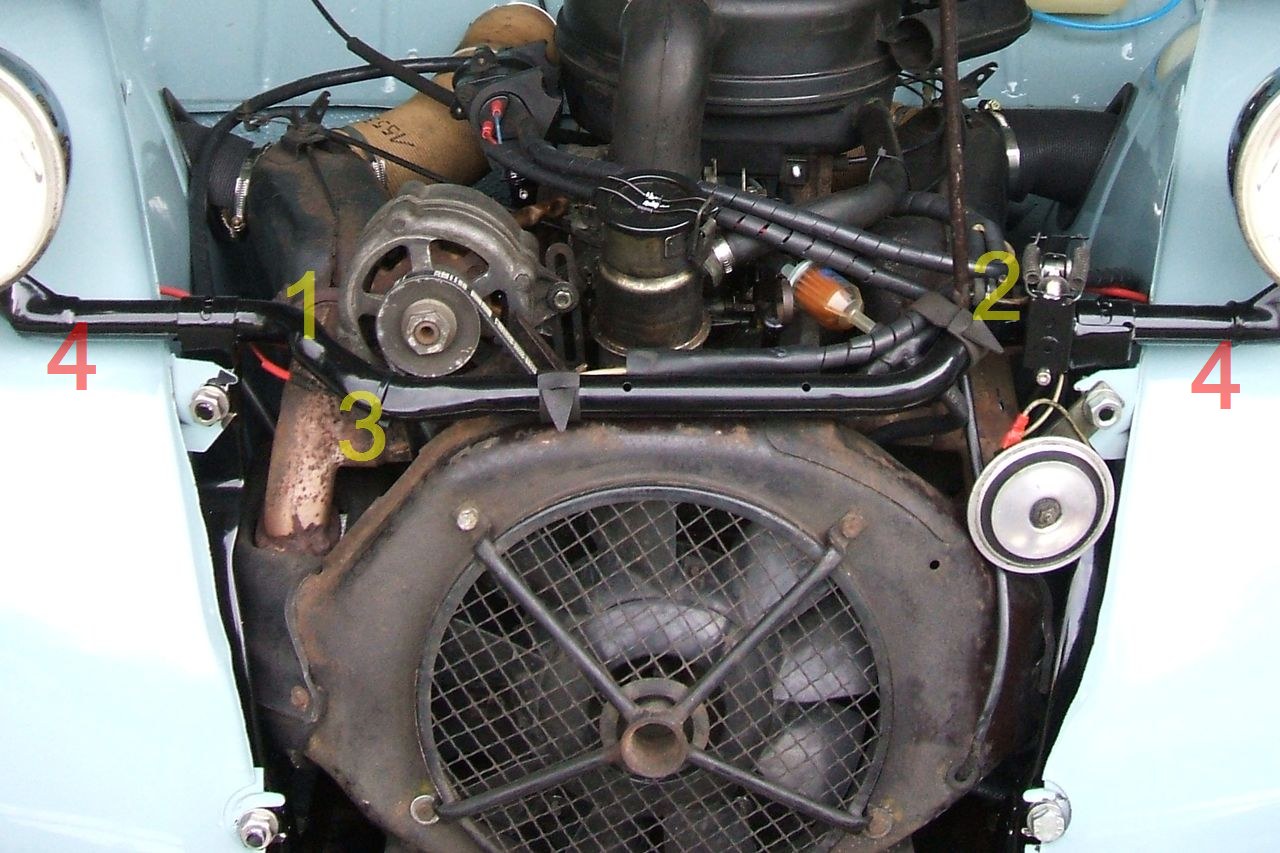

|