|
|
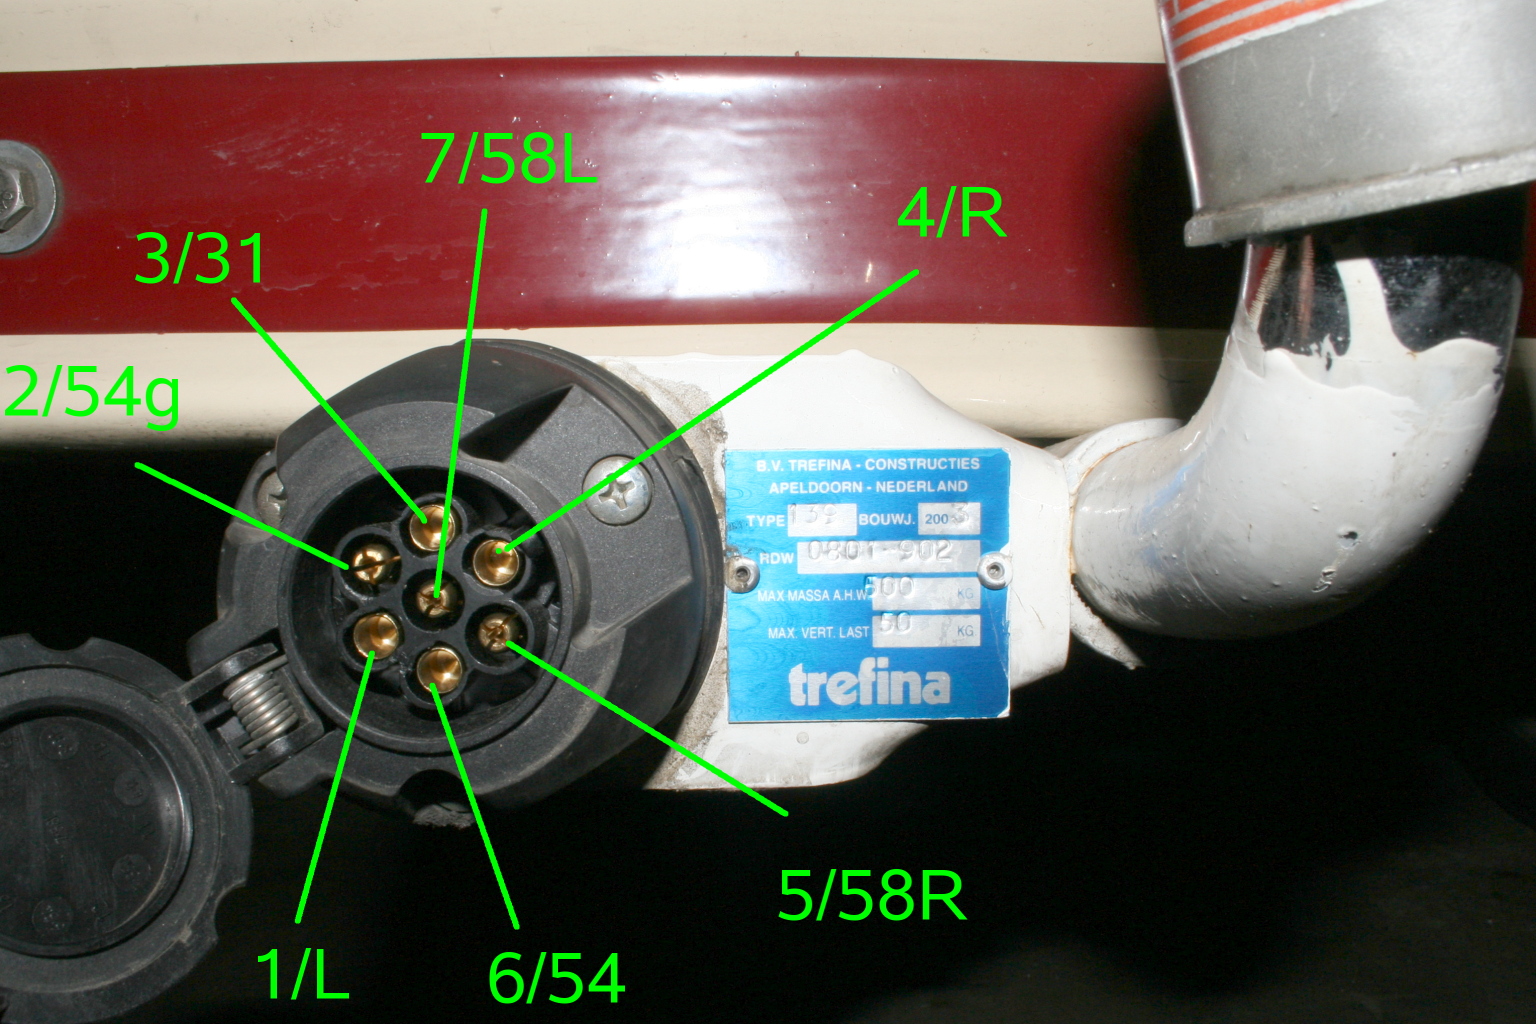
Back to still missing (1) Forward to interior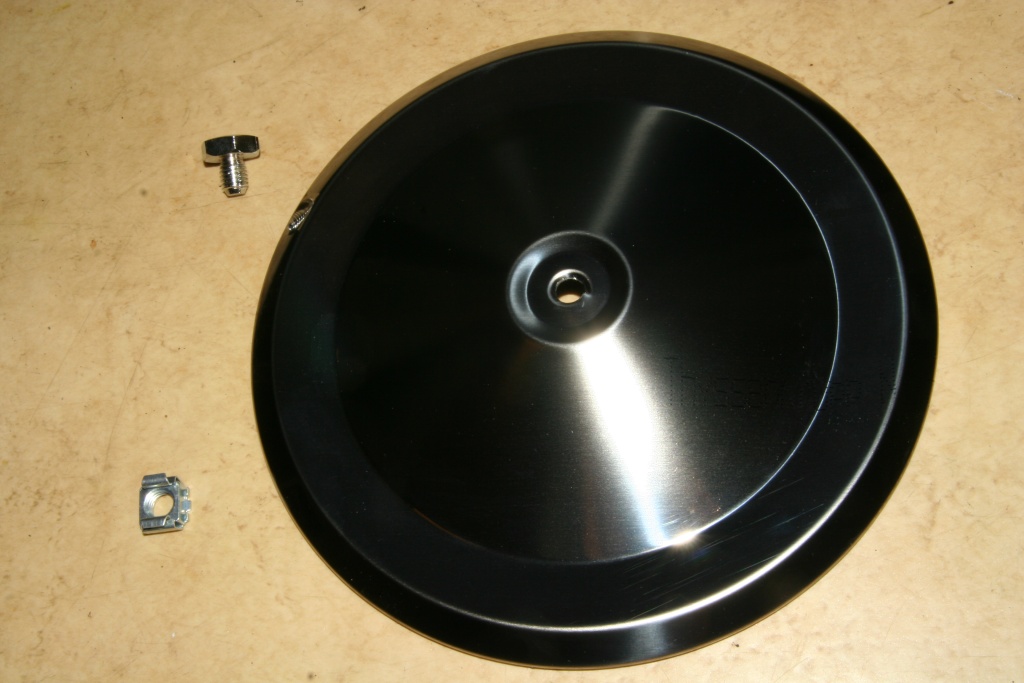 The high-grade steel wheel covers are fixed with a box nut, which is put from the rear into the square rim hole. On this copy still the print 'Thyssen Krupp' is to be read - reassuring to have always a piece of tank steel with you:).  The mounting holes of the stone guards corners must be drilled both at these construction units, and at the rear fenders. Appropriate countersunk screws (I have taken M5) should be present. 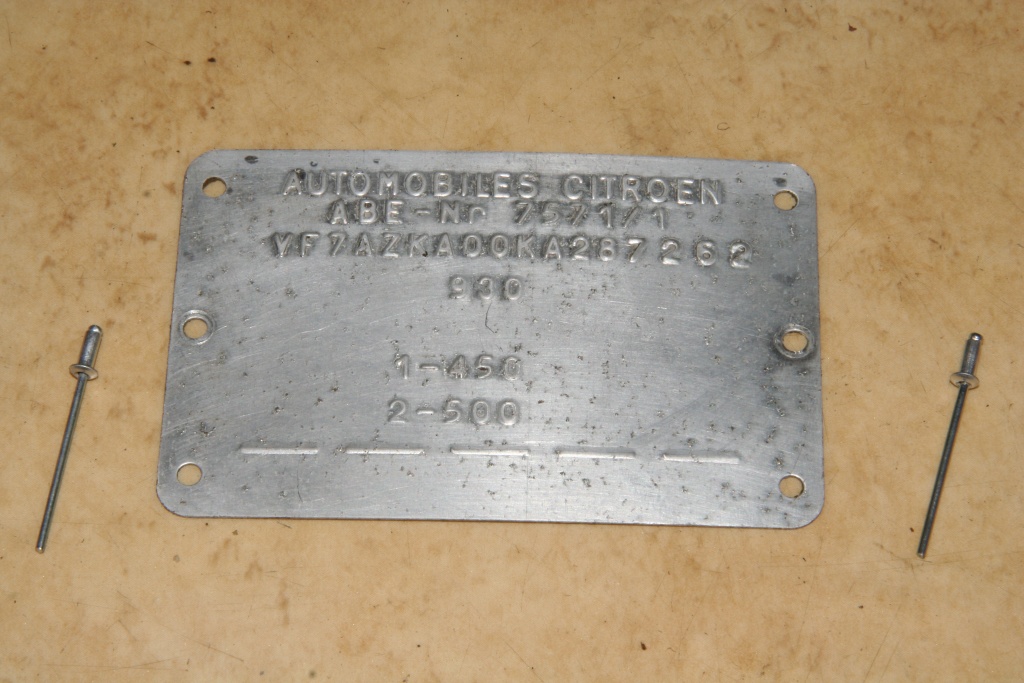 This aluminum plaque is fastened with 2 rivets in the engine compartment. Stamped are the ABE-Number, the frame number, the maximum wight and the axle load of the front and rear axle. 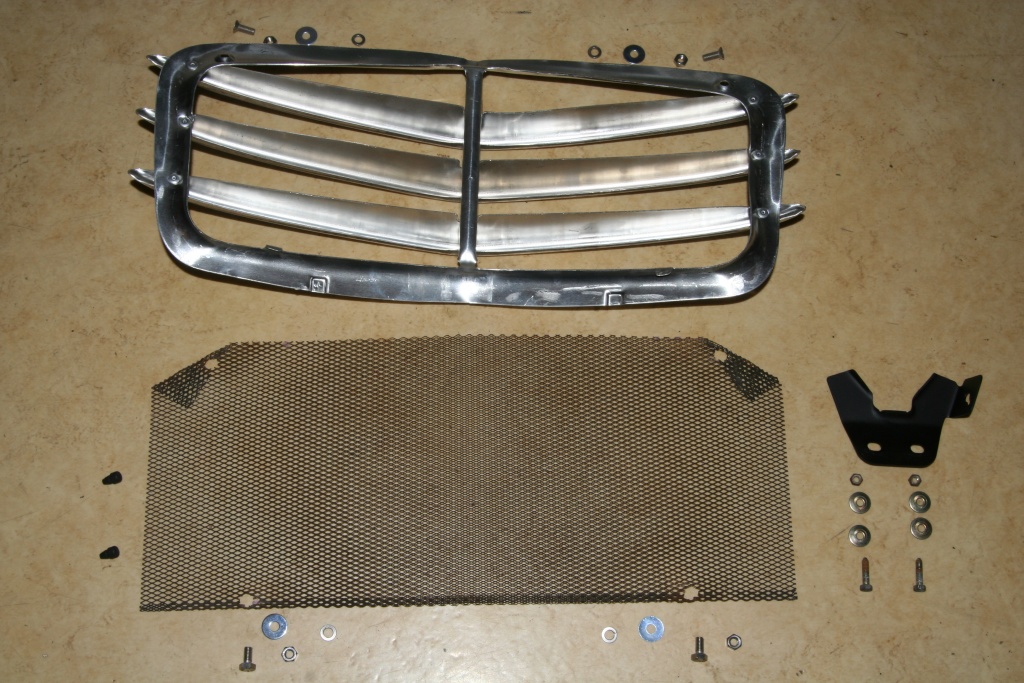 I replaced the radiator grille by the variant used at the beginning of the 70's. 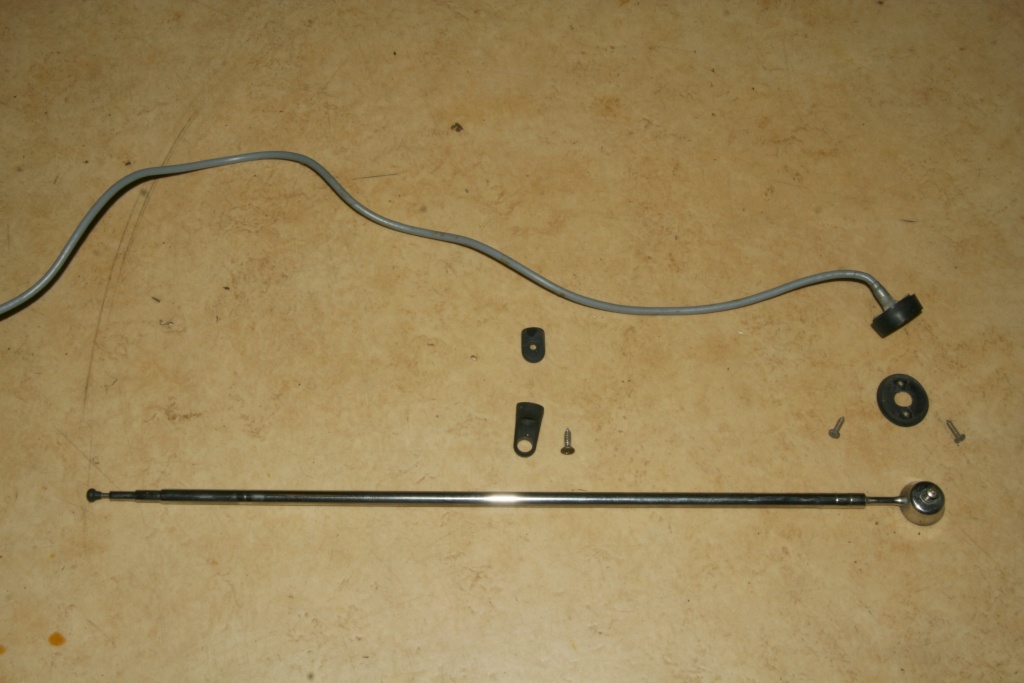 The airial for unimpaired wireless reception is fastened in this case on the curbside. With my duck Nr.2 it is on the driver's side - alternation must probably be. At speeds beyond 60Km/h the only song you can listen to is 'Blowin in the wind'. 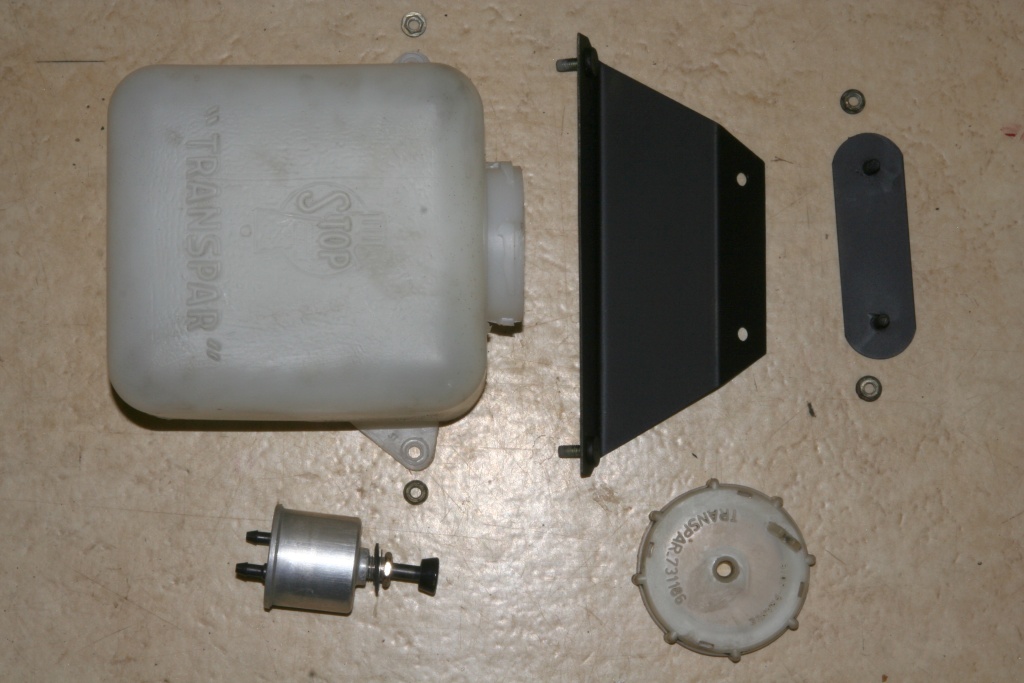 The splash-water container is screwed on to the front panel. The oval reinforcing plate is thereby in the interior of the body. At the bottom of the photo is the mechanical pump, which is fastened to the instrument panel.  The windshield wiper arms are attached to the axles and can be taken off, if the arm is folded completely away from the window.  Because of this construction unit I heard many quzzical remarks. 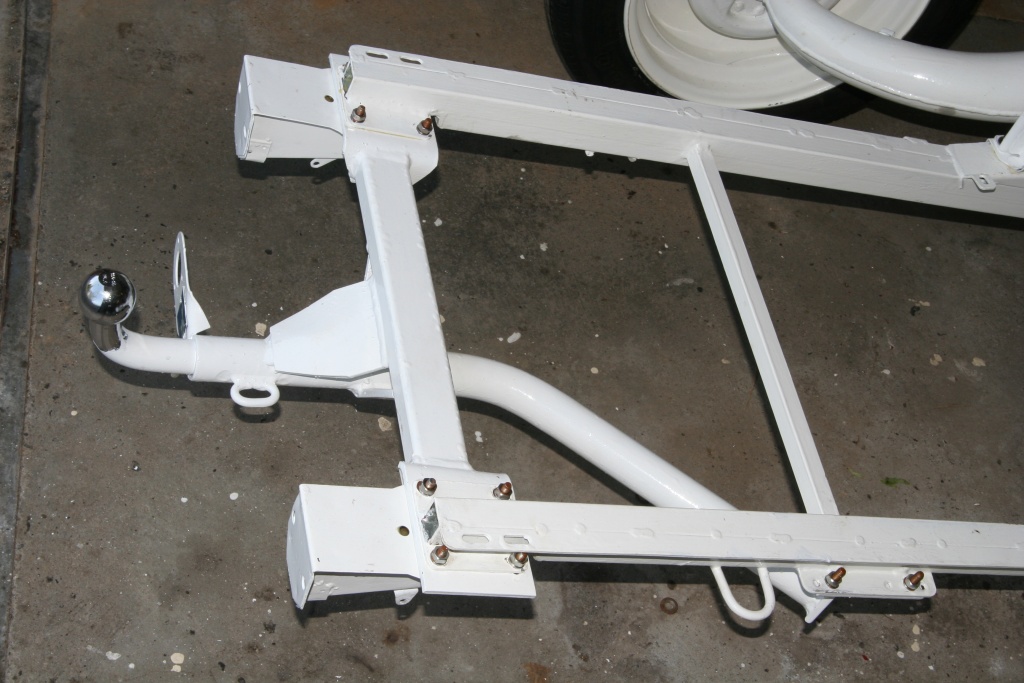 The trailer coupling is fixed at the chassis at three points. 2 holes have to be drilled at the front fastening spot. The two rear fastening spots are also for the hanging up of the bumper. The bumper must be bent inward within the range of the clutch somewhat. You can also order attachments, which set the bumper somewhat higher. At the welded lug (picture quite down) the dragging rope is latched if needed. At the trailer coupling is an other lug, which is likewise suitable.  The German certificate of conformity of the hitch. Click at the picture to see the large document. 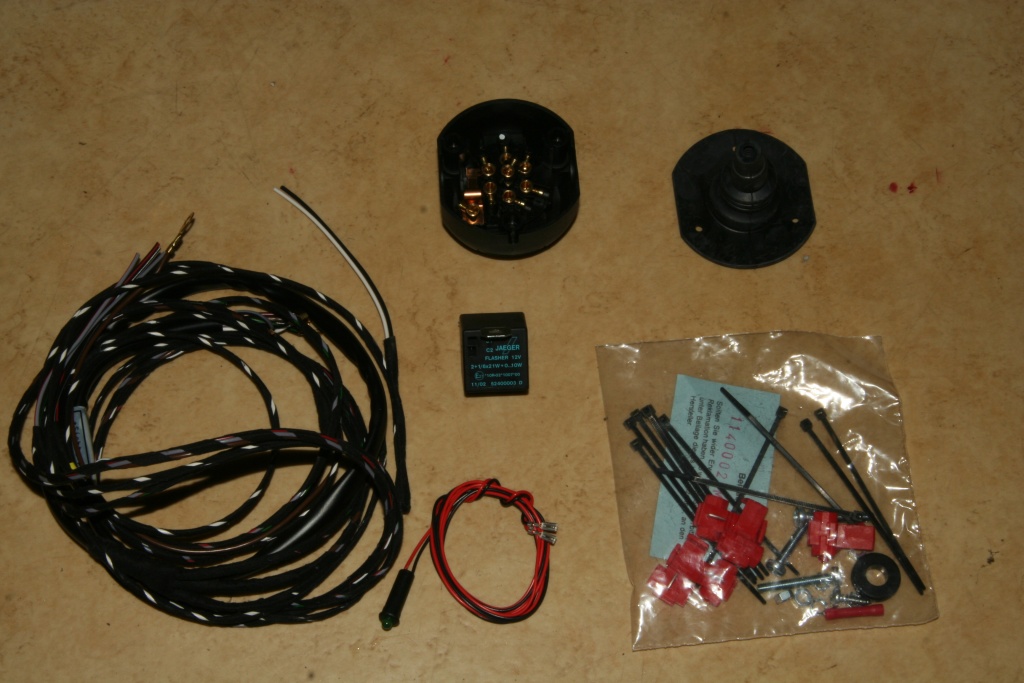 The associated wiring. The branchings take place at the end of the rear wiring harness. If the duck should have no fog tail light, it is the right time to buy one. For the appropriate pole of the plug a cable must be pulled anyway now to a switch at the instrument panel. 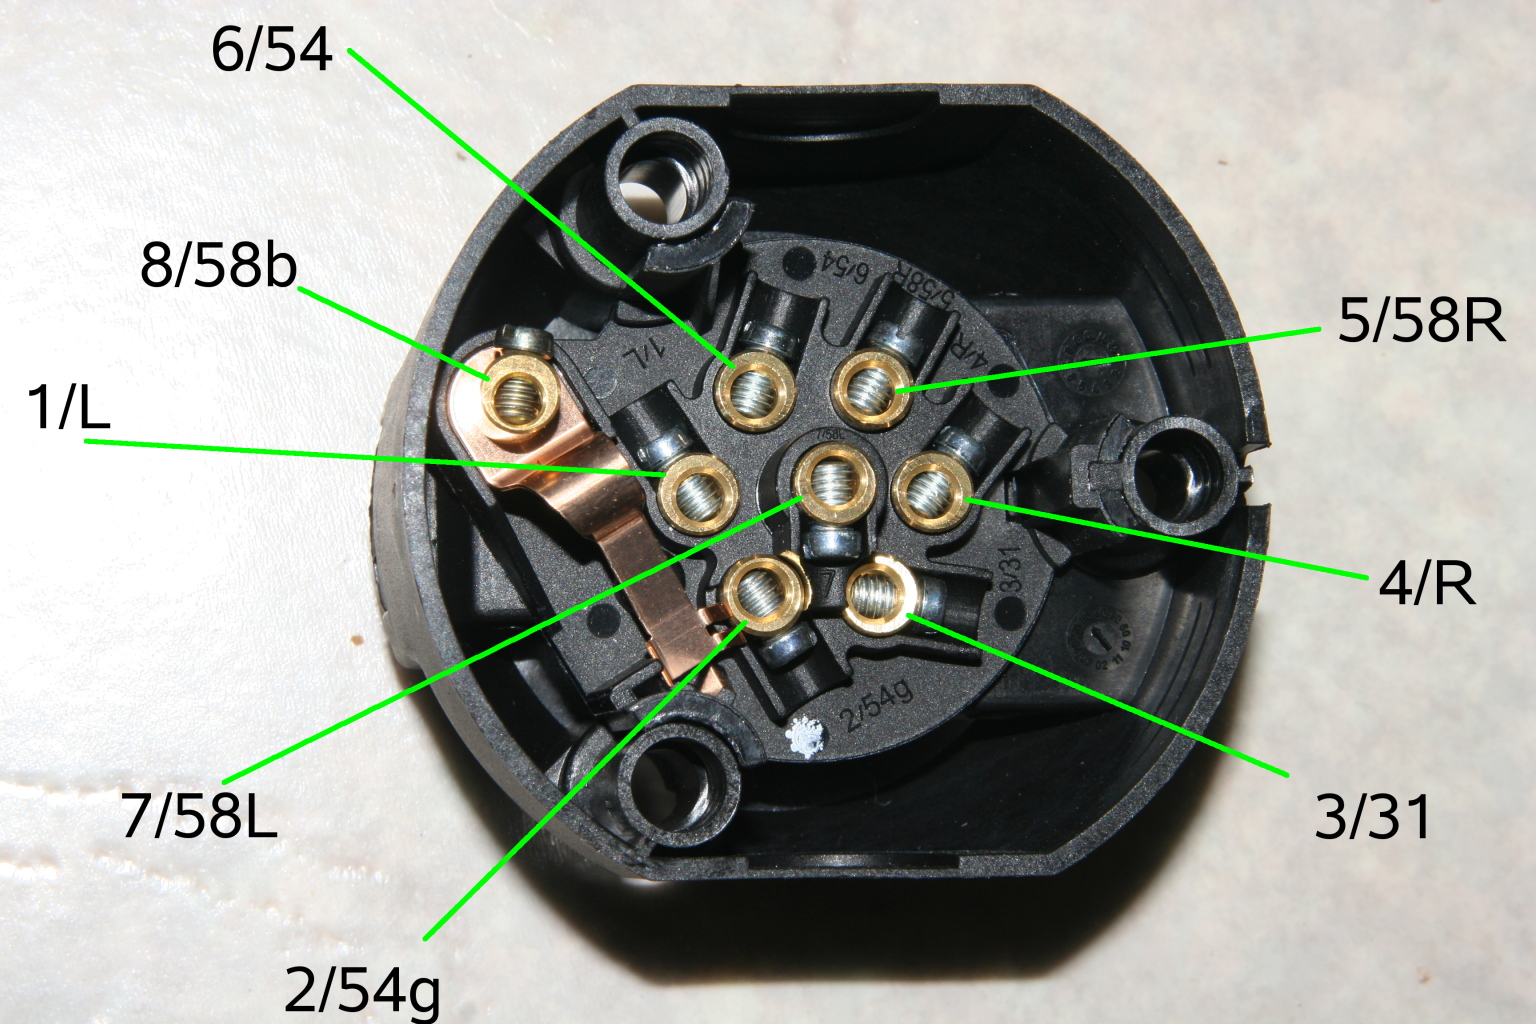 Terminal connections hitch:
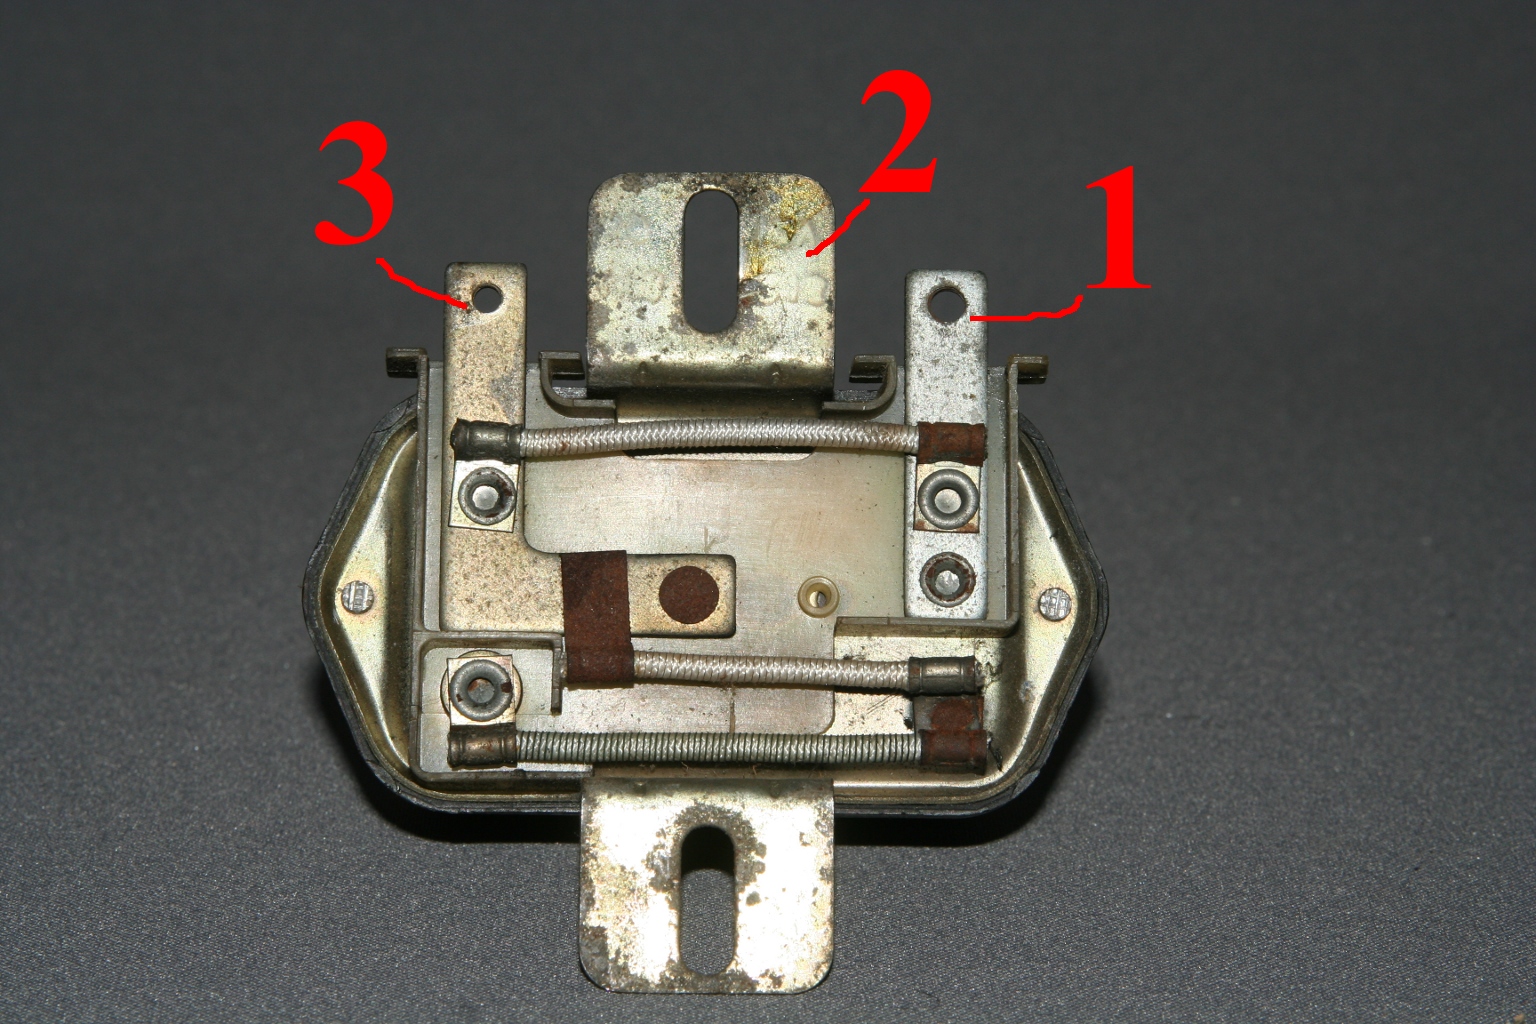
 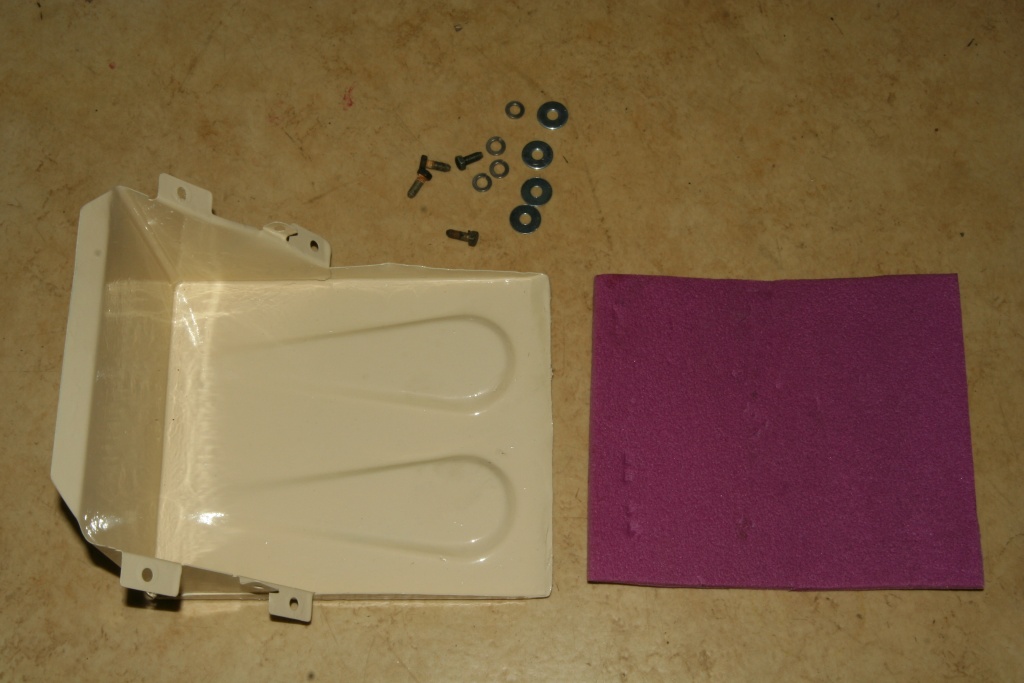 The battery support. The piece of foam serves as skid-proof. 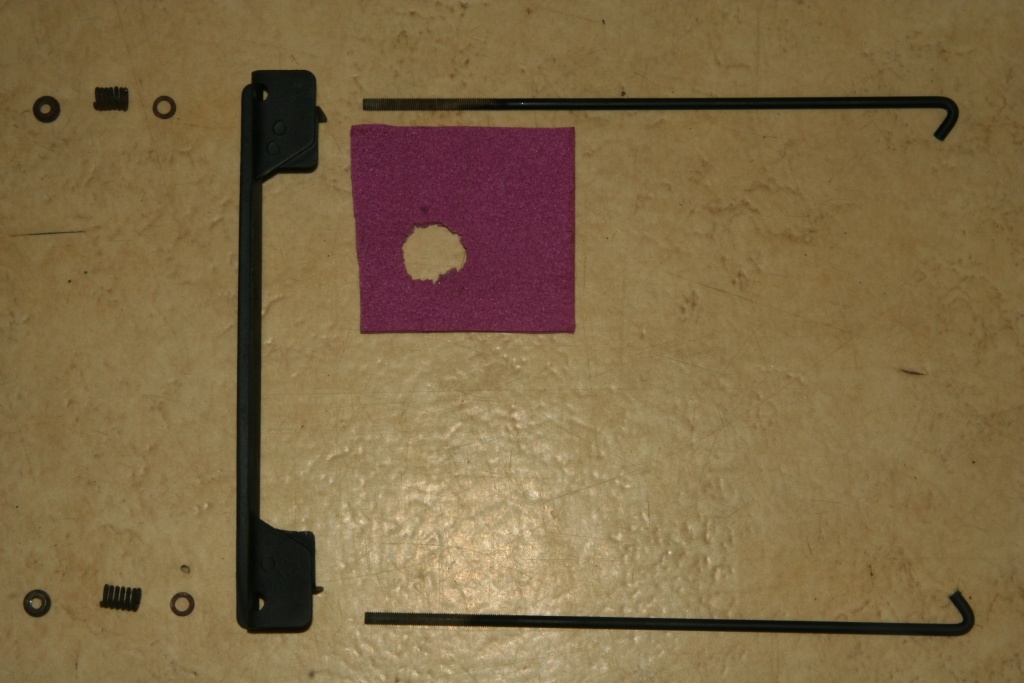 The associated mechanical safety device of the battery. In the center a small piece of foam is cut as isolation. It is placed under the clamp of the positive terminal. From above I isolated the positive terminal with a further piece and with tape. 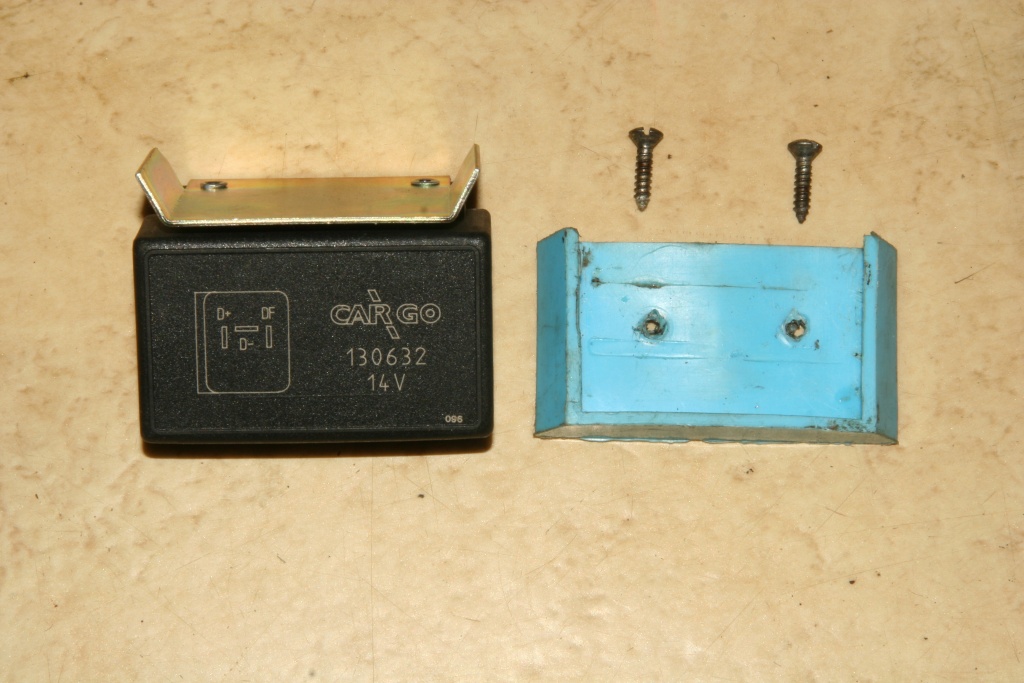 The automatic voltage controller (electronic variant) with associated mounting plate. This construction unit switches the generator off with reaching the battery conclusion voltage. 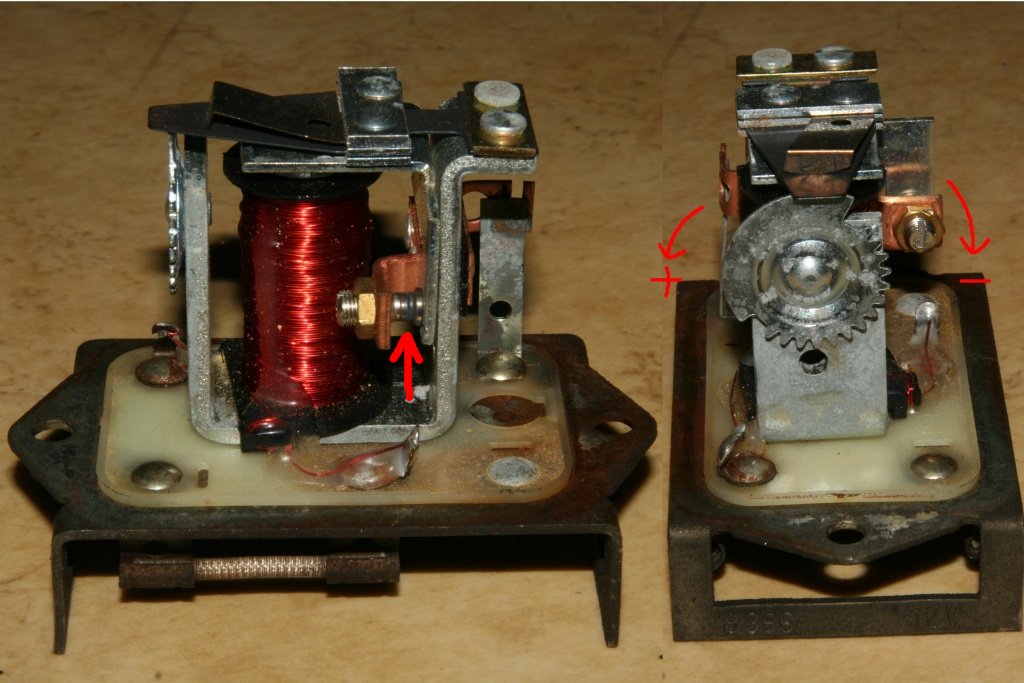 Here the electromechanical variant, which was originaly used. The interruption of the excitation wind of the generator takes place at the contacts marked with the arrow. If the generator is okay, the battery is nevertheless not charged, you can clean these contacts with fine sandpaper. The wheel which can be seen right in the picture, is for the adjustment of the voltage. It's normally 14,5V. Turn the wheel clockwise to decrease the voltage (lower voltage of the battery). 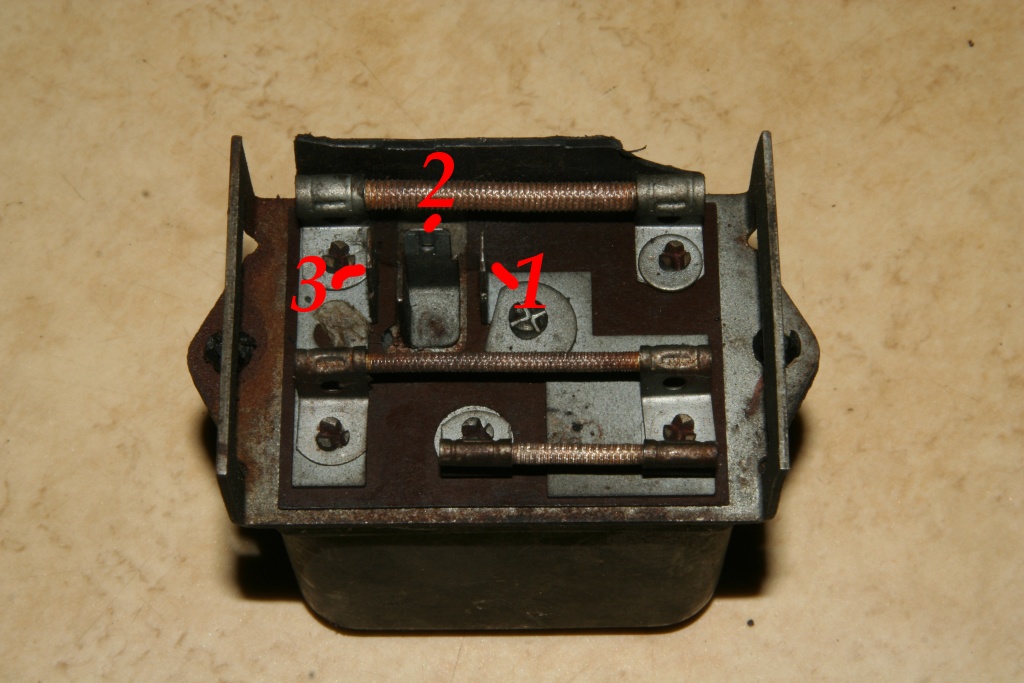 View from downside to the connections: (1) excitation electric generator - (2) Mass=Negative terminal of the battery - (3) Positive=Battery voltage When I first published this page I had swaped the labeling of pin 1 and 3 - Thanks to Alex who told me about my error. 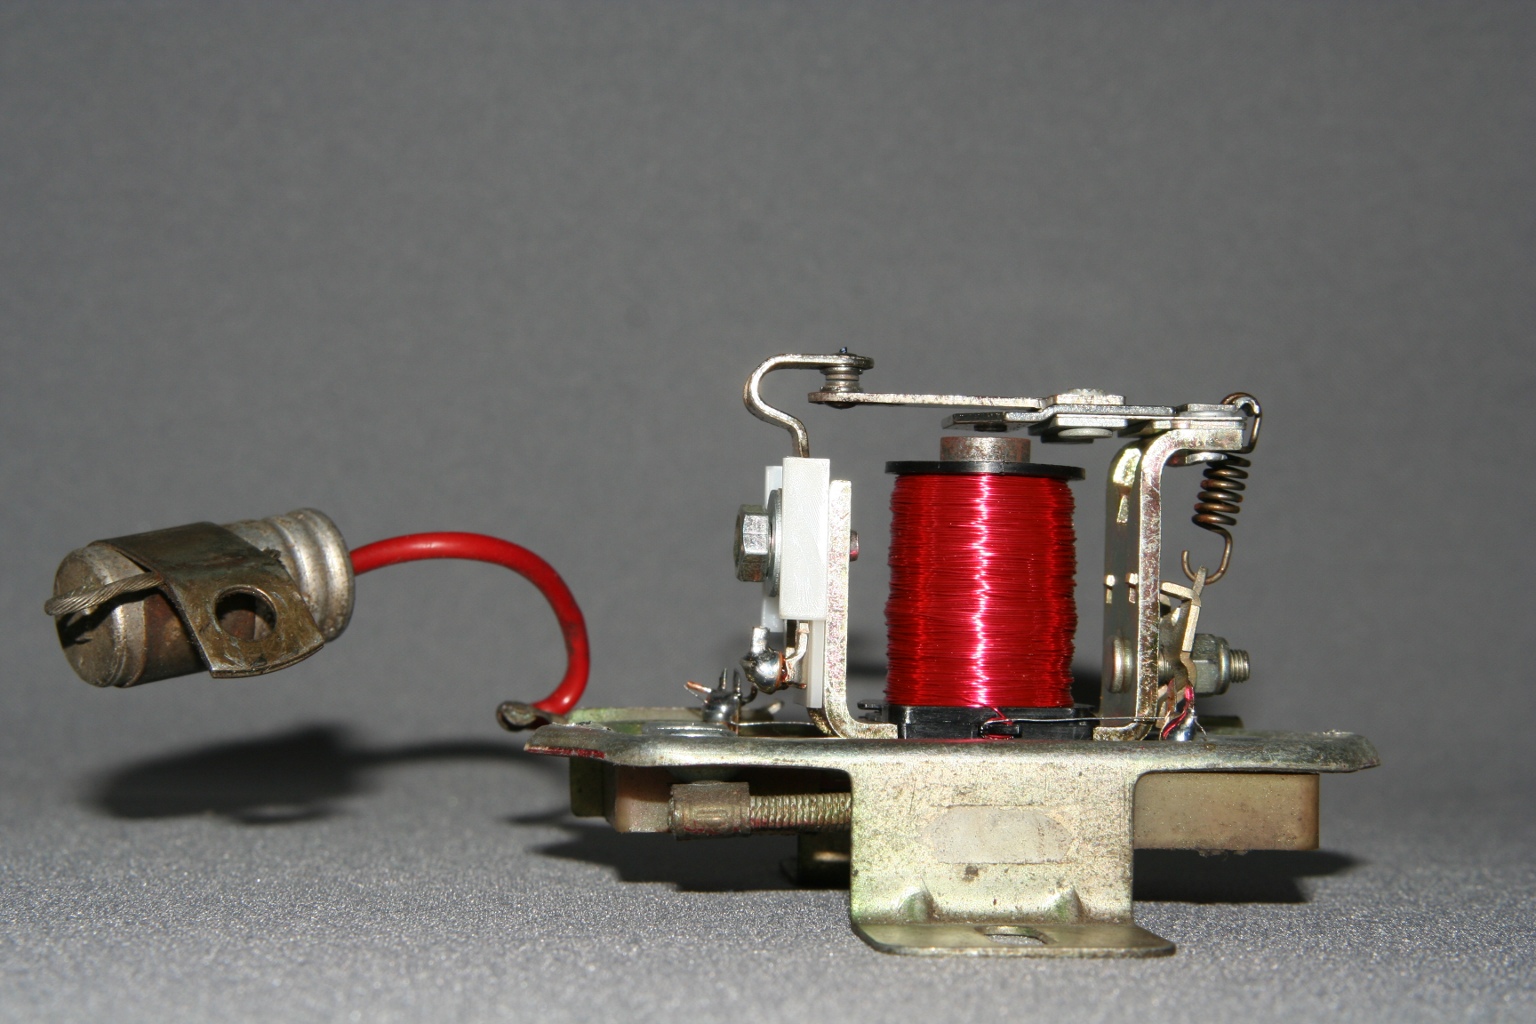
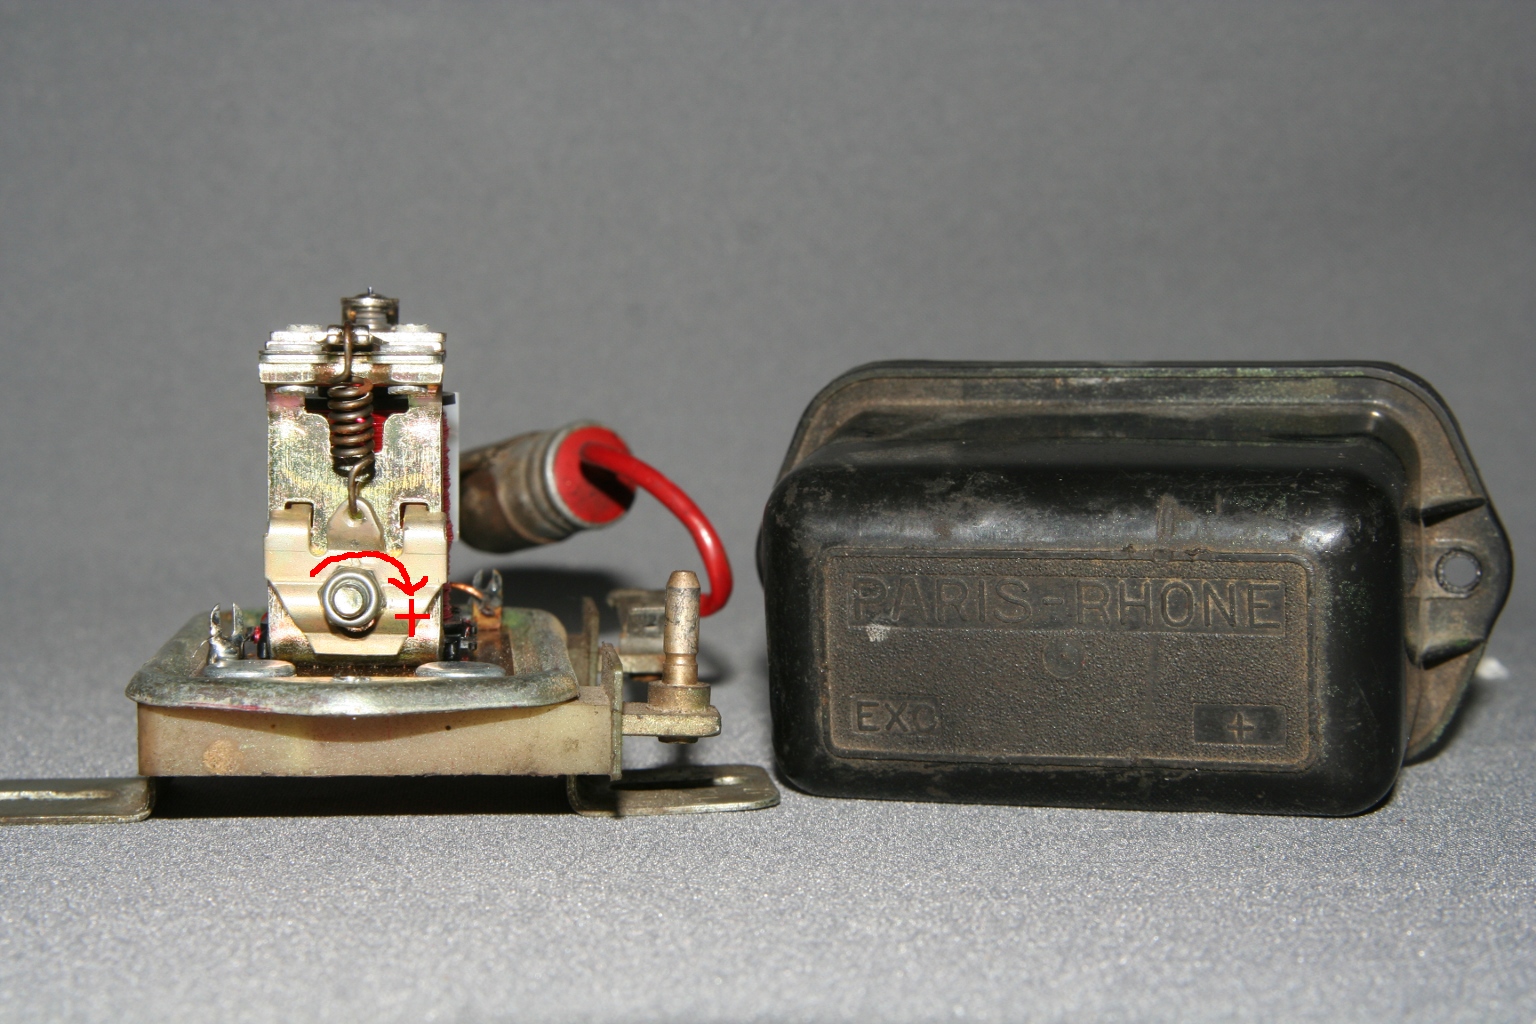
 A bit different is the construction of this model. The voltage can be adjusted comfortably by a self-locking M4 nut. Turning the nut clockwise is increasing the voltage. In parallel to the positive terminal there is a capacitor, reducing the sparking at the contact. (1) Positive=Battery voltage - (2) Mass=Negative terminal of the battery - (3) excitation electric generator 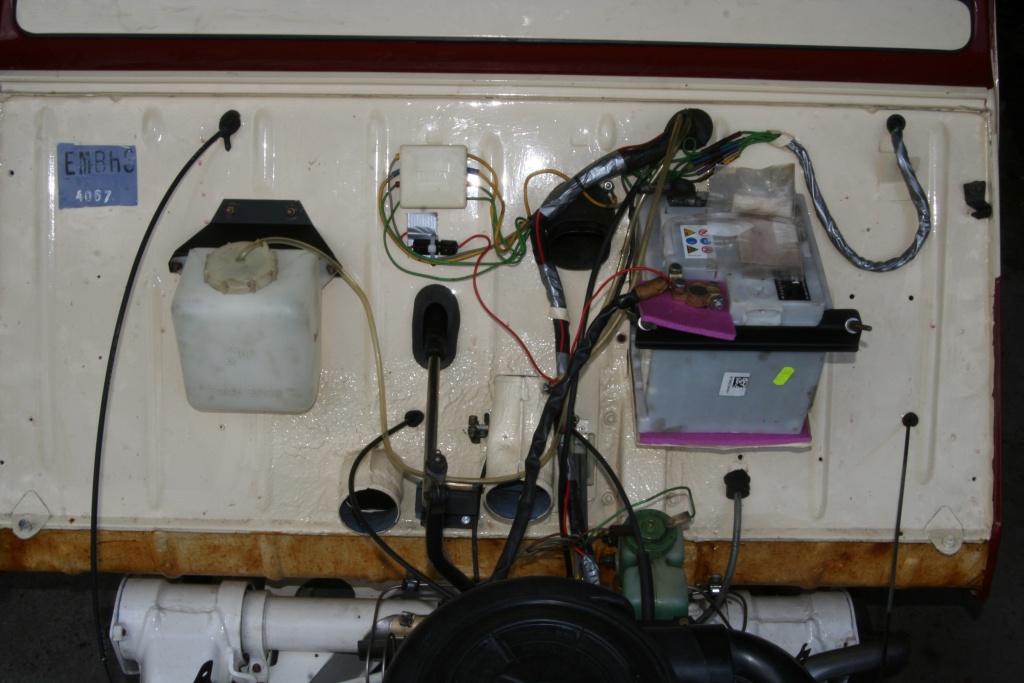 The front panel with all parts. Left above a piece of metal with the original color can be seen. Here the ORGA number is up-marked, which indicates the production date exactly. Therefore my duck slipped out of the egg on 28th December 1987 in France - I have a real Mondays car. Back to still missing (1) Forward to interior |